
Odoo has numerous modules. The Payroll module is one of them, which is widely used to manage various payroll tasks. Its integration with the HR (Human Resources) module ensures error-free payroll management.
In this blog, we will discuss how you can create and manage Payslips using the Odoo 15 payroll module.
Payslip is an important document for any organization because it includes details related to the employee's salary. Hence, the payslip should be managed appropriately.
How to Configure Payslip in the Payroll Module?
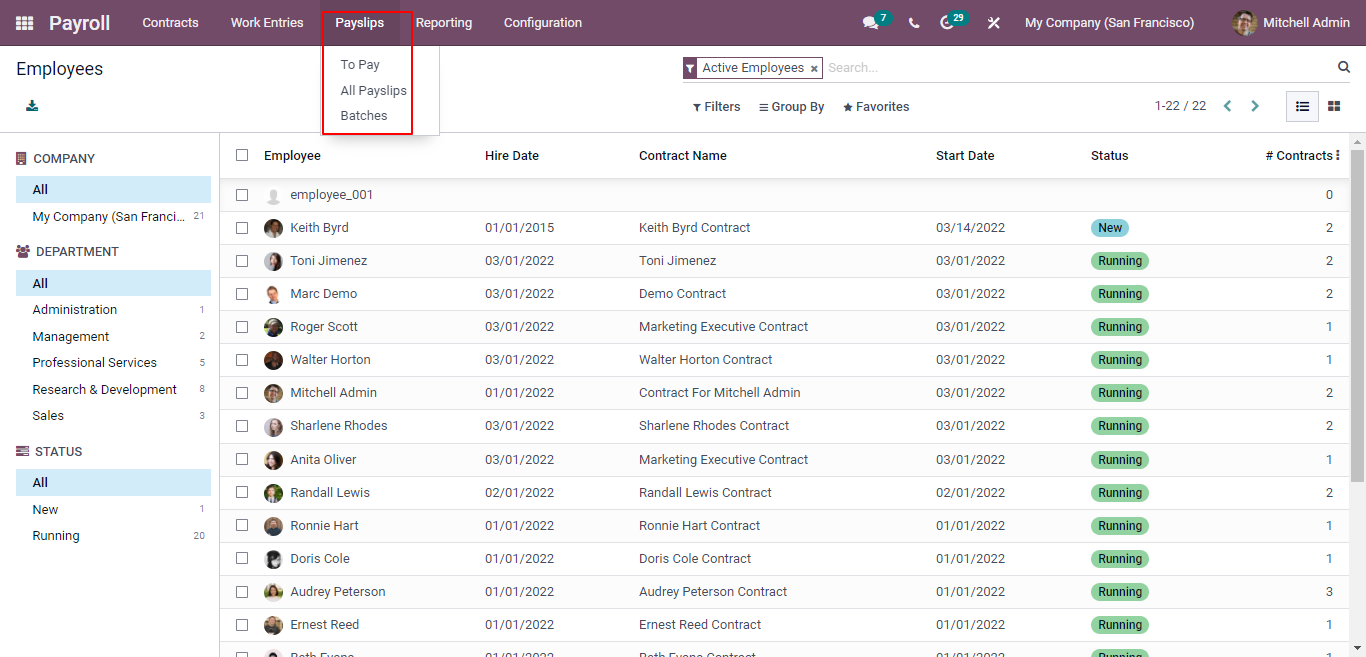
With the use of the Odoo 15 Payroll module, you can easily configure and manage payslips. First of all, you need to open the dashboard of the Payroll module. After clicking on the Payslip tab, you will get the payslip tasks such as To Pay, All Payslips, and Batches.
Let's see how these operations work
After clicking on the Payslip tab, you will get To Pay from the drop-down list. When you click on the To Pay option, the new window will appear as shown in the screenshot given below.
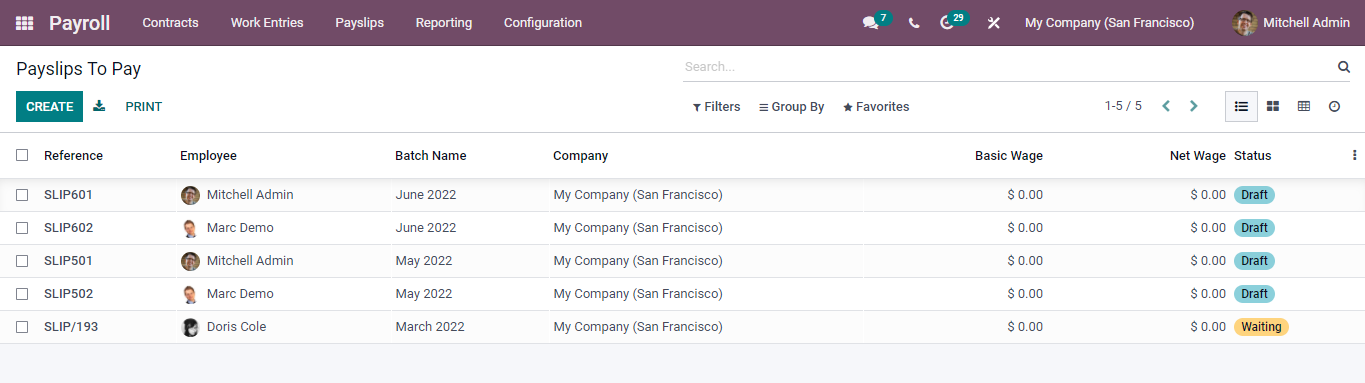
The To Pay page displays the list of payslips, which are supposed to be paid. There is a CREATE button through which you can create a new payslip. You will obtain a new configuration page to create a payslip after clicking on the Create button as highlighted below.
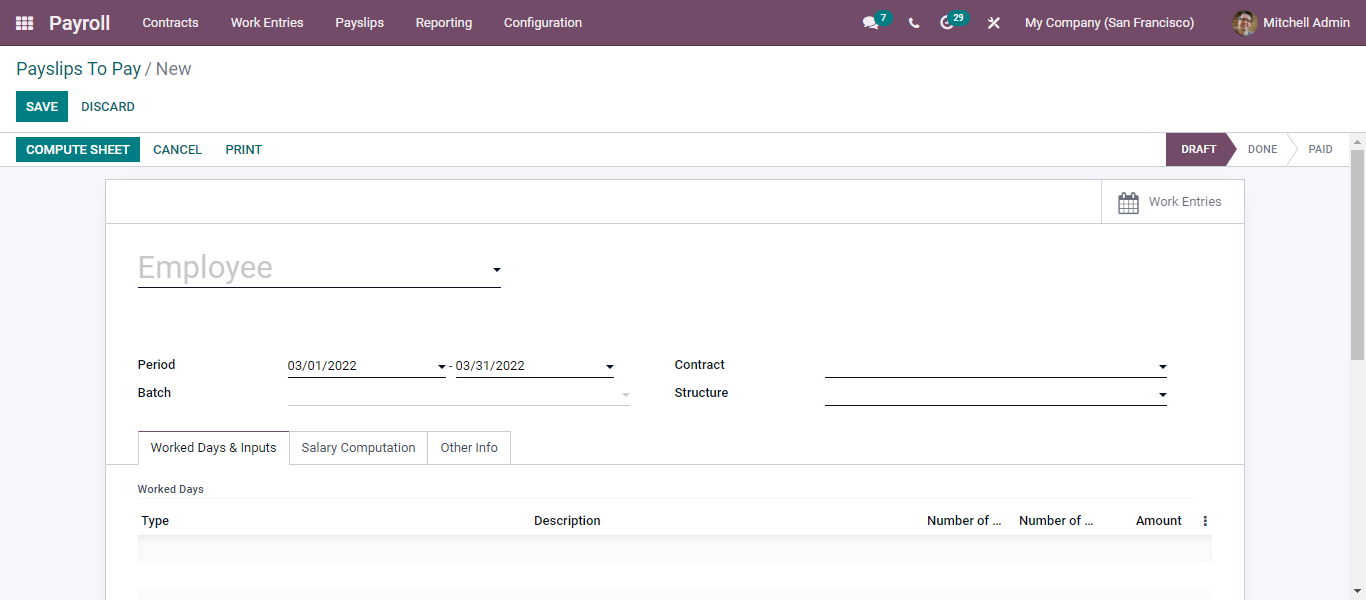
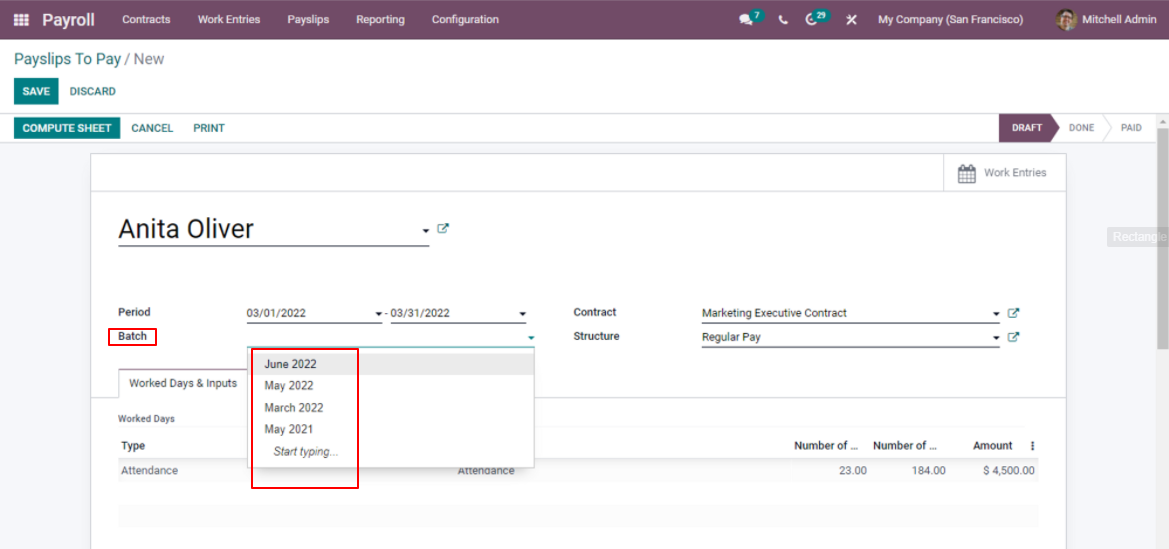
Once you click on the Employee field, the list of employees appear before you choose the employee from it. The contract of the employee is updated automatically after adding the employee in the Contract field. Besides, you can use the Period field to add the period and Batch field to select the batch years as displayed below.
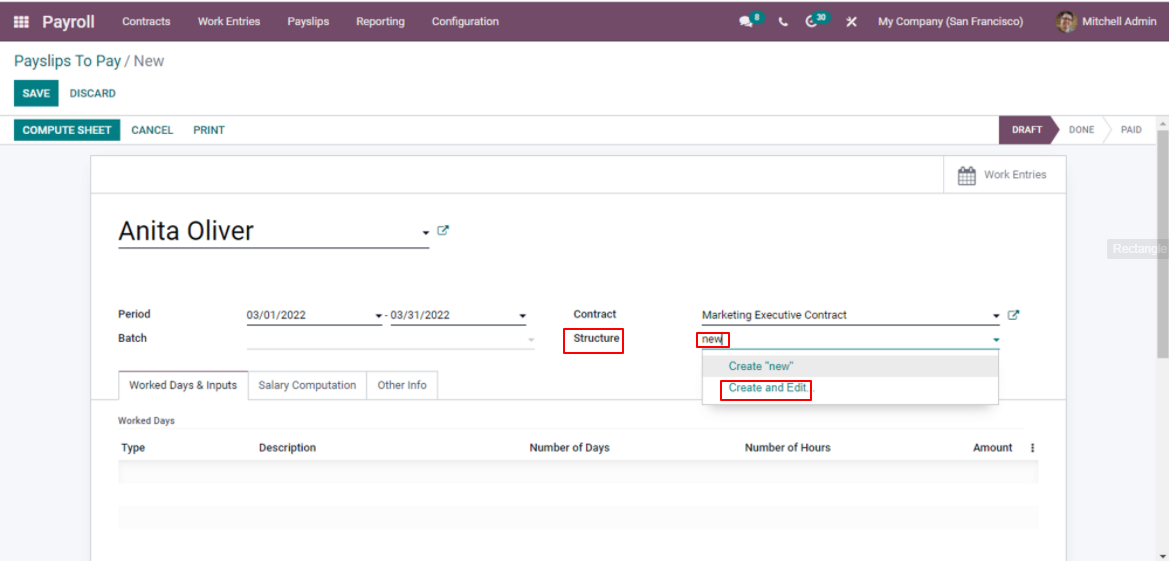
Choose the types of payments from the drop-down list in the Structure field. The salary structure can be created from the Payslip configuration page. Typing "New" in the structure field gets you "Create and Edit" options as shown below.
The configuration pages allows you to create a new structure after clicking on the create and edit window as displayed in the screenshot given below.
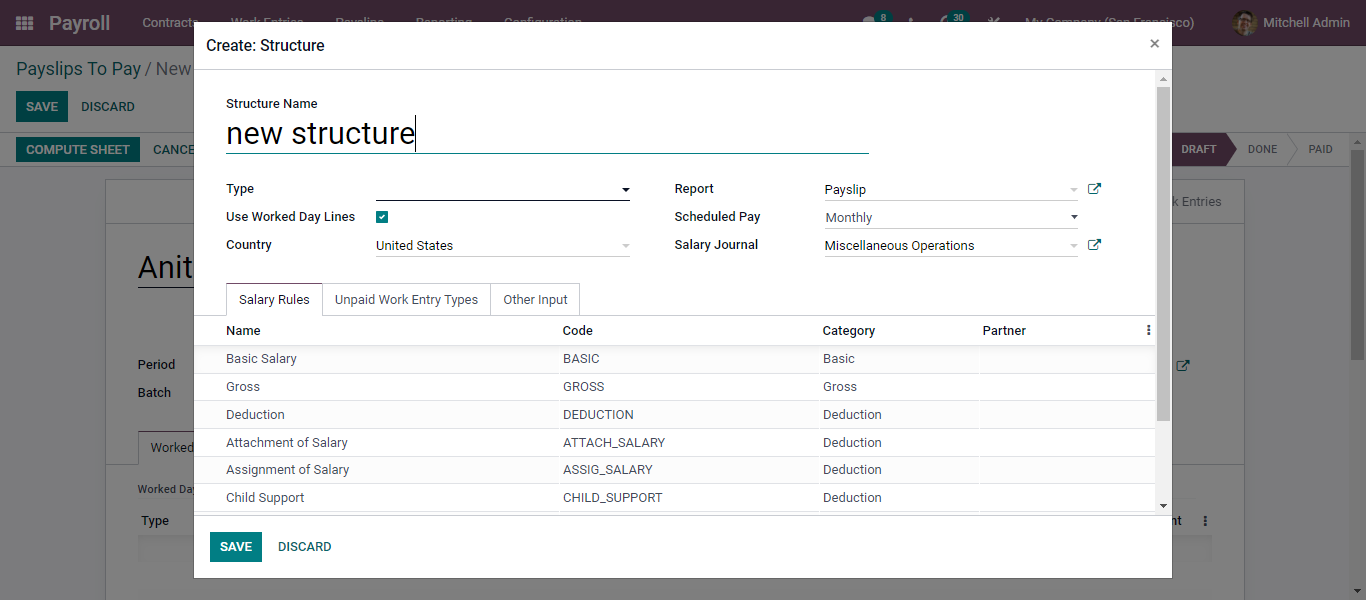
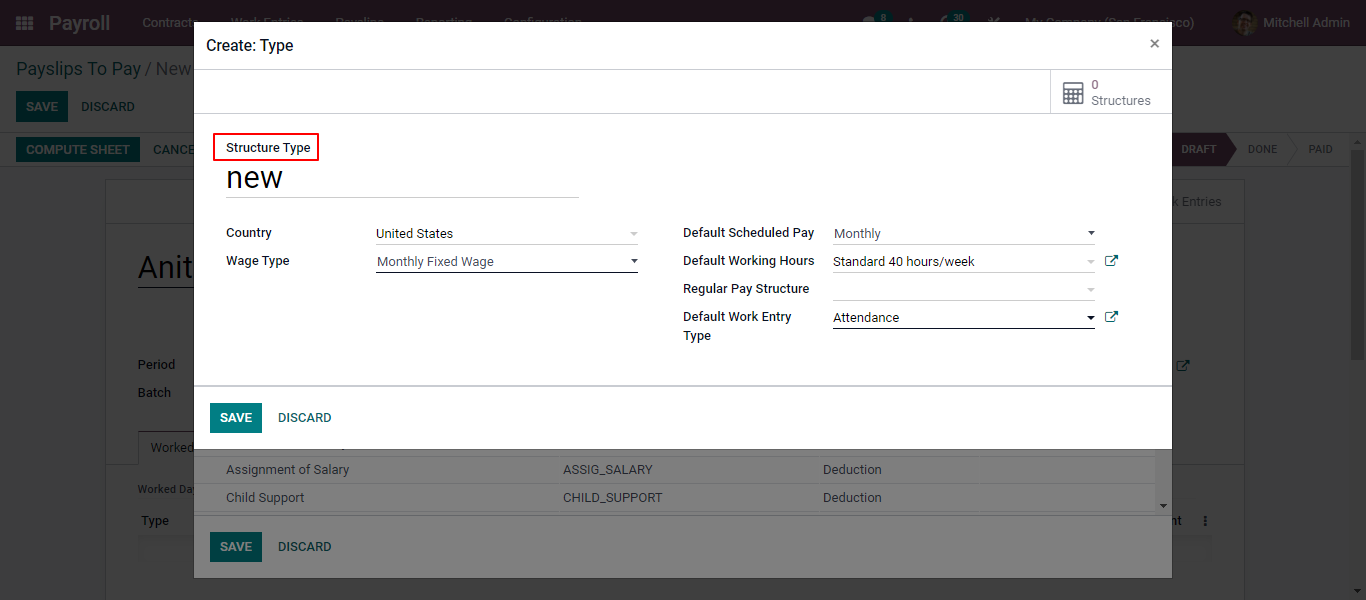
In this window, add the name of the new salary structure in the Structure Name field then click on the Type field to select the type from the drop-down menu as shown below.
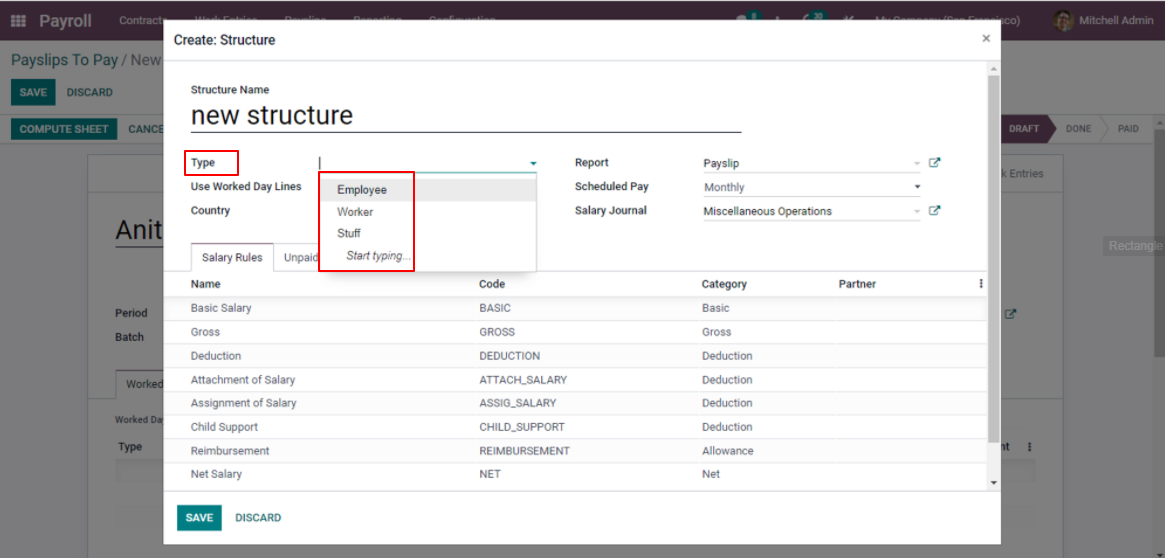
Select the wage type from the Wage type field. In addition, you are allowed to configure the default monthly pay and the working hours for the types of structure. On top of that, it is also easy to configure the pay structure and the default work entry type from here. Once you complete the configuration, click on the SAVE button.
As soon as you update the salary structure of the worked days, the input tab is configured automatically as shown in the screenshot given below.
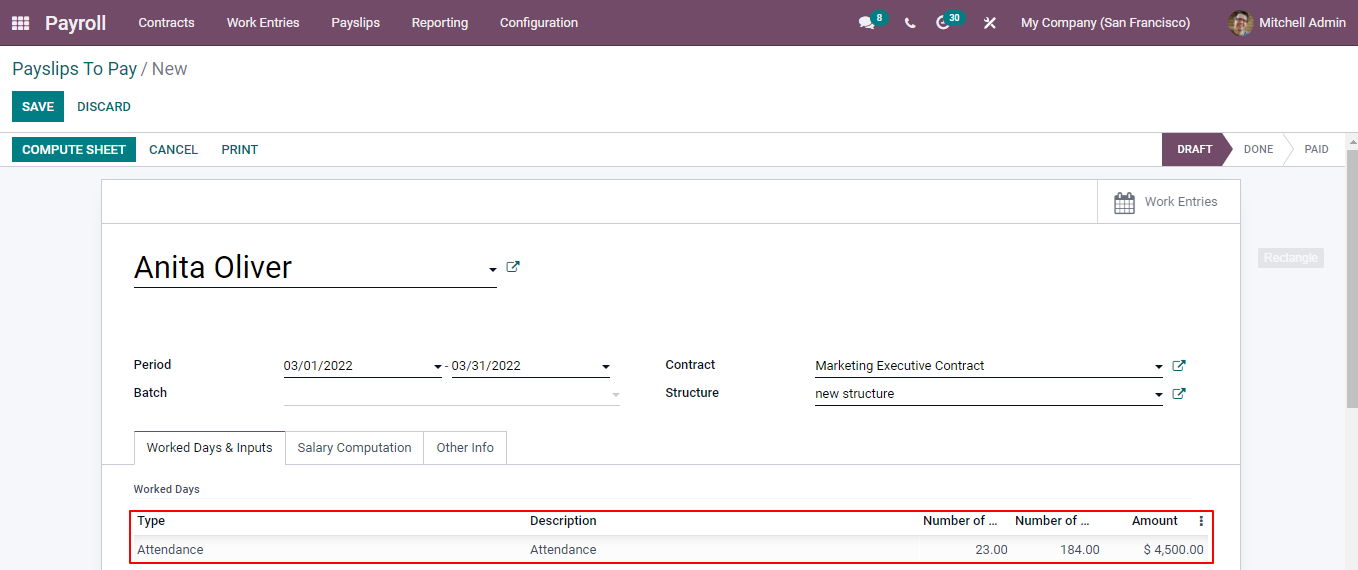
Click on the Compute Sheet button to compute the sheet. After this, your tab will be filled automatically. This allows you to compute the salary and the data will be delivered to salary computation.

You will be able to find additional option to configure the payslip with the other info tab as shown below.
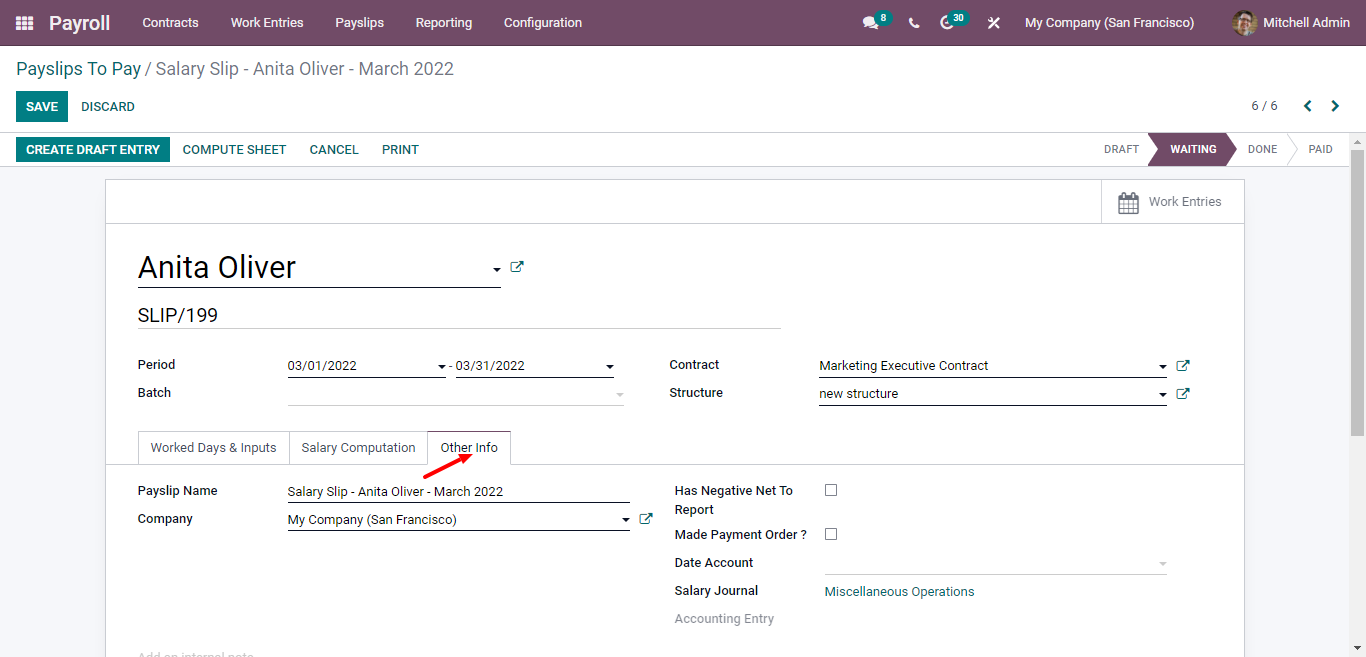
The name of the payslip and company will be filled automatically, which allows you to use numerous options for the payslip configuration. Besides, you can also replace the company name with a new one from this field. You can enable the check box by clicking on it. Press the Made payment order tab to activate the function. A page on the Journal will appear as soon as you click on the Salary as shown below.
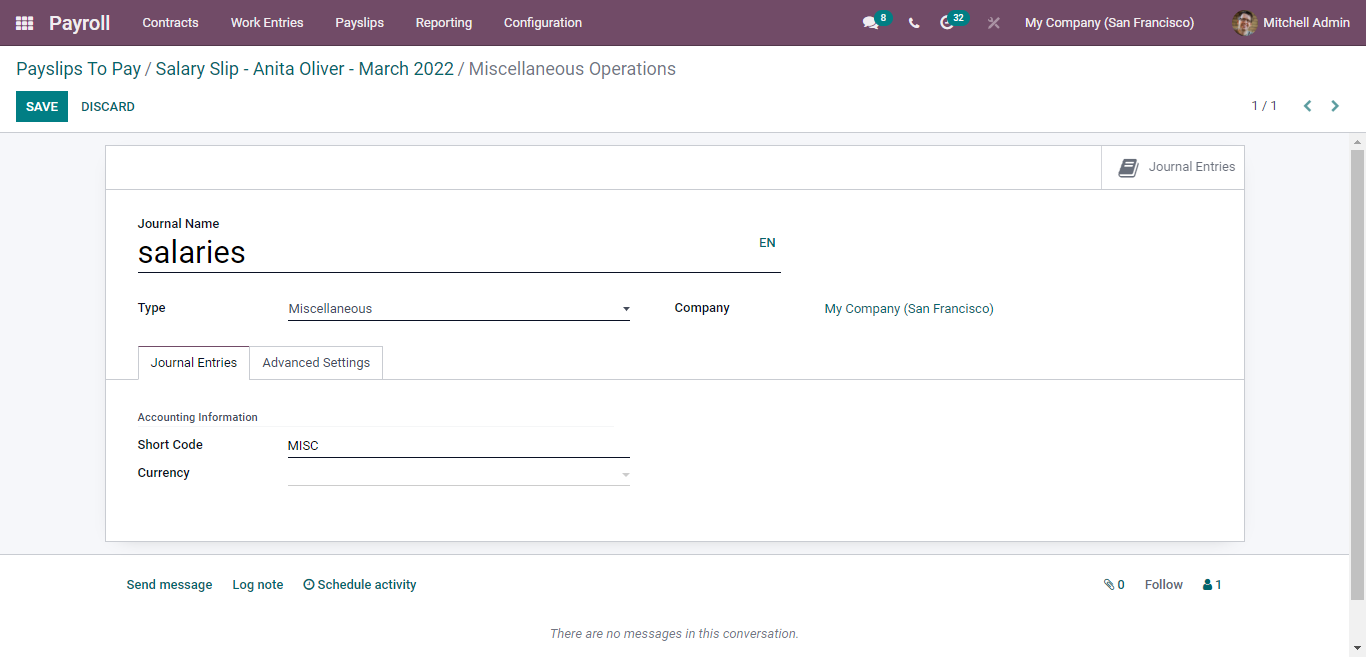
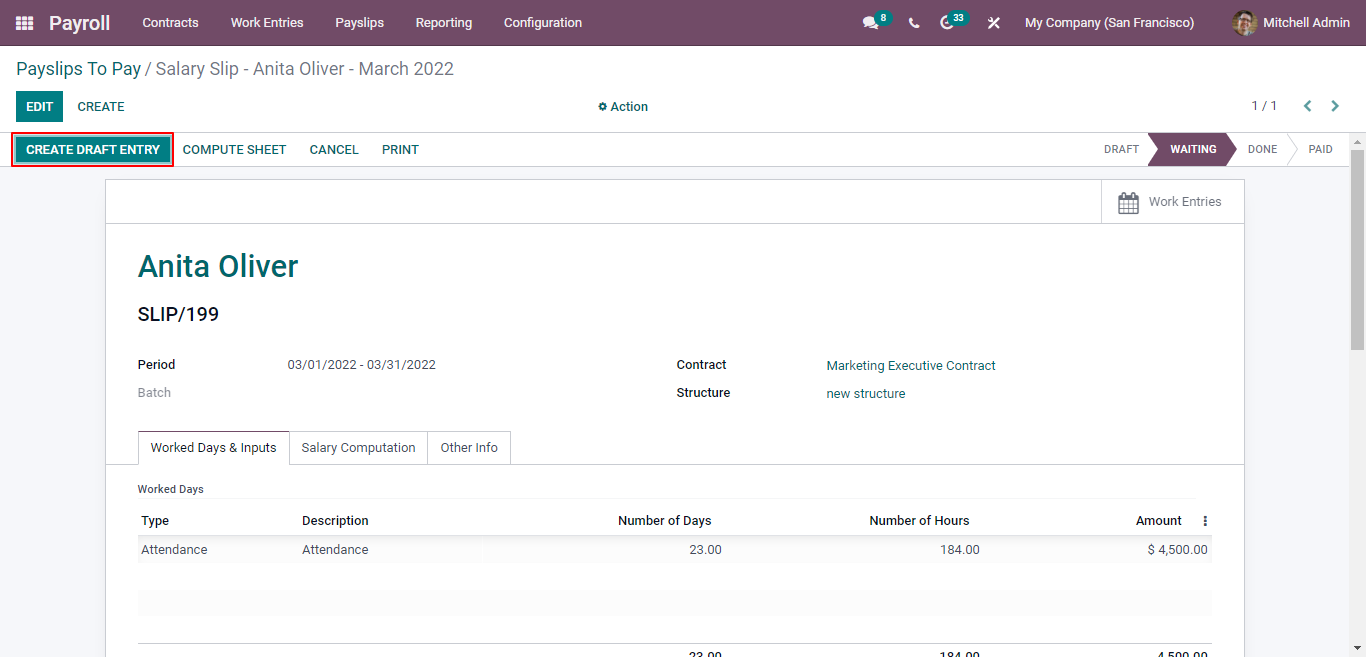
You can edit the journal by clicking on the Edit button. Once the configuration ends, click on the Save button to save the payslip you have just created. You can split the data into different columns. It is generally a structured note of an employee's salary. Each category is used to create the final salary of the employee. You can also collect the crucial accounting information through the Other info tab. The draft entry can be formed by clicking on the CREATE DRAFT ENTRY button. After that, a draft entry page will soon appear in front of you as shown below.
From this window, you can complete the payslip configuration. Go to the page and make sure it has no errors. Then, create the Payment report on the employee by clicking on the CREATE PAYMENT REPORT button.

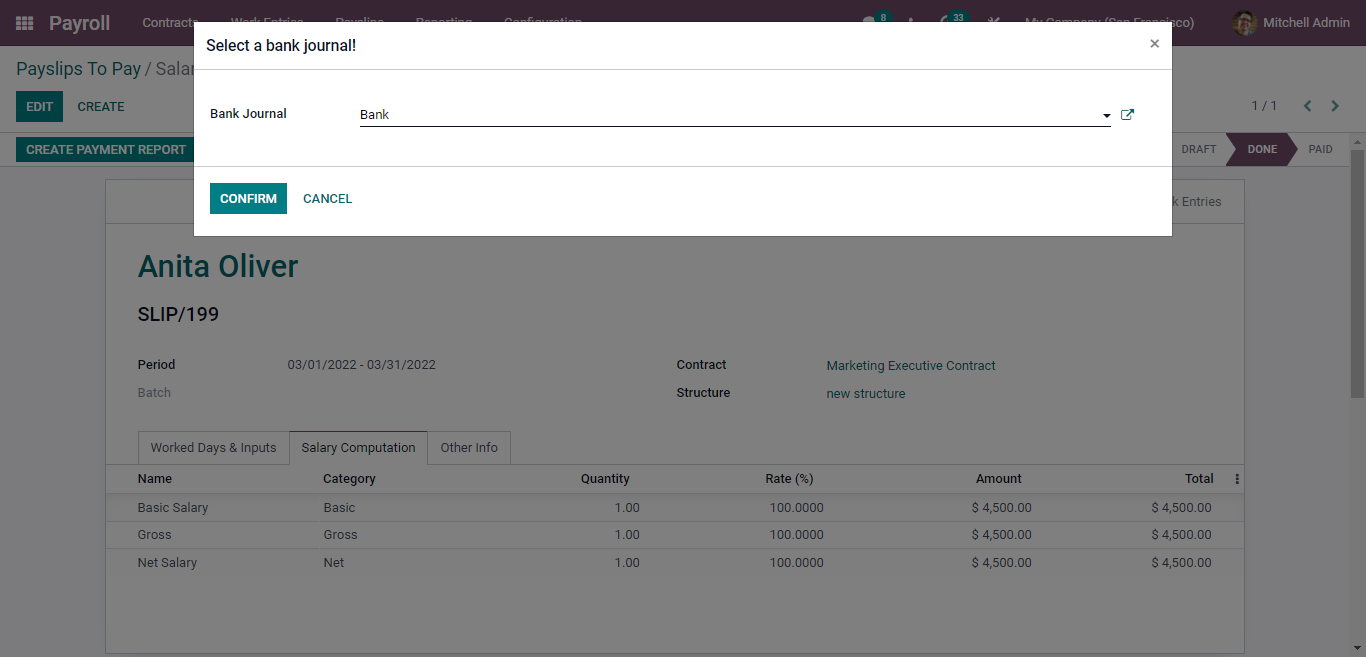
After clicking on the REPORT PAYMENT REPORT button, a tab will appear to select the Bank journal as displayed below.
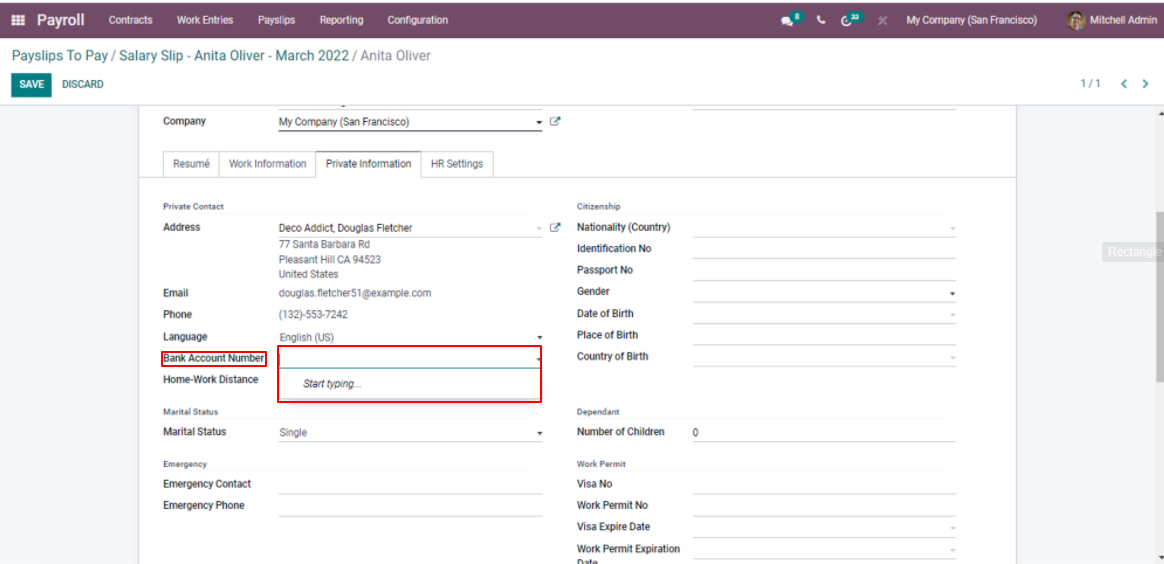
If Odoo restricts you to select the Journal account, in this case, open your employee profile and configure the details of your bank account. You can easily find the Account field using the Personal Information tab of the employee profile as shown below.
From this page, a Create and Edit button will appear after entering your account number. After clicking on it, a new tab will open to create the bank account as highlighted below.
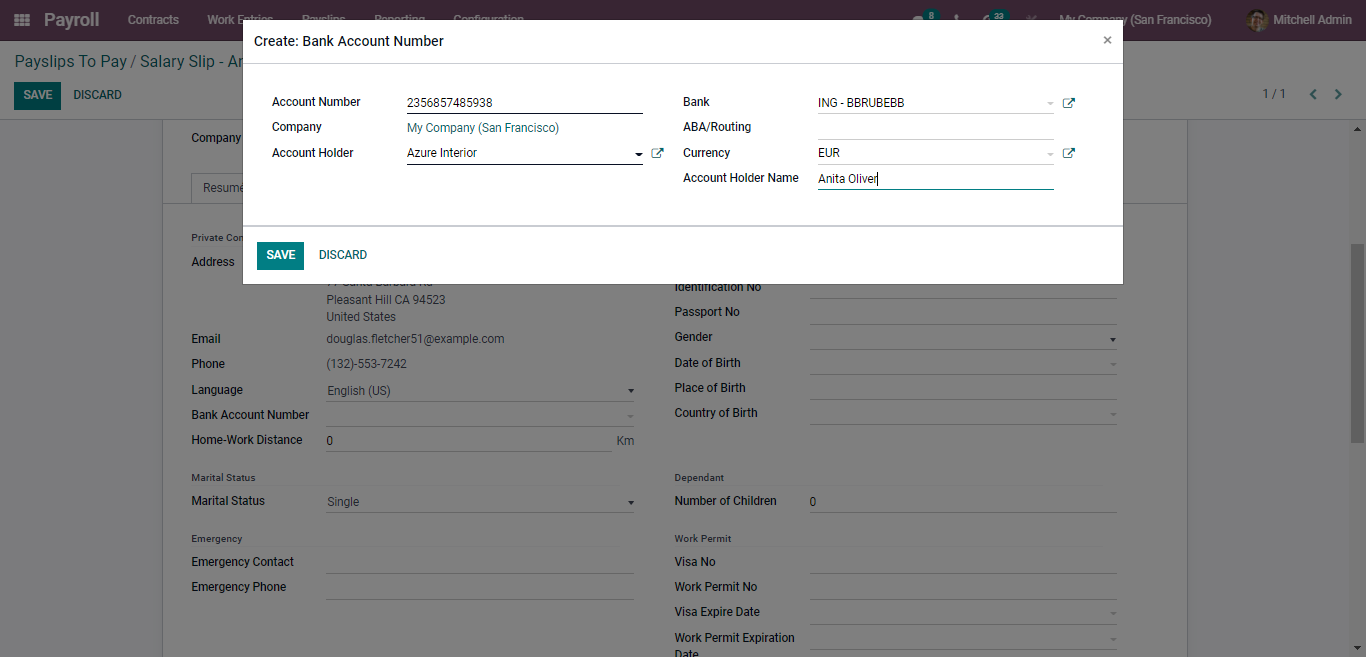
Apart from the Account number, select the bank including the preferred currency, and name of the account's holder from the specified fields. To save the configurations and the Bank account, simply press the SAVE button. Return to the payslip configuration page and carry forward the bank account's process. After that, you will find the processed payslip listed in the All Payslips tab. All payslips will open once you click on them.

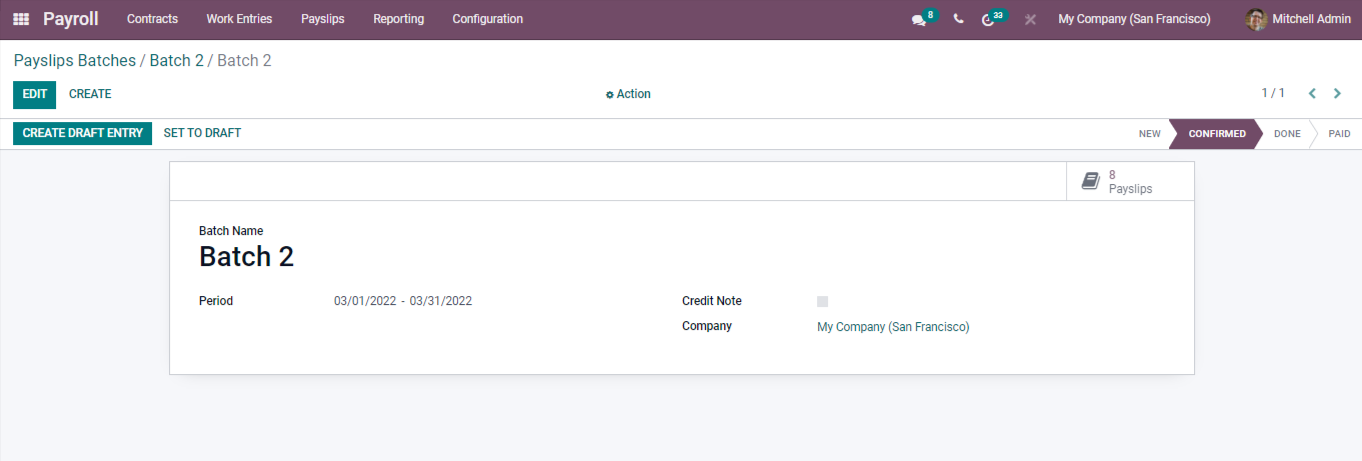
This way, you can easily form payslips for employees. Besides, it is also easy to create payslips as batches as shown in the image given below.
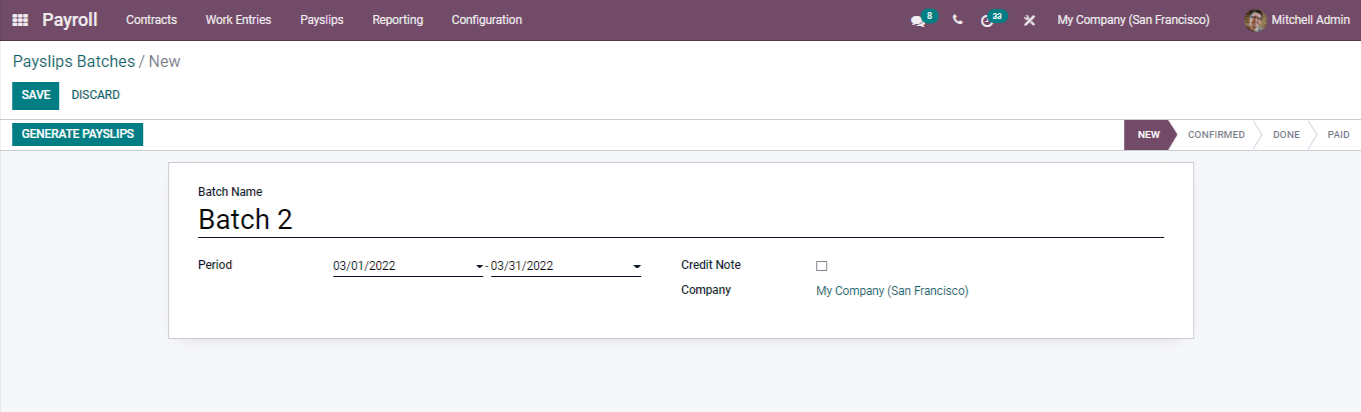
When you click on the GENERATE PAYSLIPS button, you will get a page to configure the Batch payment as found in the screenshot below.
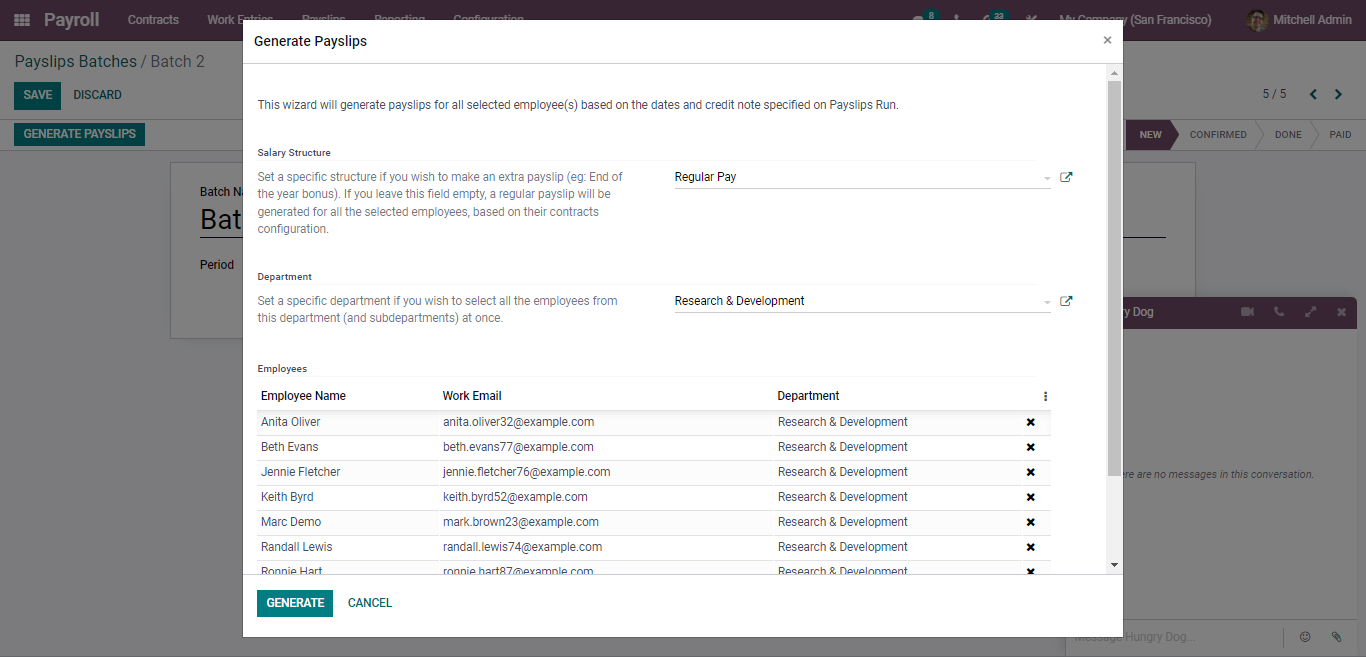
After selecting the Salary structure and Department the employee's section will be filled automatically. By clicking on the GENERATE button, you can generate the payslip.
Conclusion
We hope, now you have understood how to create and manage the payslips with the Odoo 15 payroll module. As previously mentioned, it can be easily integrated with the HR module of Odoo, which allows you to access the details of the employees.