
During the formation of a new project in the Odoo project module, you can easily divide the project into various tasks and sub-tasks, which will allow you to systematically manage the operations related to the project you are working on.
Systematic management of the tasks gives some relief to employees from the workload. Moreover, certain employees who are closely involved in the project can also work on the project with so much ease. Putting the tasks into tasks and sub-tasks categories will help the prime project manager adequately tackle the project.
This blog is about how tasks and sub-tasks can be assigned in the Odoo 15 Project module.
In order to create a new project in the project module, you ought to follow a few simple steps. By doing so, your path towards creating a new project becomes much easier. Once you create a new project, you can effortlessly add tasks to a newly created project.
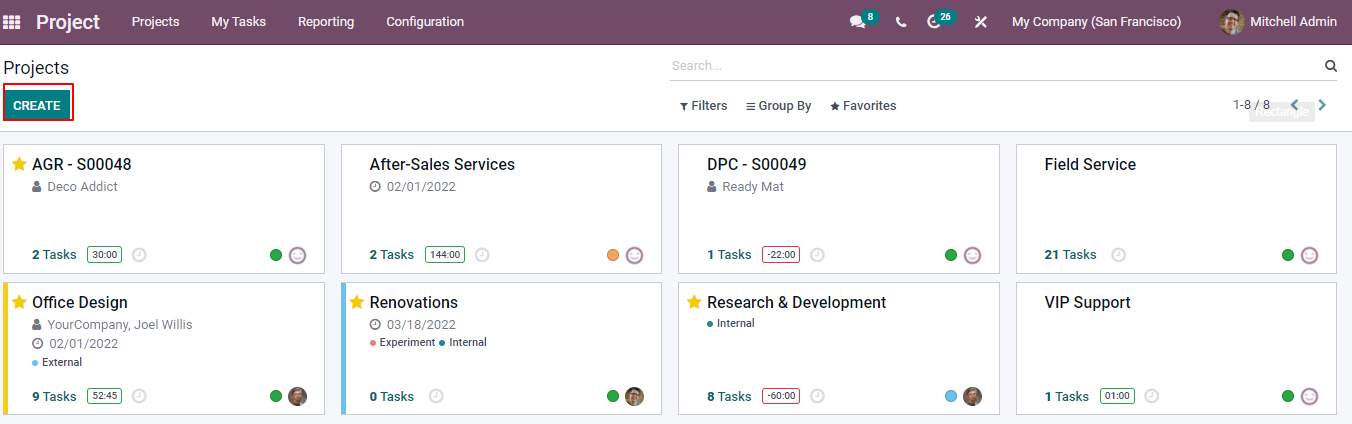
Go to the project module dashboard and click on the Create button to create a new project.
After that, a pop-up window will appear where you can enter the name of your project as shown below.
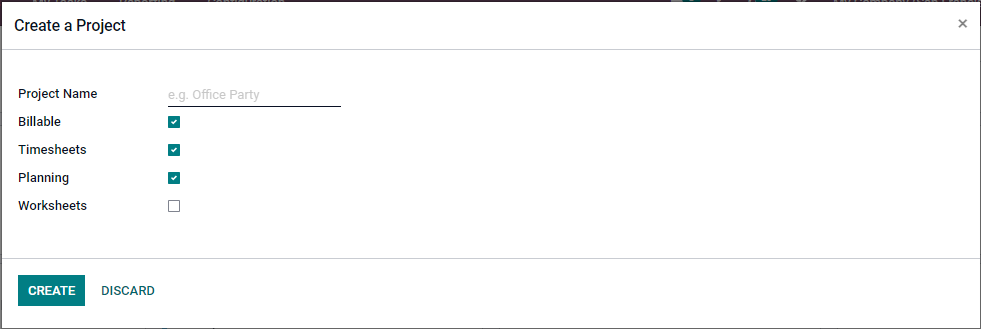
After naming the project, you will find options like Billable, Timesheets, Planning, and Worksheets. You need to activate them as per the requirements. Press the Create tab and you will be taken to a new window by Odoo where you can hassle-free create tasks for the project you have formed as highlighted in the below image.
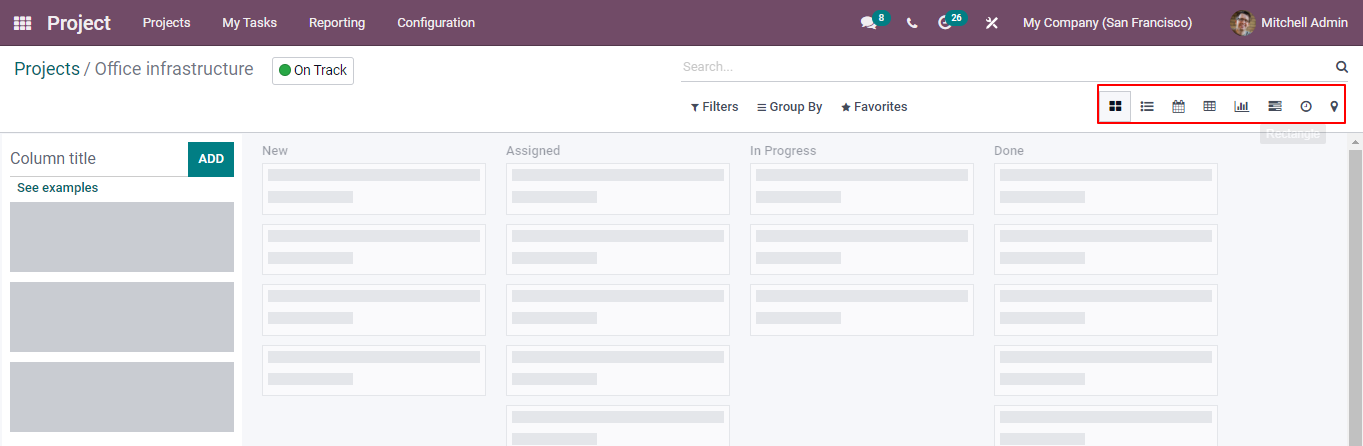
From here, you can easily create new stages like Assigned, In Progress, and Done, which help you understand the actual growth of your tasks. This window allows you to access the task views such as the Kanban, List, Pivot, Calendar, Graph, Gantt, Map, and Activity as shown in the screenshot given below.
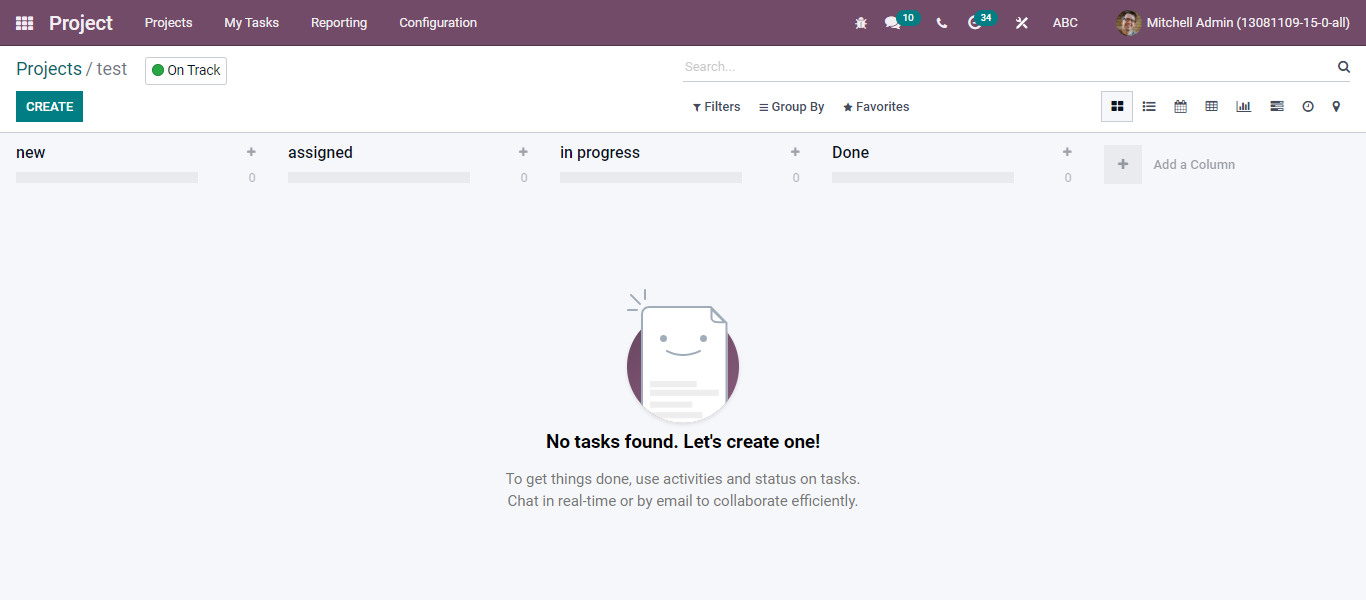
After the configuration of these stages, you can configure additional tasks by clicking on the Create button as displayed in the image given below.
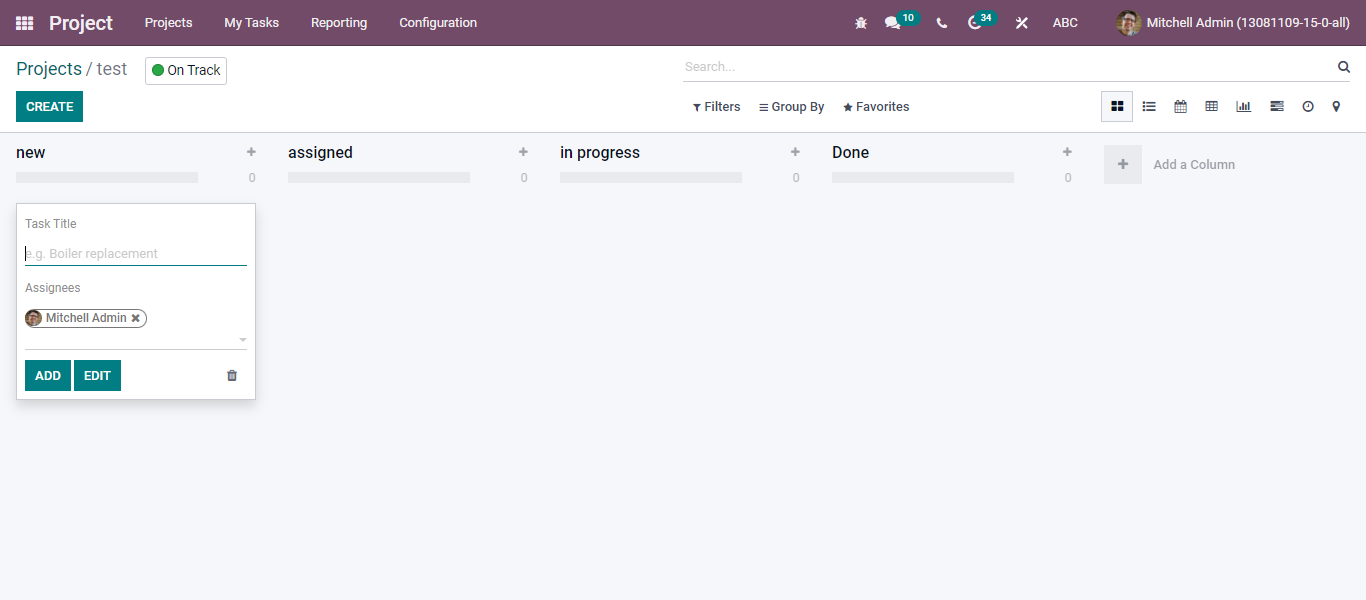
In the new field, you can enter the title of the task, worksheet templates, and assignees. Apart from this, additional information related to the task can be added with the help of the Edit button as shown below.

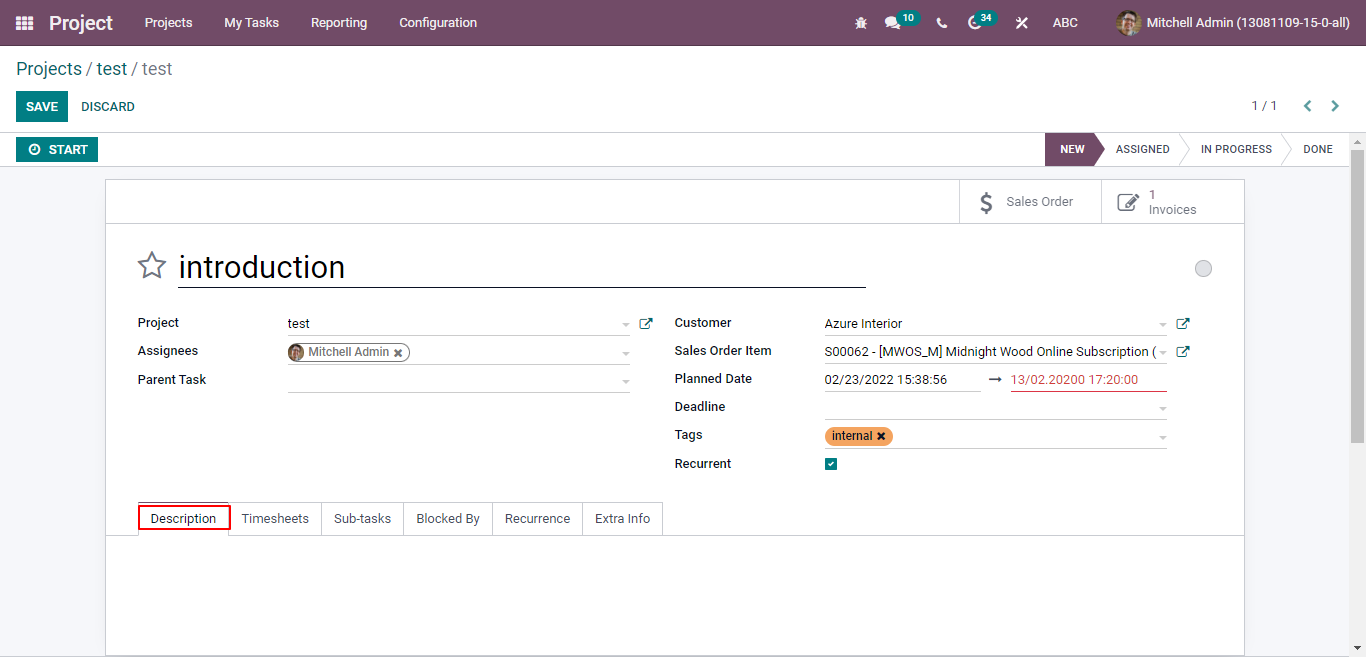
Using the Star icon, you can add the task to the favorite list. Here, you already have enough information about the Project, Worksheet Template, and Assignees. To add the time that you have spent on the particular project, you need to define the Parent Task, Customer, and Sales Order Item. This action will help you create Invoices, Planned Date, Deadline, and Tags as shown below.

By activating the Recurrence field, you can repeat the task at a regular interval. You will have to enable the Recurring tasks option to access the Recurrence field. In the same way, you can enable the Collaborative pads to use a collaborative pad to easily enhance communication with team members. You can easily turn your task into sub-milestones after activating the sub-tasks option.
There is a Task Dependencies option that you can use to define the order of the task. Besides, you can allocate resources across projects and tasks by activating the Planning option. This helps predict deadlines with more accuracy.
There is another option called Timesheets, which is used to trace the record you have spent on every single task for the project. Once you finish activating the options as per your requirements, get back to the task creation window.
By means of collaborative panel, you can easily communicate with your teammates about the progress of the task. This feature helps you collaborate quickly with your team members in critical situation.
Once you finish the task creation, it gets easier for you to record the time that you have spent on the important task. Moreover, you can view your recorded time under the Timesheets tab. You are allowed to specify the time in the Initially Planned Hours field. The time you specify in the field depends upon your estimation to complete the task. Your task progress rate is judged by Odoo ERP software based on the time you have recorded on the Progress field. With this tab, you can view the total hours you have spent on the task as shown in the above image.
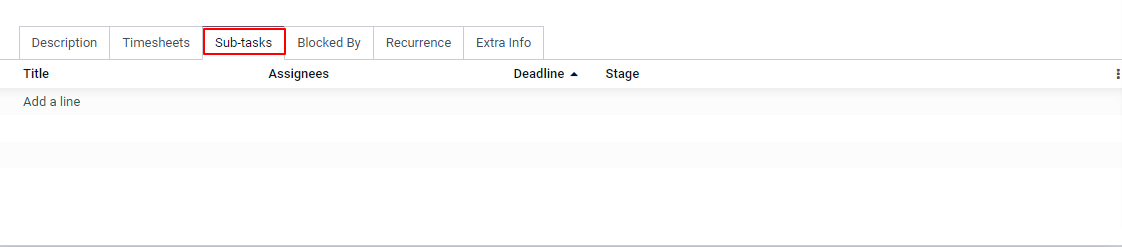
Go to the Settings menu and enable the corresponding option to get the sub-tasks tab. With this tab, you can easily split the task into sub-tasks, which will result in systematic arrangement of task activities.
To enter the name of the title, click on the Add line. Do the same with the remaining fields such as Assignees, Deadlines, and Stages. As soon as you save the task, a View task will appear through which you can trouble-free view and manage the corresponding sub-tasks.
You can define the task order to perform after generating tasks for a project. You can easily do this using the Task Dependencies option. After activating the Task Dependencies option, you will obtain a Blocked-By tab.
By using a Blocked-By tab, you can block the tasks, which you think are unnecessary . After clicking on the Add a Line button, you will gain a pop-up window that can be used to choose the tasks you want to add to the block list.

After activating the Recurrence tab, you can repeat the current tasks on the days you have chosen. As per your day's selection, Odoo will give you the details of your Next Occurrences on the tab.
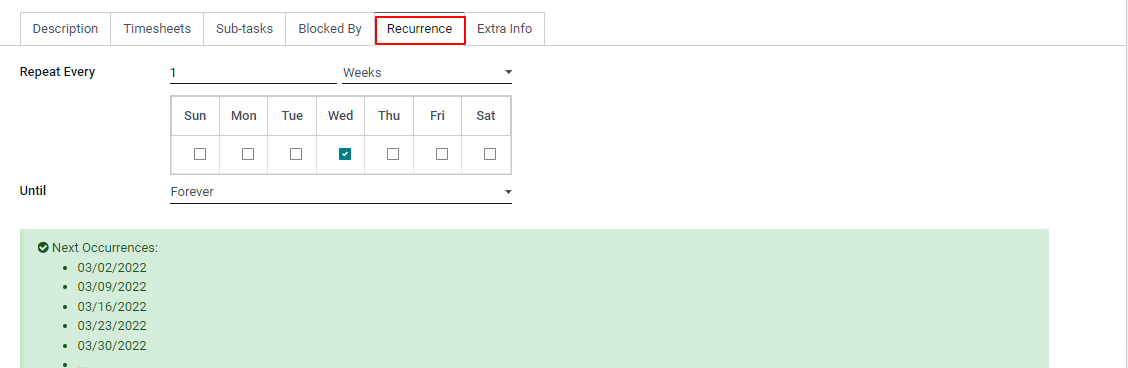
Additionally, you can set the repetition as Forever, End Date, or Number of Repetitions in the Unit field. You can configure the additional details about your task in the Extra Info tab.
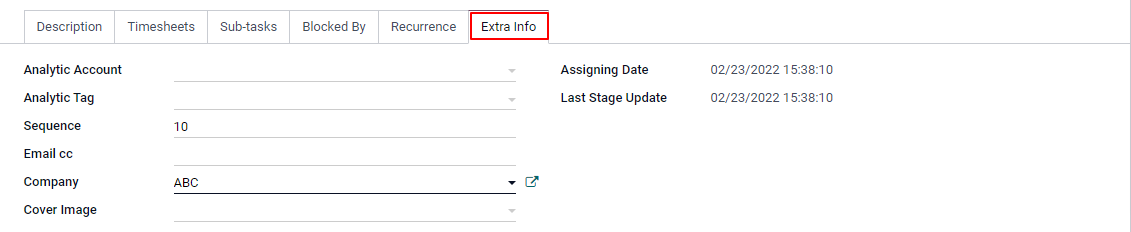
For recording the spending and revenue of the task, you have to add an Analytical Account in the defined field. You can also view other tabs like Sequence, Company, Assigning Date, and Last Stage Update in the Corresponding field. In the Extra Infor tab, add an Email cc and Cover Image for this task.
Conclusion
Simply put, with the Odoo Project module, you can easily divide the projects into tasks and sub-tasks and manage them in an organized manner.