
The Helpdesk module has got new features in Odoo 15 edition. With the Odoo Helpdesk app, you will have direct interaction with your customers and can suggest quick solutions to their queries.
Providing better customer service should be your first priority when planning business strategies. For this, a company needs a platform that helps enhance communication with the customers and brings solutions to their queries in a timely manner.
With the help of the Helpdesk module, you can maintain a long lasting relationship with customers. There is a unique system integrated into this app, which supports you to carry out every customer's task with great accuracy.
The Helpdesk module involves all the features that you require to provide better customer support on a single platform. Mediums like Email, Phone calls, Live Chat, and Website the customers can use to raise issues.
In this blog, we are going to talk about how you can manage helpdesk tickets with the help of Odoo 15.
Let's start the process. First of all, go to the main dashboard of Odoo. You will find the Helpdesk module.
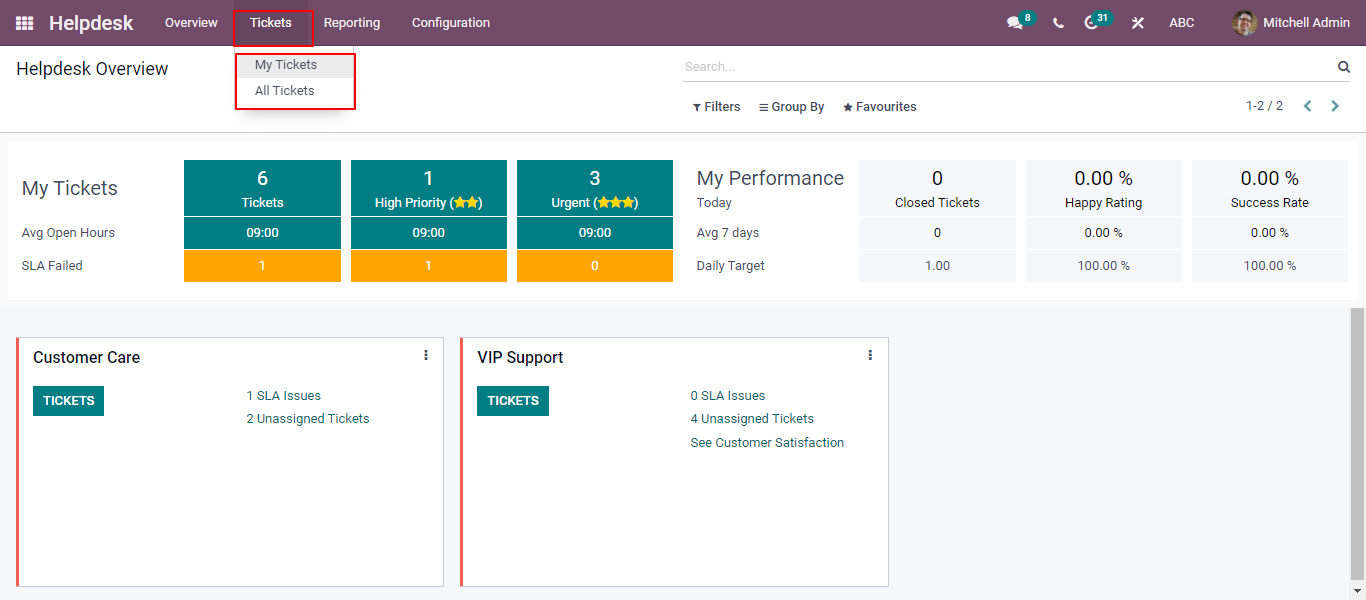
Click on the Helpdesk module to go to the Helpdesk overview page. On this page, you will collect detailed information about each operation, which will benefit you in further operations.

In the window below, you can see the tickets, which are allocated for the users and helpdesk team. You can easily access the Ticket menu by going to the main menu bar of this module. After clicking on the Tickets menu gives you two sub-menus called My Tickets and All Tickets.
You can use the My Tickets options to obtain the information related to the tickets assigned for the users of the database. Additionally, there is a list of tickets , which contains the options such as Name, Helpdesk Team, Assigned to, Customer, Company, Next Activity, Priority, Deadline, and finally stage. In addition, each ticket platform provides you with a list of all tickets allocated to different helpdesk teams within your company as displayed in the image given below.
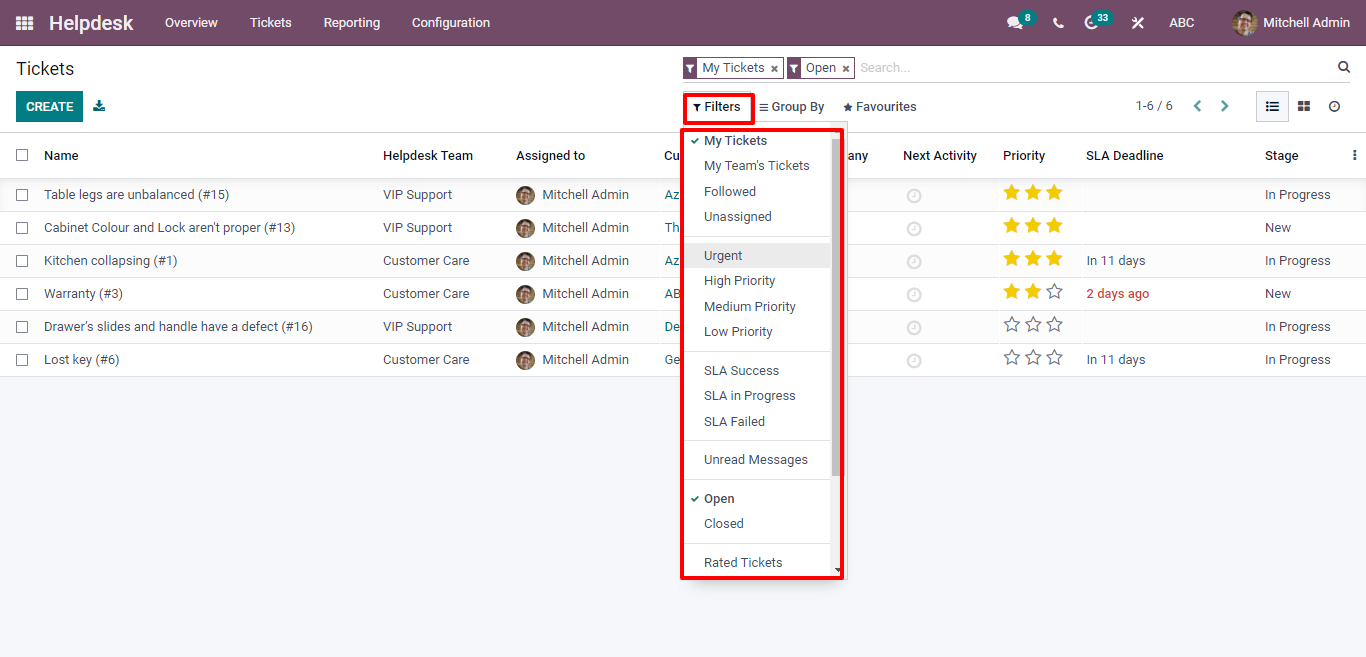
With the help of default filters, you can easily categorize the tickets as per My Tickets, My Team's Tickets, Followed, Unassigned, Urgent, High Priority, Medium Priority, Low Priority, SLA Success, SLA in Progress, SLA Failed, Unread Messages, Open, Closed, Rated, Tickets, Creation Date, and Archived. On top of that, You are also provided with Custom Filters to filter tickets as shown below.
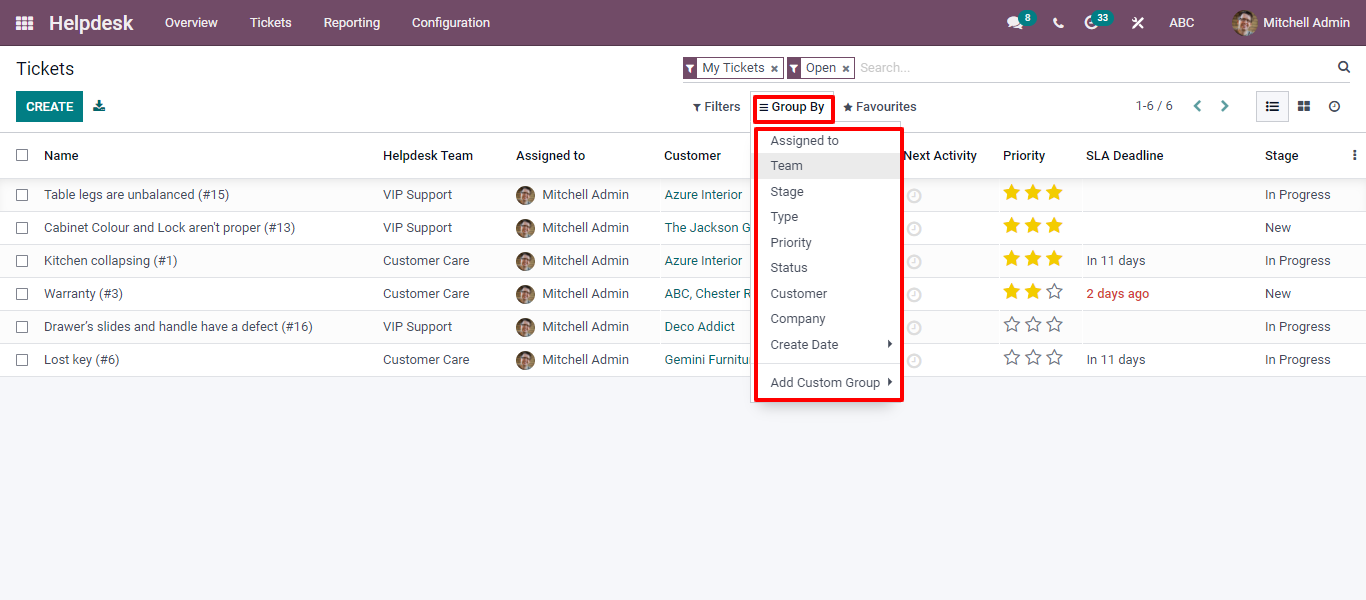
Besides, it is easy for you to group the tickets based on the assigned employee, Team, Stage, Type, Priority, Status, Customer, Company, and Creation Date. Furthermore, you can use the Add Custom Group option to create a new grouping option for the tickets.
As we mentioned above, the platform, which customers use for reporting their queries will be converted into support tickets in the Helpdesk module by Odoo itself. On top of that, you can easily create tickets manually as shown below.
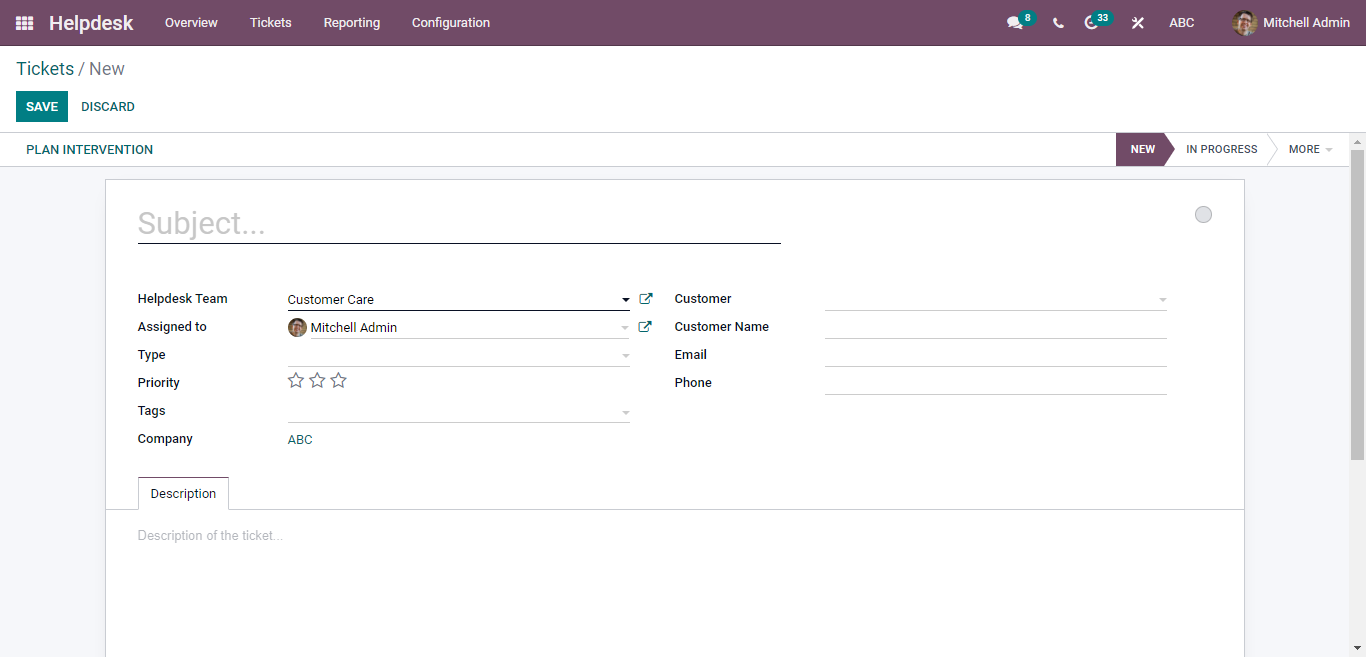
After clicking on the CREATE button, you are taken to a ticket creation window.
Afterward, define the subject of the ticket in the specified field. This window allows you to configure a Helpdesk team and assign employees in the right space. In addition, you can add information related to the ticket, Priority, Tags, Company, Customer, Customer Name, Email, Phone, Email cc, and Product. Here, you can use the Description field to mention the customer's queries as highlighted below.
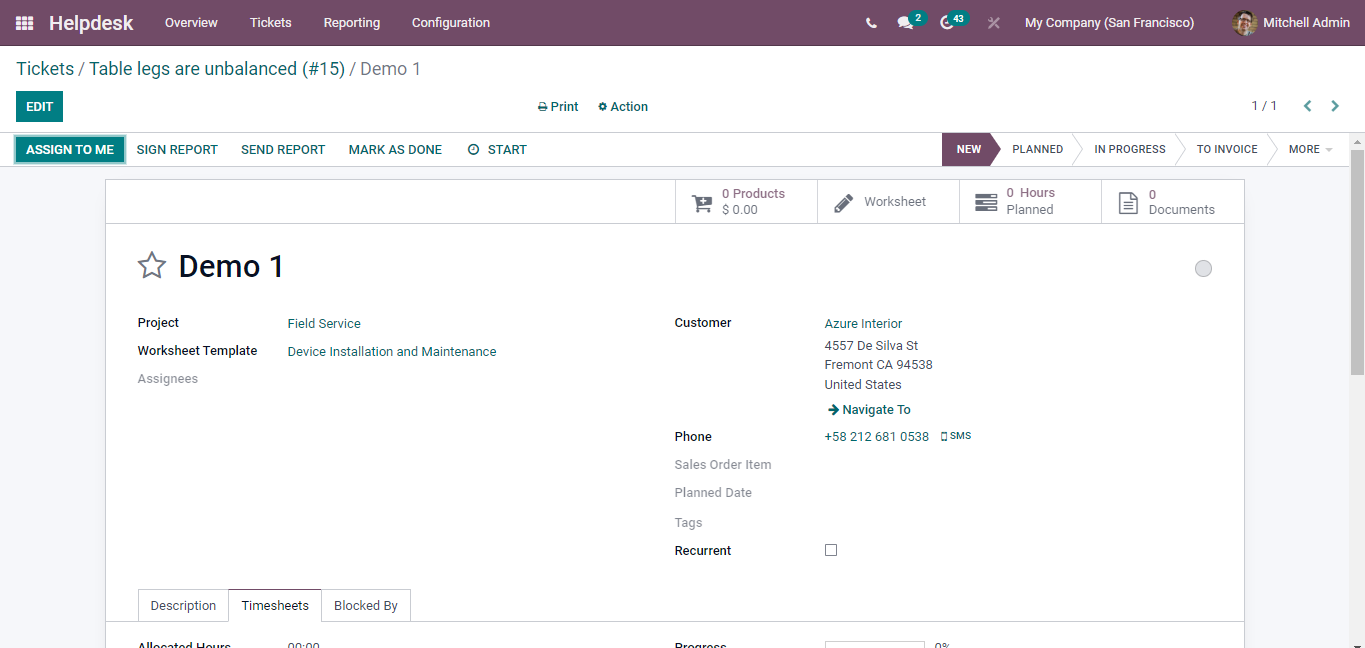
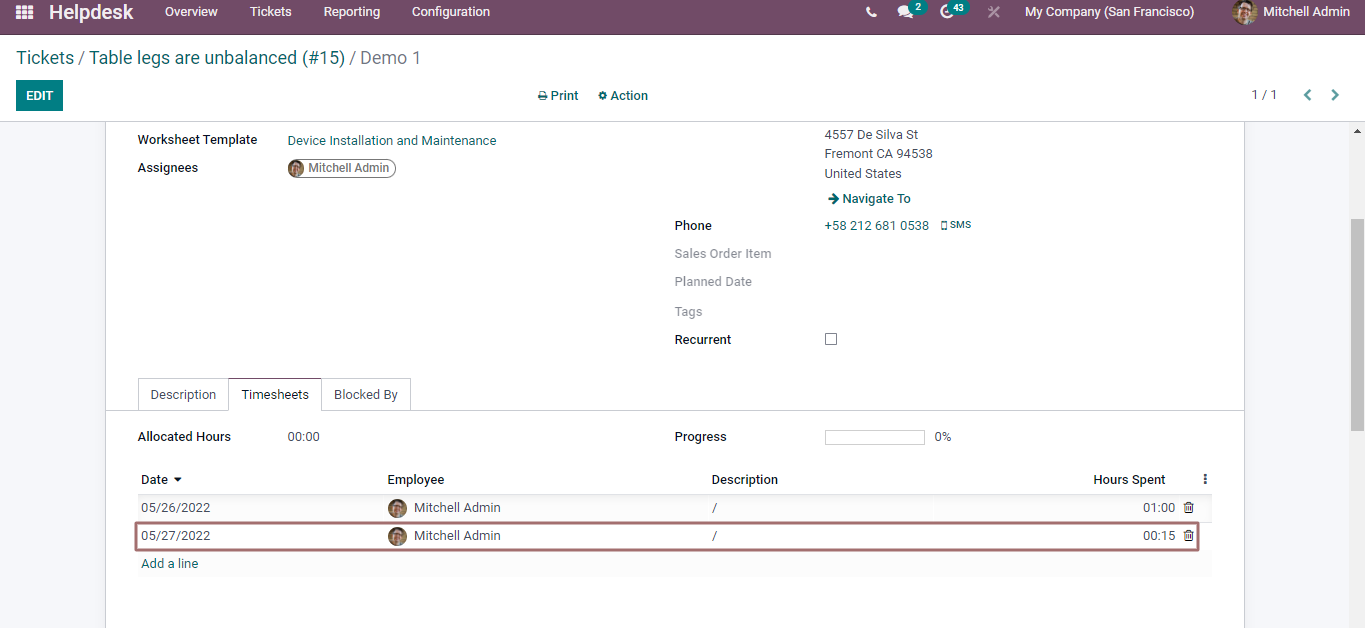
To track the time of employees, you can use the "Timesheets" option. Additionally, you can easily configure timesheets along with the details such as Date, Employee, Description, and Hours Spent with the help of the Add a line button.
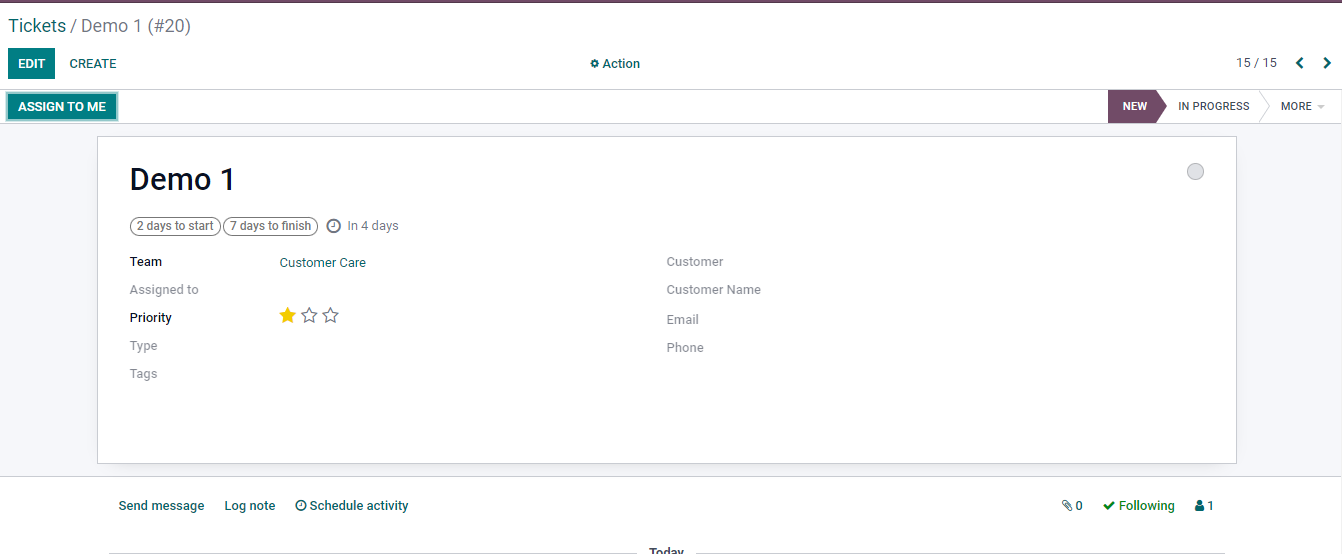
Once you save the ticket, the start button will appear that will automatically help record timesheets you spent on tickets as shown in the screenshot given below.
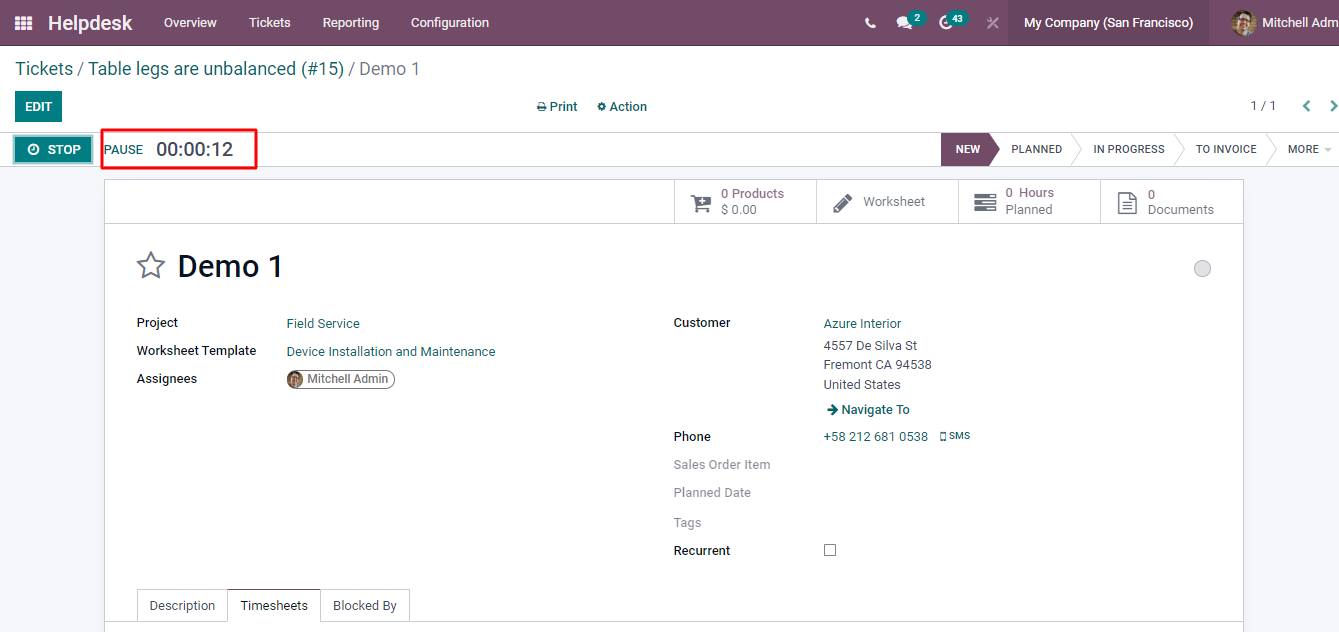
In this window, you can find the Stop and Pause button. The Pause button can be used to confirm on tickets, which will be further added to the Timesheets as mentioned below.
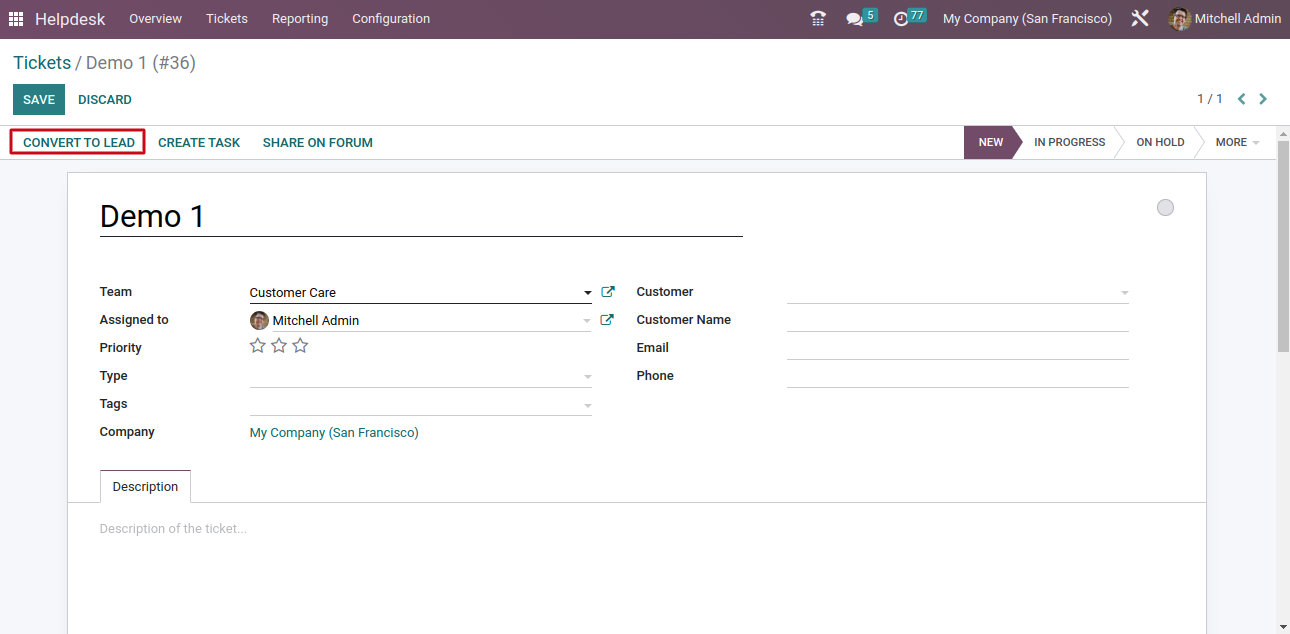
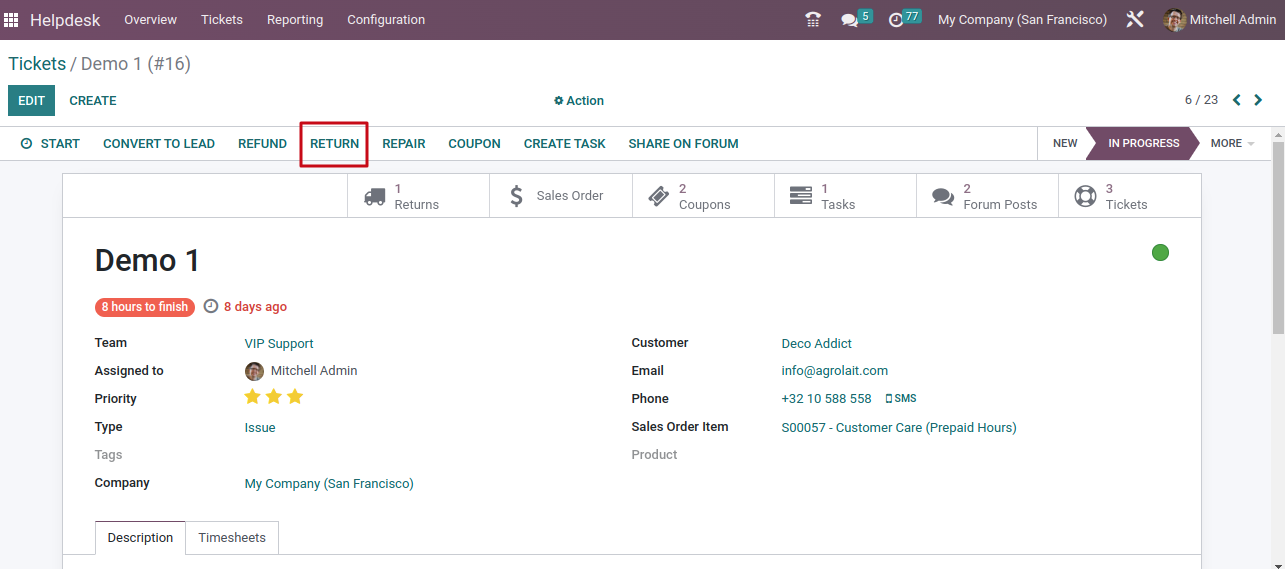
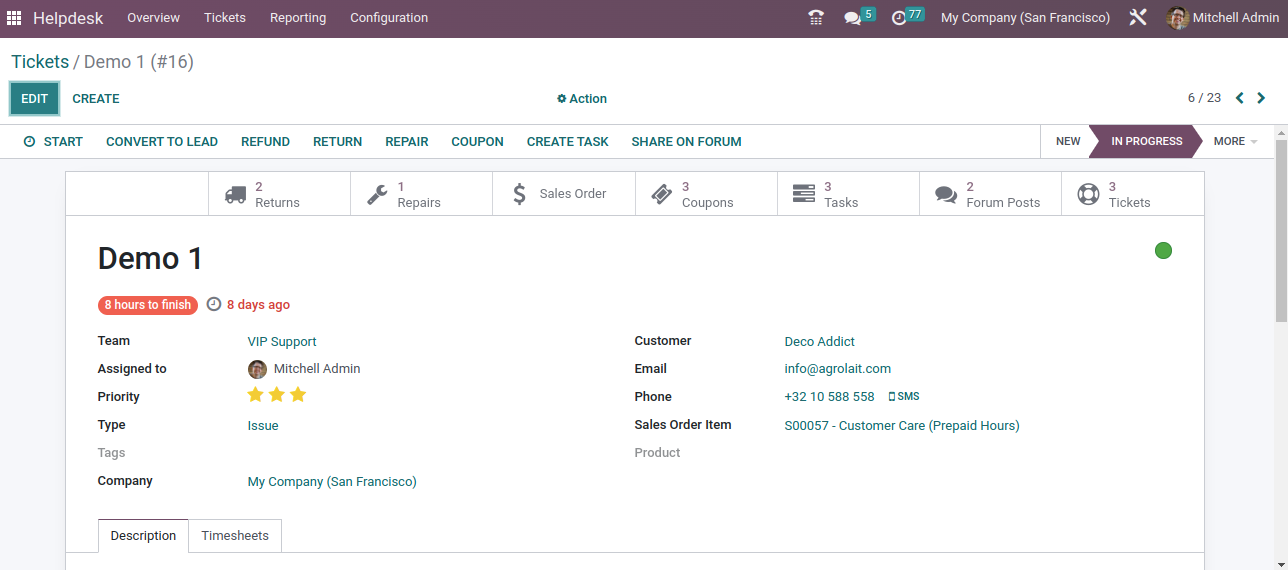
The window has advanced options such as Convert To Lead, Refund, Return, Coupon, Plan Intervention, and Share on the Forum the assigned employees can use to take concrete actions on the registered ticket. Let's discuss them separately.
Convert to Lead
In case a customer submits a ticket, Odoo enables you to generate a new lead using the customer's details. This action can be performed easily using the Convert to Lead option as shown in the image below.
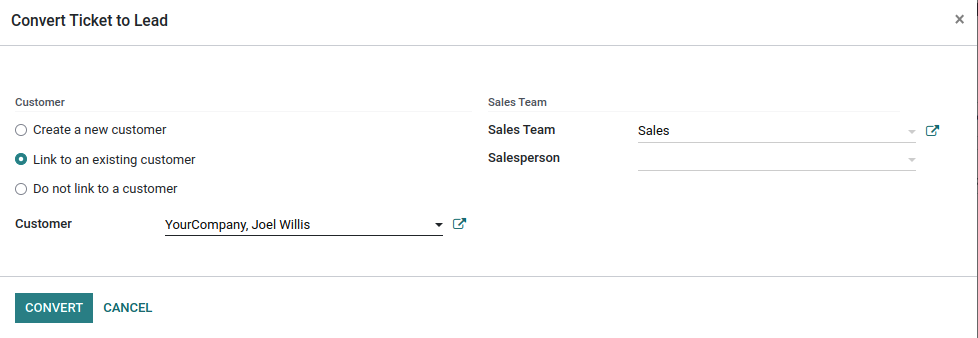
A new pop-up window will appear as soon as you click on the CONVERT option. This pop-up window assists you in converting the ticket into a lead.
You will find two corresponding options in the customer field one is customer details and the second one is a link to an existing customer. After selecting them, you can easily create a new customer record.
Additionally, you can pick the "Do not link to a customer" option if you are not interested in linking the customers' details to an existing customer option. After clicking on the Convert button, you can assign s Sales Team and Salesperson for the lead.
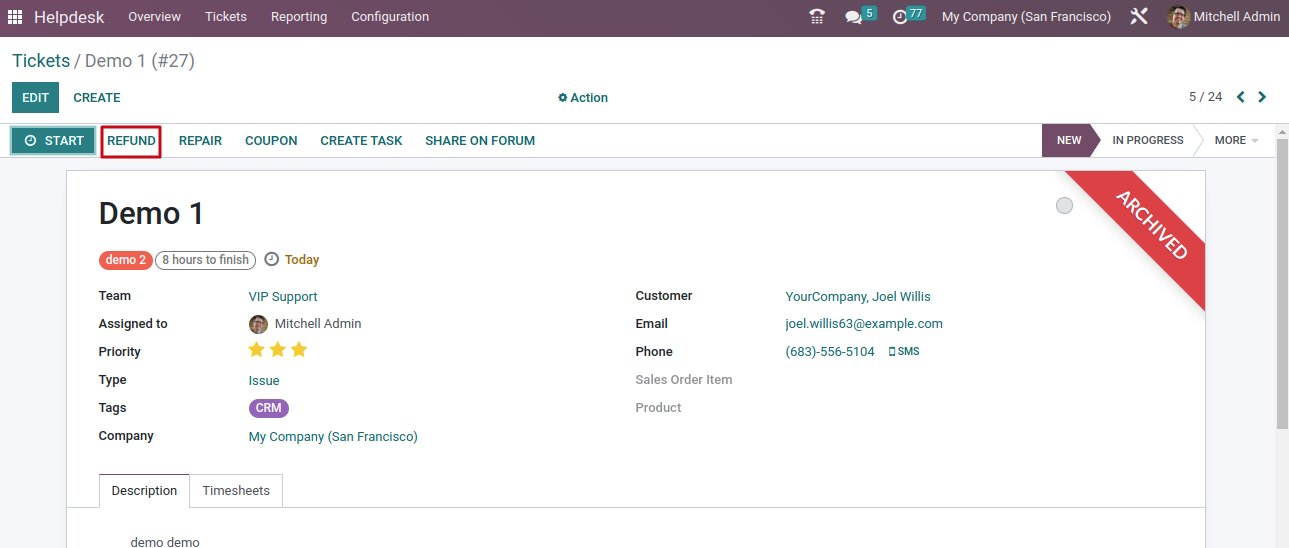
Let's discuss the Refund option.
Refund
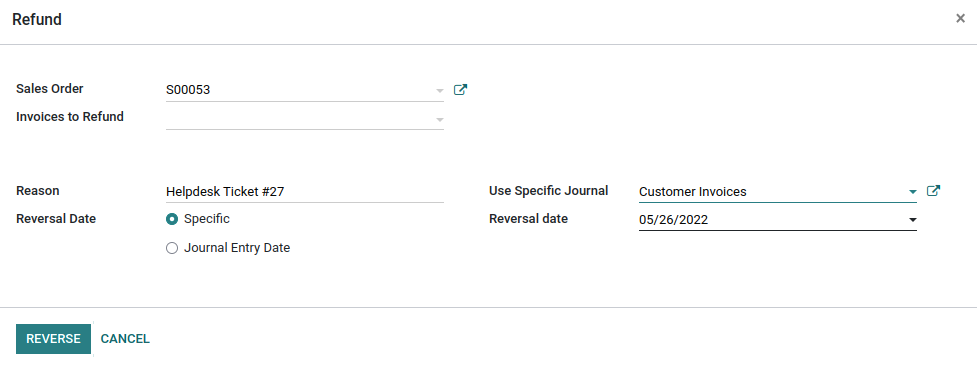
The Refund option is used to refund the customers for the purchased product. You can view the window below.
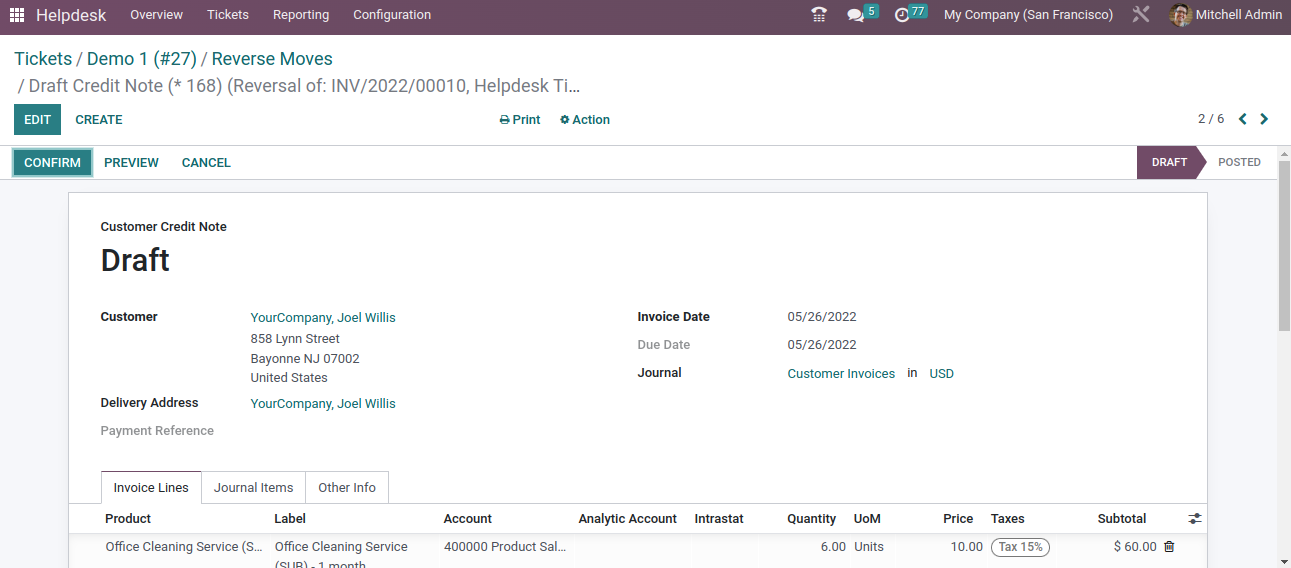
After clicking on the Refund, you will get a pop-up window to add the Invoice to Refund, Reason, Reversal Date, and Journal. In addition, you can create a draft credit note for the customer by clicking on the Reversal button.
You can see the Confirm button in the screenshot below that can be used to confirm the customer credit note. Once you register the payment you can wrap up the entire refund procedure. Let's take the next option.
Return
This option allows the customer to return the defective or damaged product to the company as per the defined rules and regulations. You can report the return of the product by clicking on the Return tab.
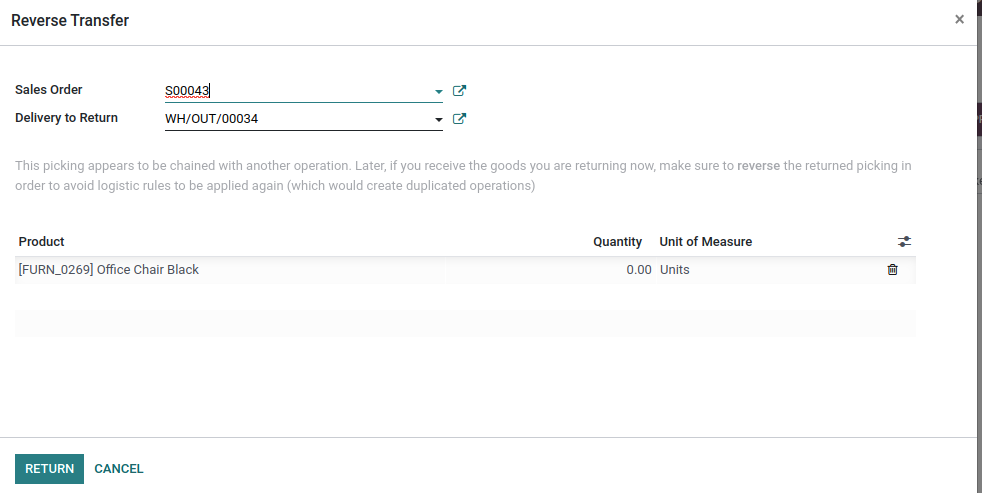
After clicking on the Return button, you will get a pop-up window where you find specified fields such as Delivery to Return, Product, and Return to Location. Enter the details in the respective fields.
You are taken to a new window after clicking on the Return button where it will be easy for you to validate the reverse transfer.
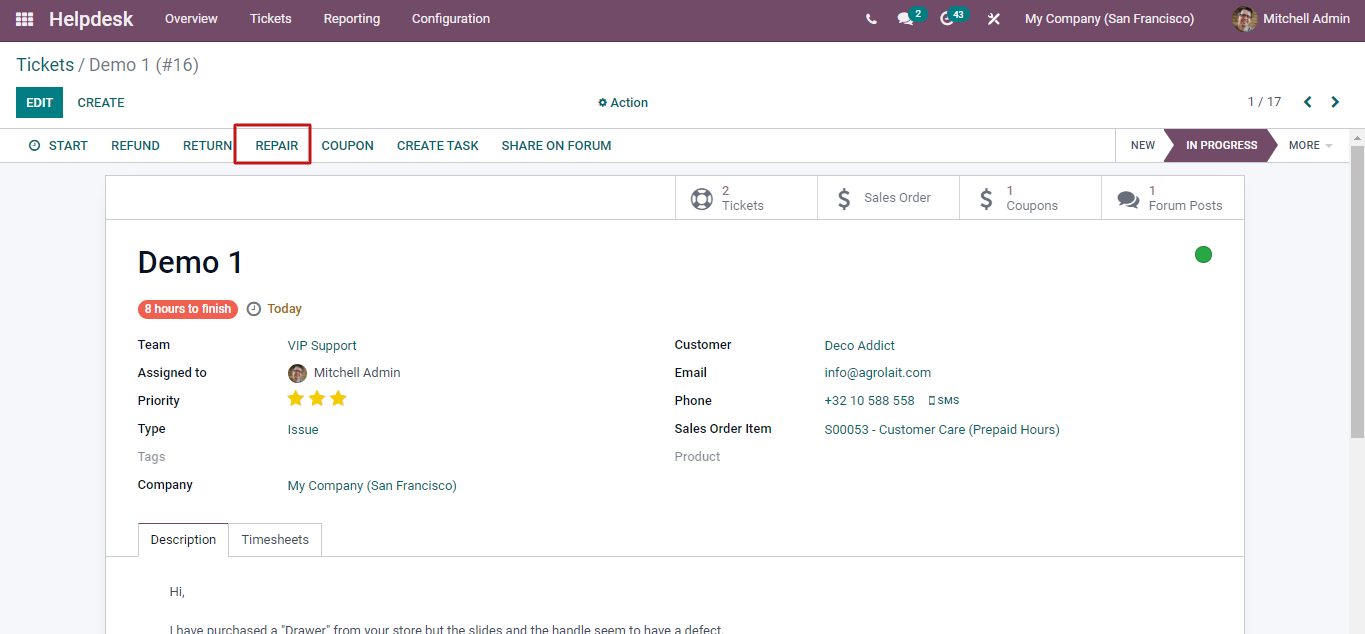
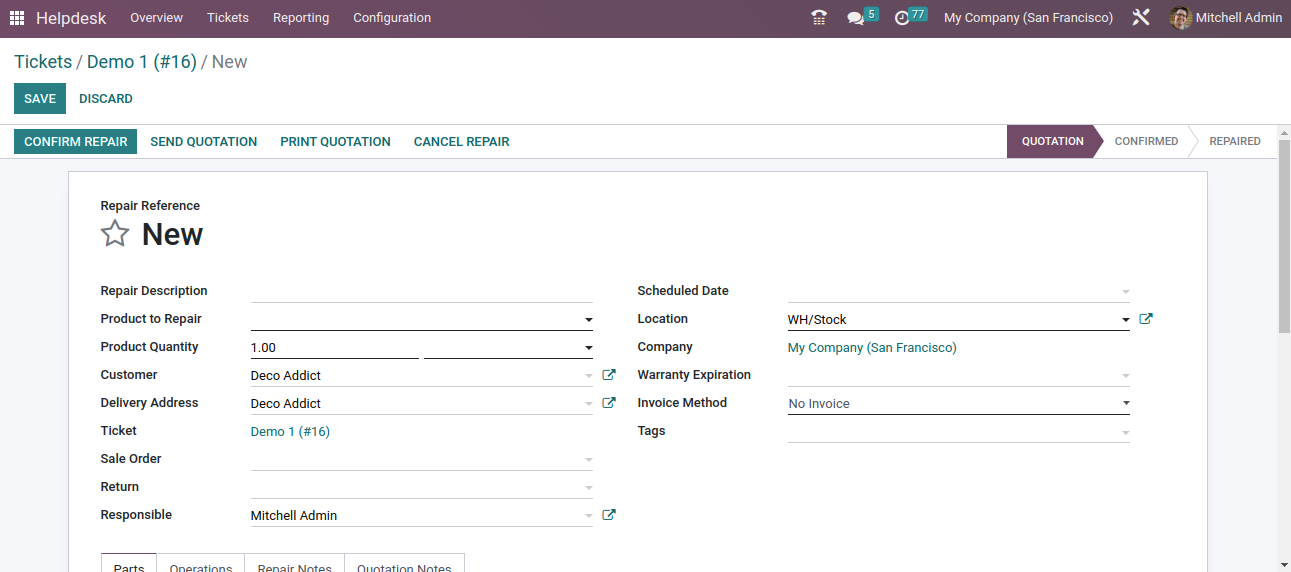
Repair
The Repair option is used to return the damaged product for repair by creating repair orders from the ticket. With the Repair button, you can easily create a new quotation to repair your product. Click on the Confirm Repair button to confirm your repair order as shown below.
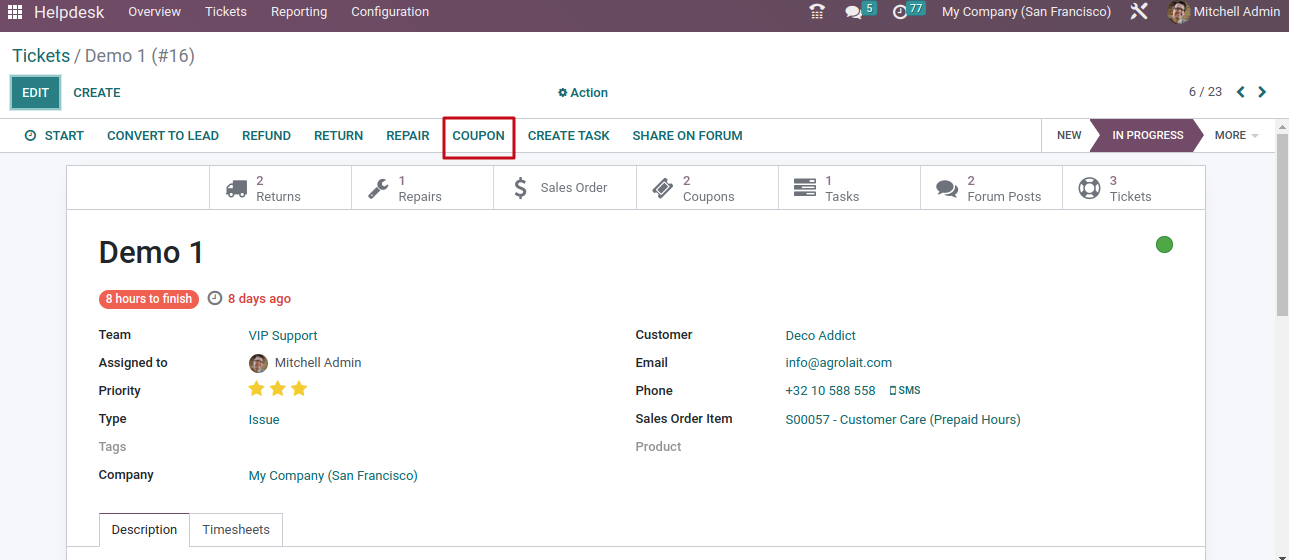
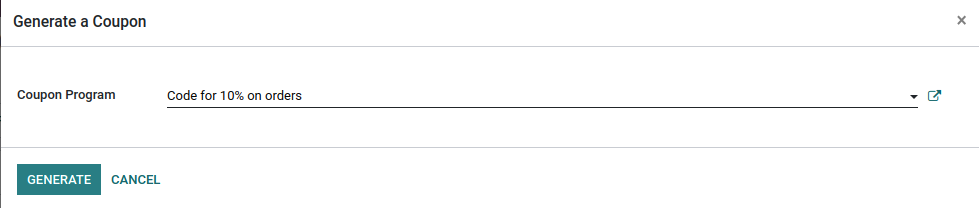
Coupon
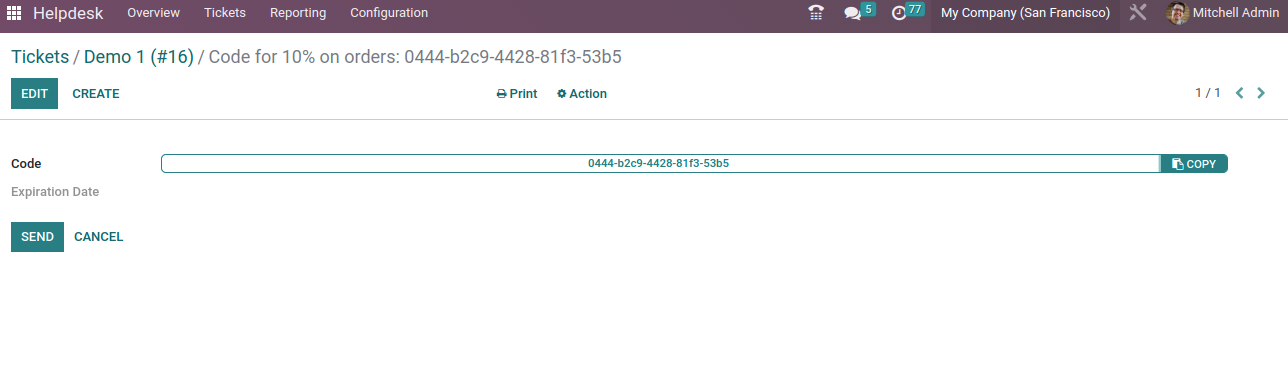
It is effortless to create coupons for your customers by clicking on the Coupon button. After clicking on the Coupon button, the new pop-up window appears where you can easily generate new coupons. Besides, mention the Coupon Program in the given fields. In order to obtain a new coupon, click on the Generate button as shown below.
Through the Send By Email button, you can easily send this coupon to the relevant customers as displayed in the screenshot given below.
Share on Forum
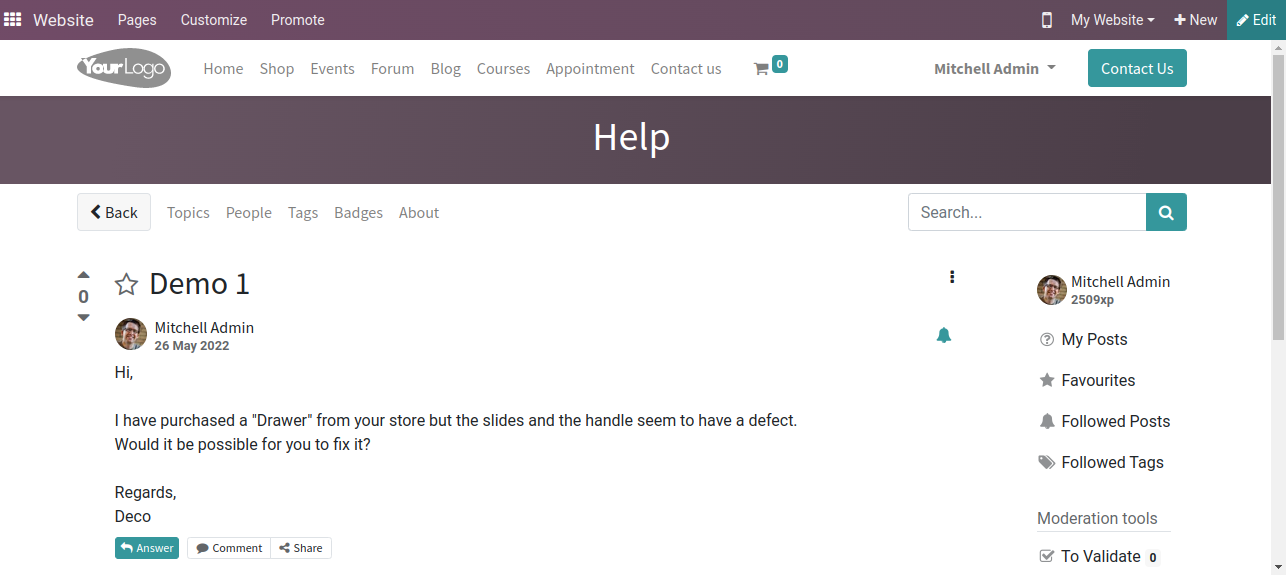
The customers can use this forum to submit their queries and get responses from various audiences.
The queries will be published on the forum as soon as you click on the Share on Forum as shown below.
The forum allows visitors to answer, comment, and share posts using your company website.
Once you solved the ticket, you can change the current stage of the ticket and move to the Solved stage.
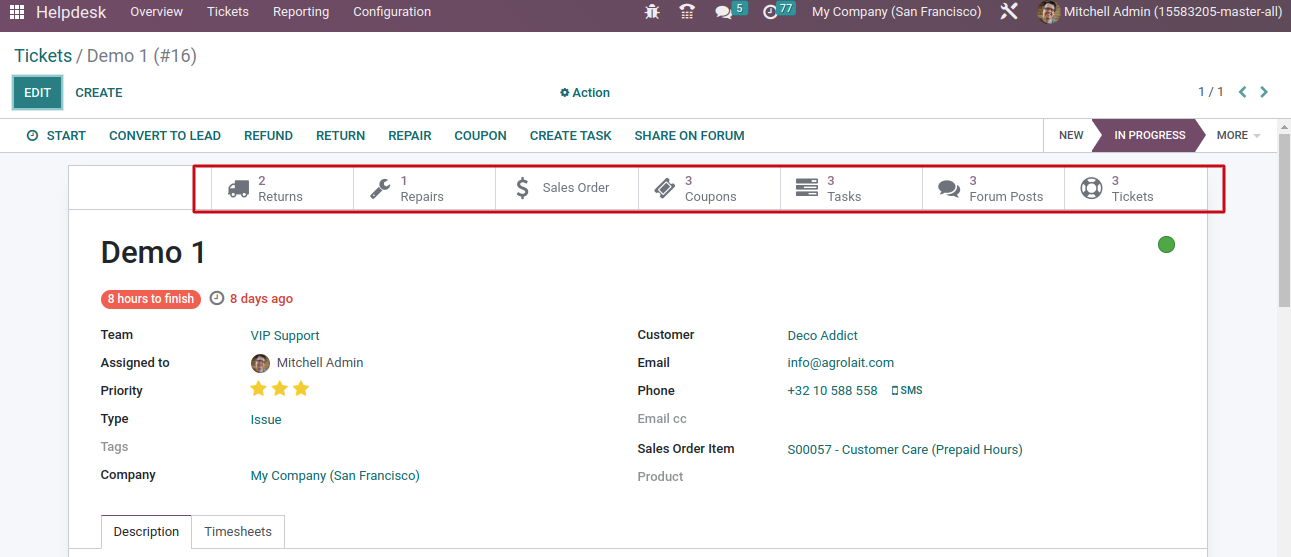
You can find the smart button in the window to take action on ticket.
Conclusion
On the whole, with new features in the Odoo 15 Helpdesk module, the management of helpdesk tickets gets easier.