
A Successful event depends upon proper management and error-free coordination between the various departments. If you want your event to be a massive hit, you need an outstanding event management system.
Odoo 15 has new features for the Event module that help create seminars, conferences, festivals, and events smoothly for your company. With this module, you can design templates, tags, stages, and tickets. Besides, you can view the attendees who are going to join your event.
In this blog, we are going to discuss how the management of a new event is carried out in the Odoo 15 Event module?
First of all, go to the Odoo home dashboard, you will find the Event module in the dashboard given below.
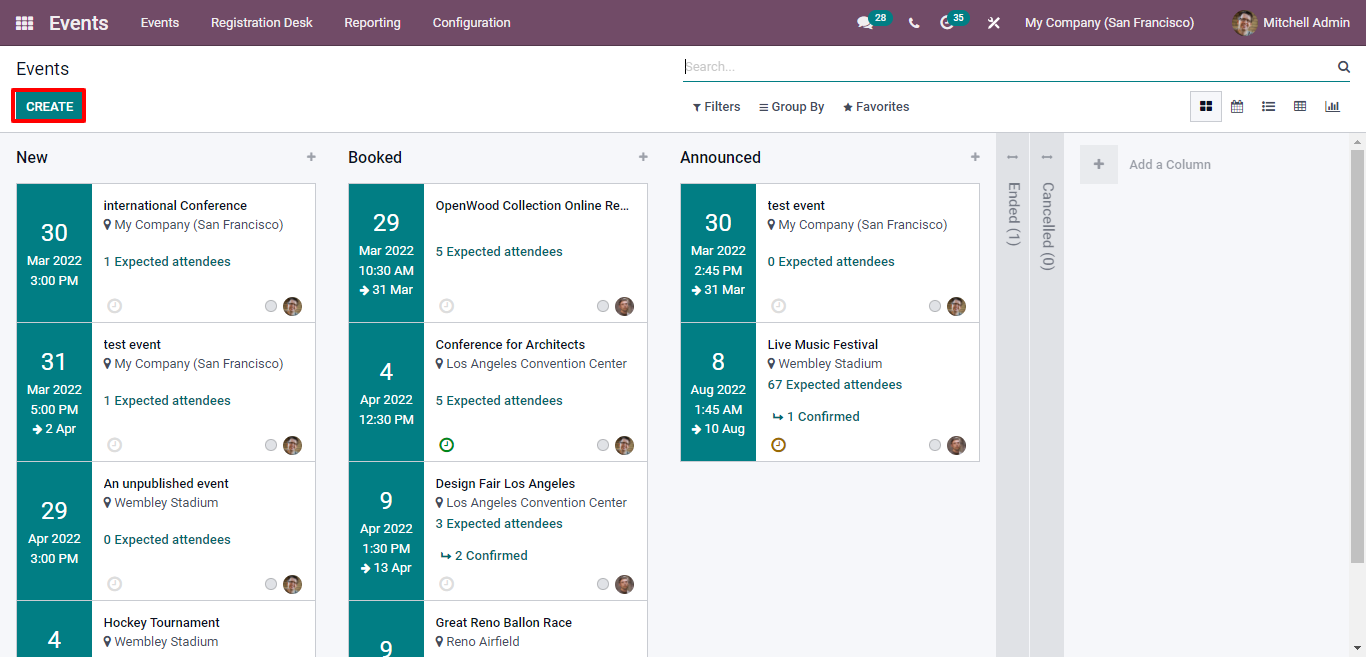
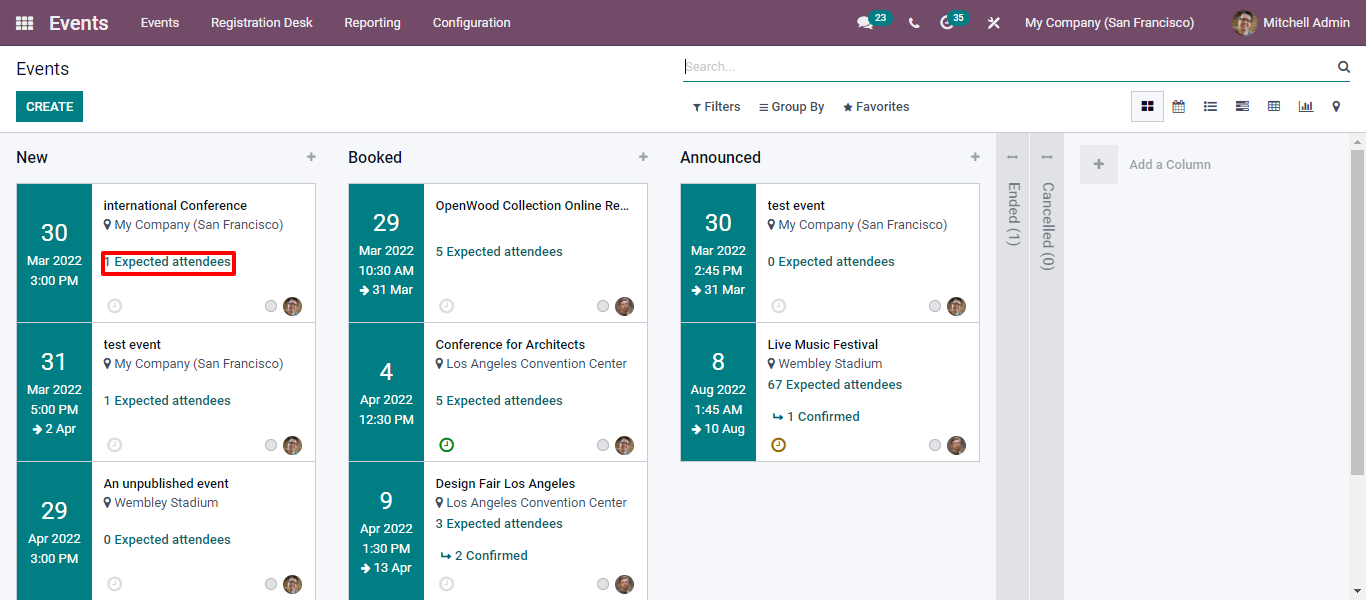
Click on the Event module to access it. There is a list of events created in the Event window. Each event is put into different stages like New, Booked, and Announced. In this window, you can easily view the schedule time, date, event name, and present attendees.
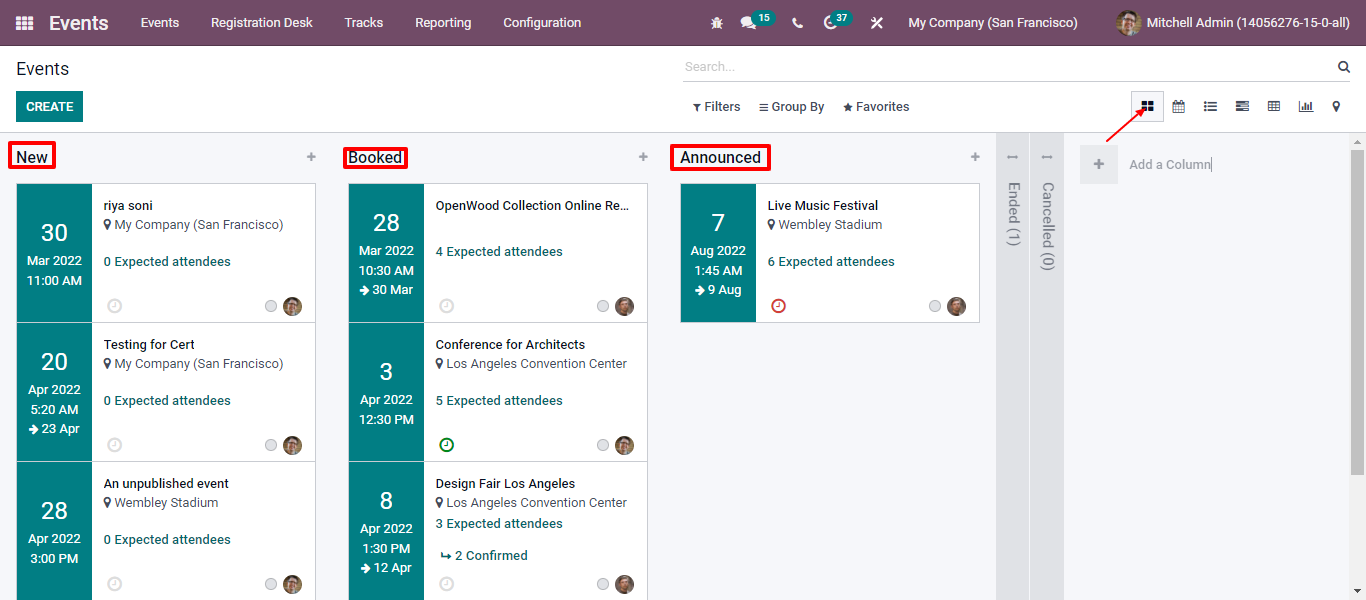
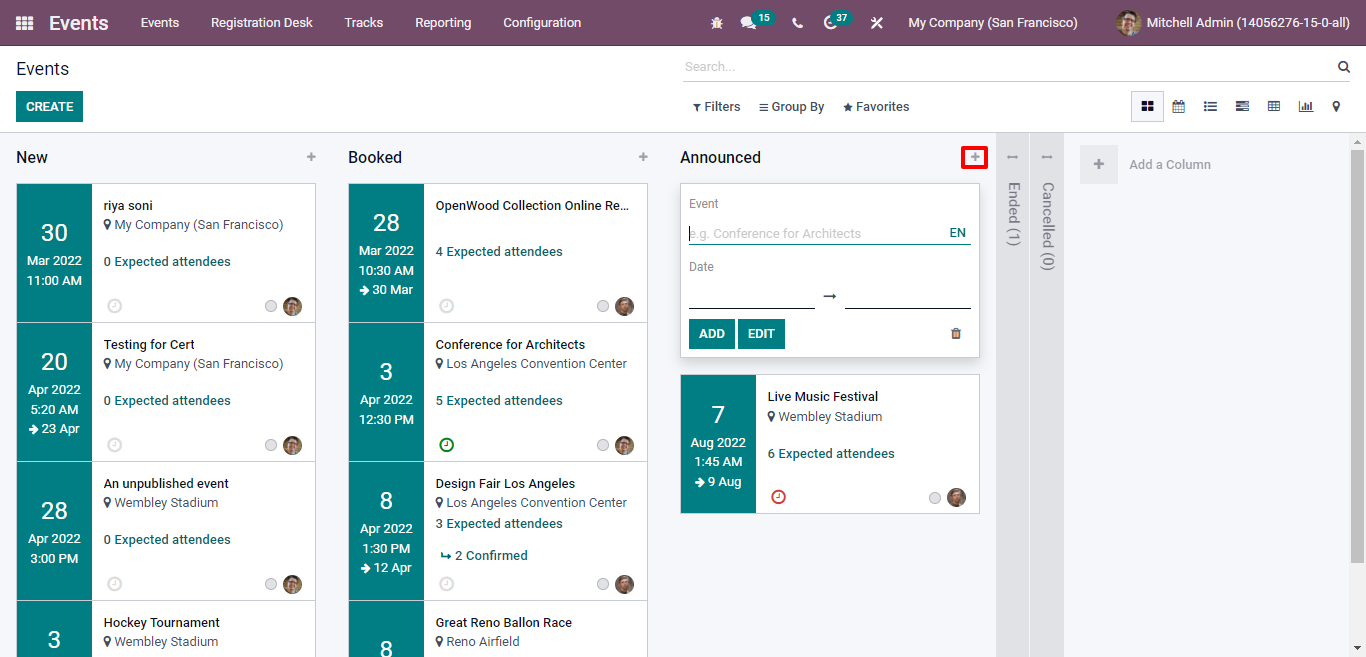
By clicking on the given stages, you can collect essential information about a specific event. Moreover, you can create a new stage by simply clicking on the +icon visible in the window. All you need to do is enter the name and date then click on the add button to add a new stage as shown in the screenshot given below.
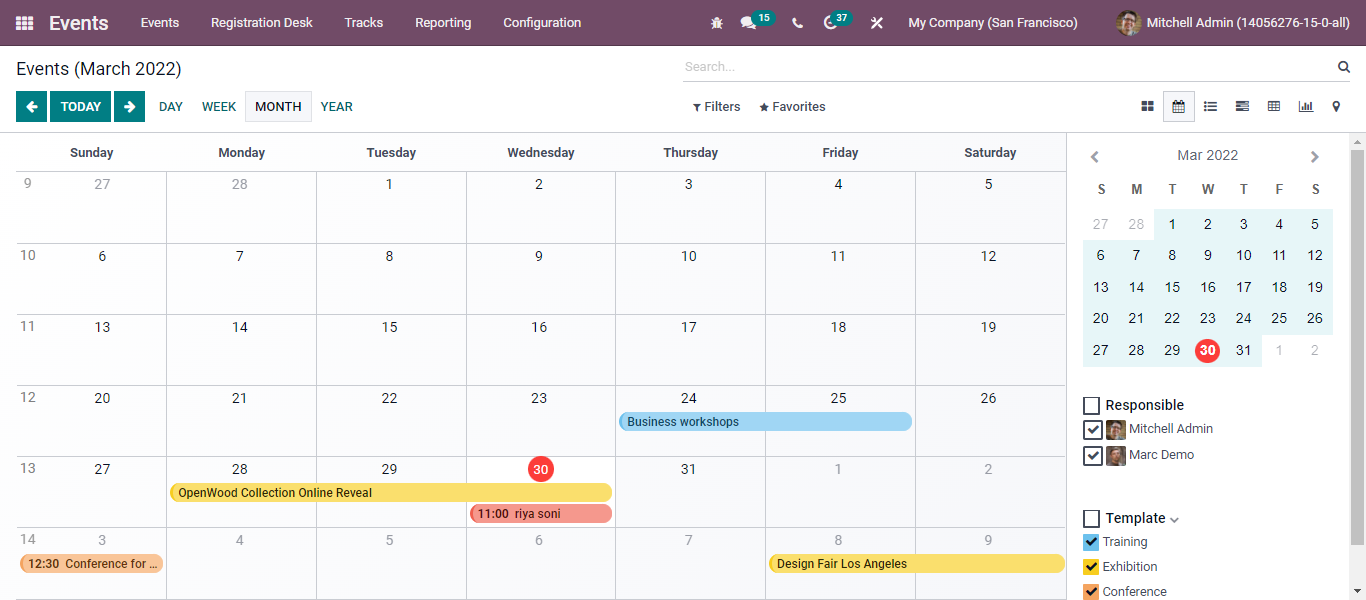
With the Calendar view, you can easily check the date of a specific event along with the person responsible. It is also straightforward to add a new event by clicking on a particular date you wish to organize. You can see the demo in the image given below.
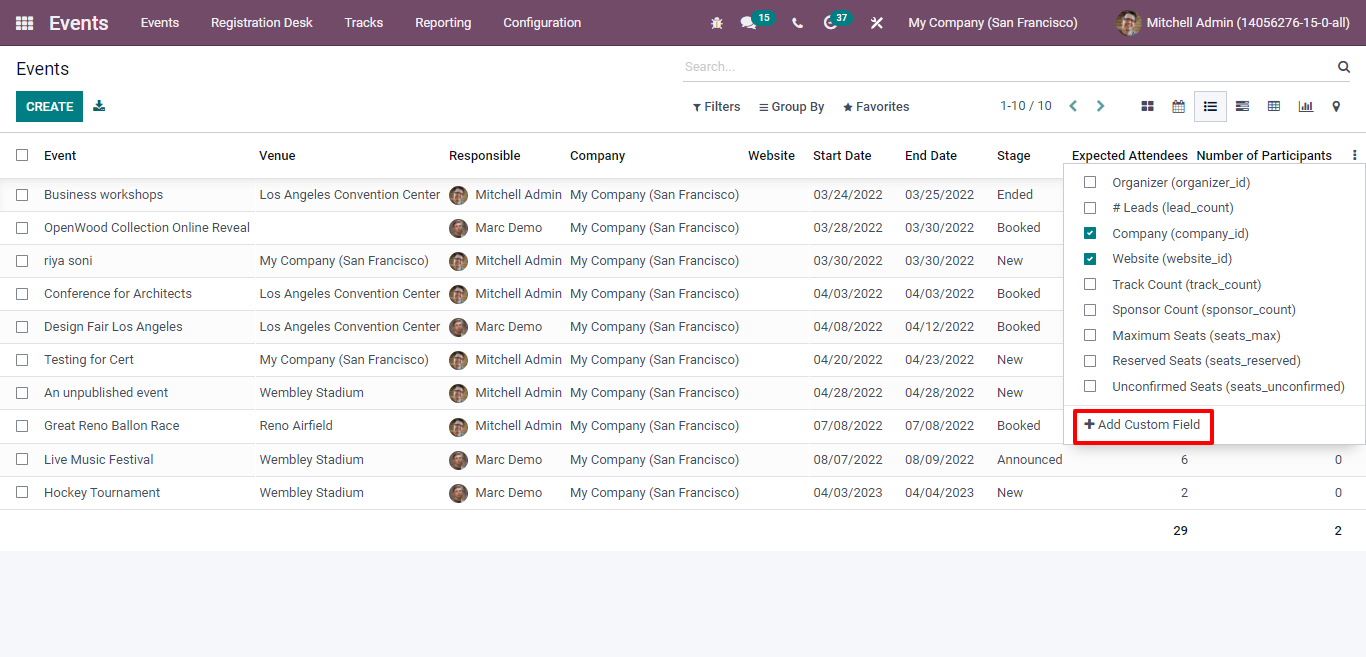
Look at the list of each event in the image given below. This list provides detailed information about the events depending upon the Date, Venue, Number of participants, Stage, Company Responsible person, and Expected Attendees. Click on the Add Custom Field tab to add additional fields as displayed below.
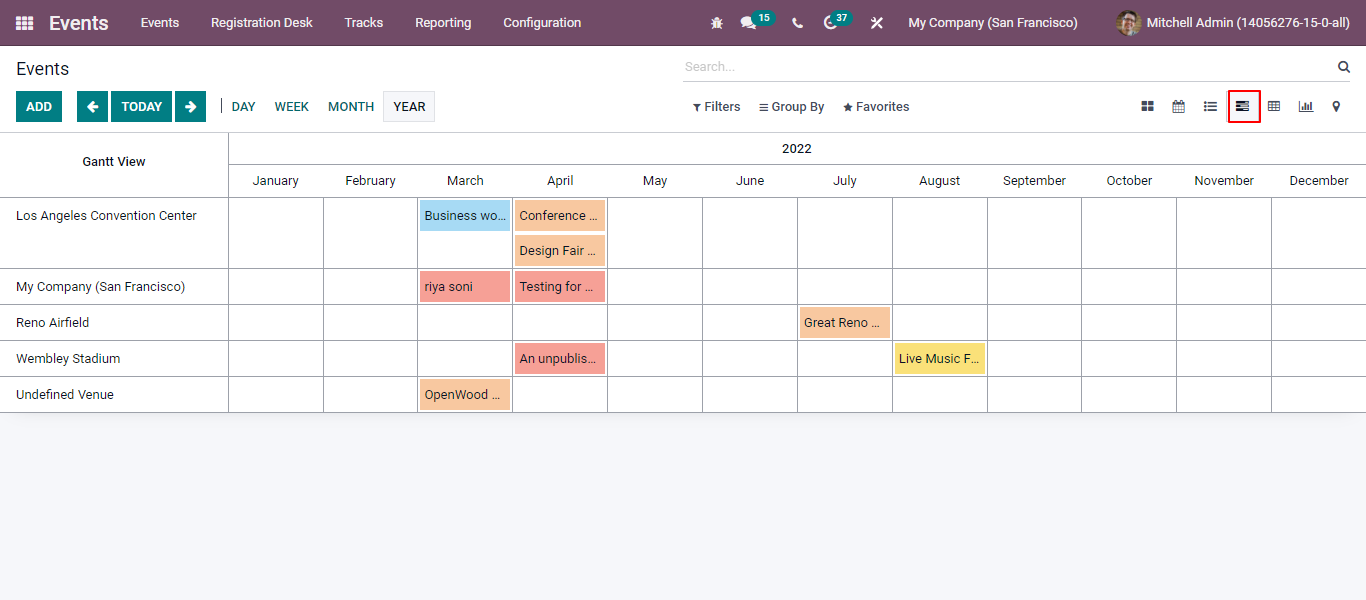
You can see in the image that the event plan is displayed in the Gantt view. By clicking on the +icon, you can form a new event easily.
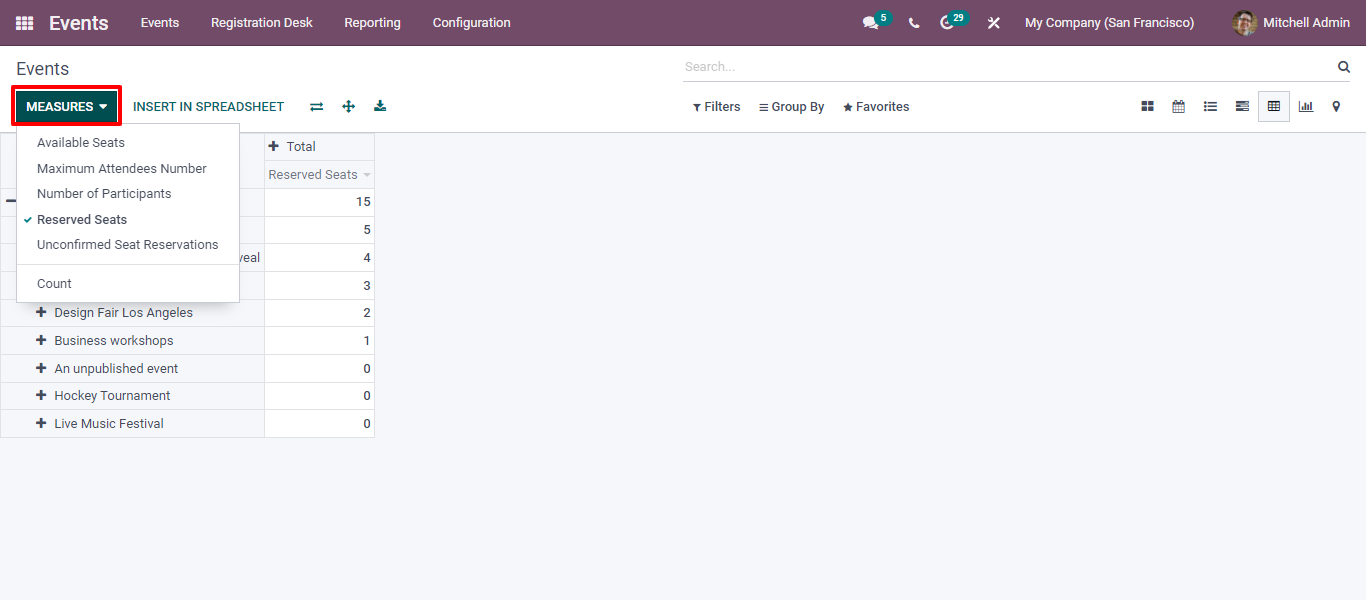
The Pivot view of the Events window indicates the number of reserved seats for all events. Click on the Measures icon to view the options such as Available Seats, Maximum Attendees Number, Number of Participants, and Unconfirmed Seats Reservation as shown below.
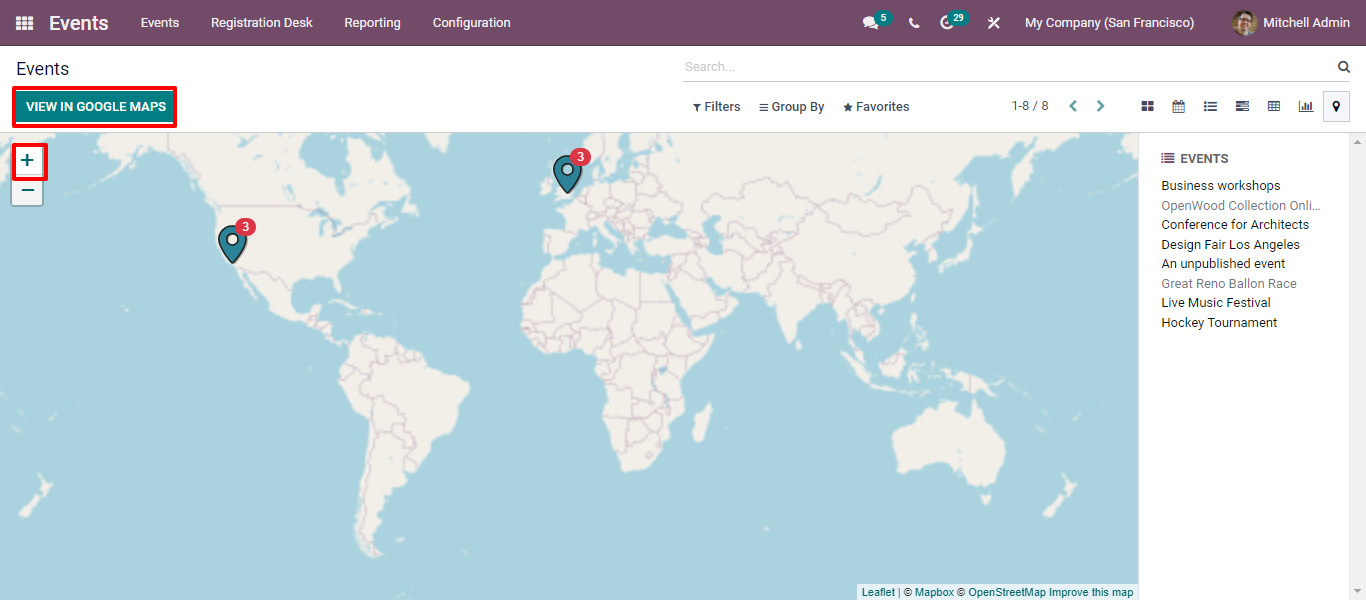
With the help of the Map, you can identify the address of the event. On top of that, it can be viewed on Google Maps. Use the +icon to zoom the location of the event. Using the Map, you can easily track the specific event's location.
How To Create A New Event?
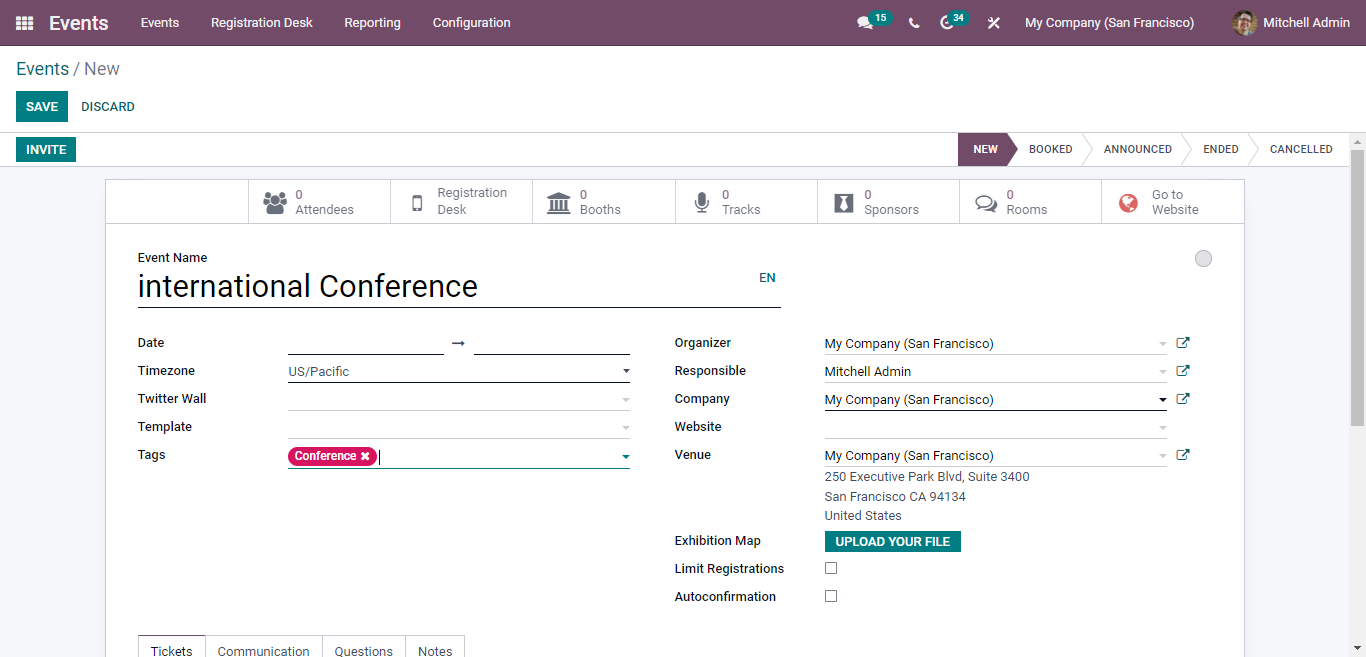
All you need to do is go to the Events dashboard and click on the Create button to create a new event.
As soon as you click on the Create button, the new page will appear. Enter the name of the event in the Event Name field and the date in the Date section. Go to the Configuration tab and click on the Events Templates menu that helps you form and make necessary changes in the Template for your event. Furthermore, you can add as many attendees as you can in the Limit Registration field. In the Venue option, enter the location of the event as shown below.
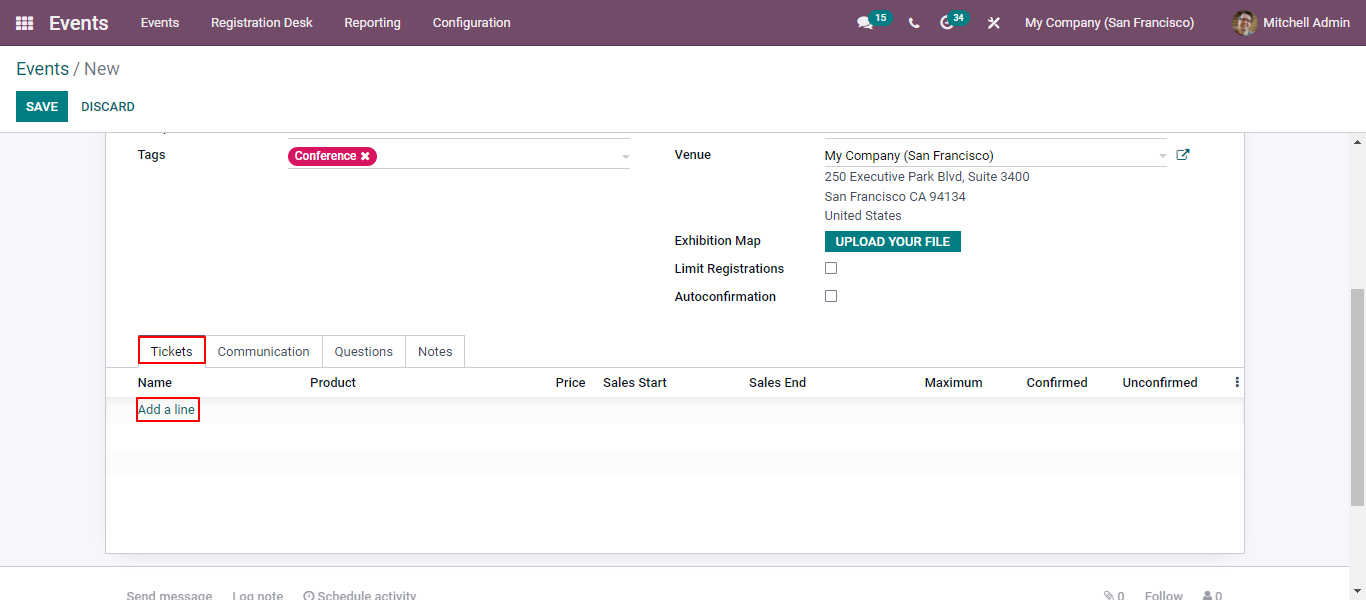
In the Ticket option, enter the details like Price, Name, Confirmed, Product, and Maximum Number. Moreover, you can provide more information using the Add a Line button.
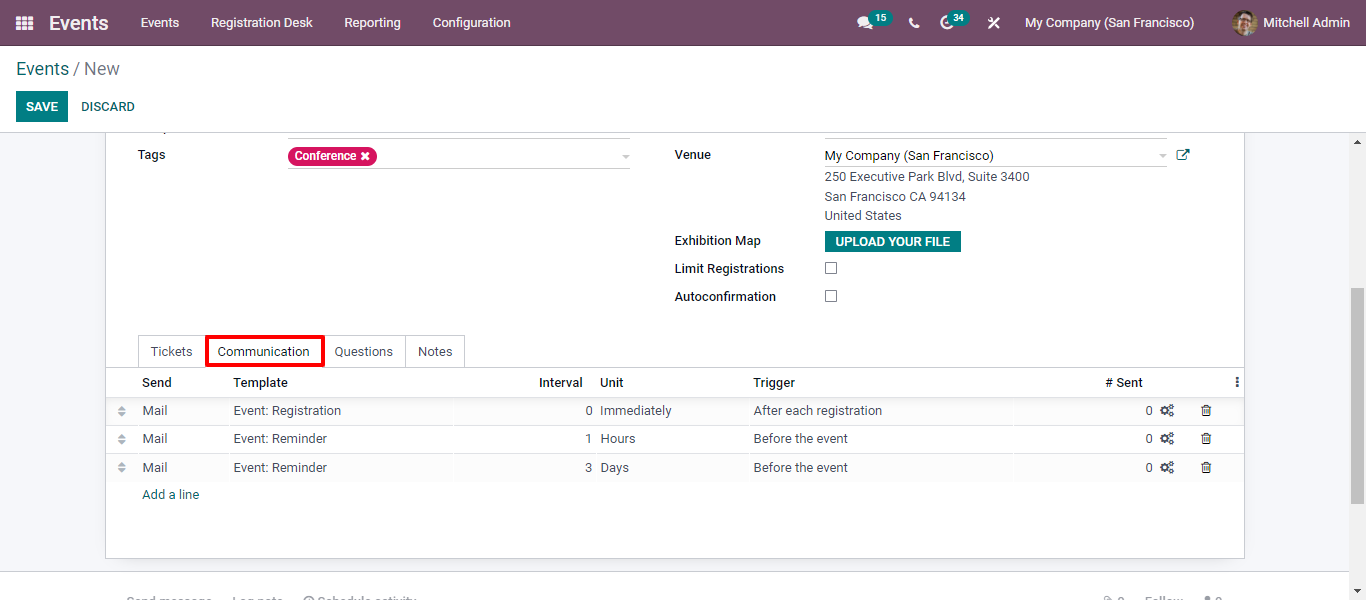
With the communication tab, you can easily communicate with customers by sending Email and SMS. It is easy to set the units based on hours, week, month, and Send in SMS/Social post/Emails. The communication tab sends alerts to the participants regarding updates about the event.
Creating questions for the participants gets easier with the help of the Question tab. If you want to create more questions. You can click on Add a Line option. After entering the questions and answers, click on the Save and Close tabs as shown below.
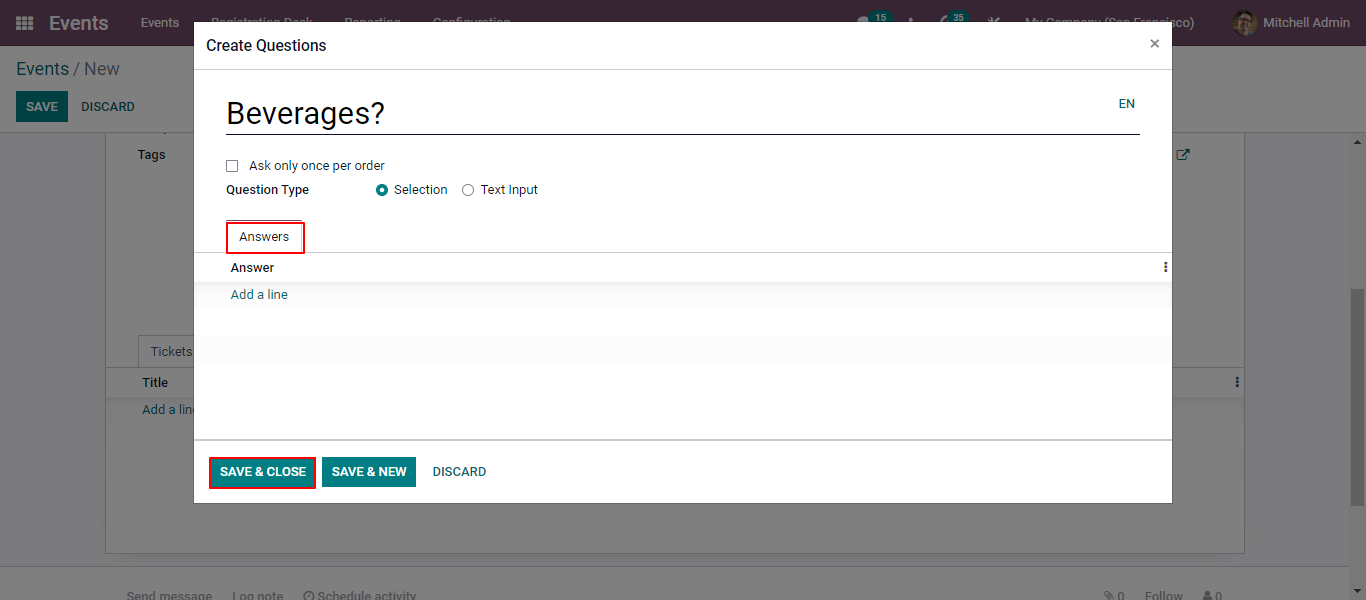
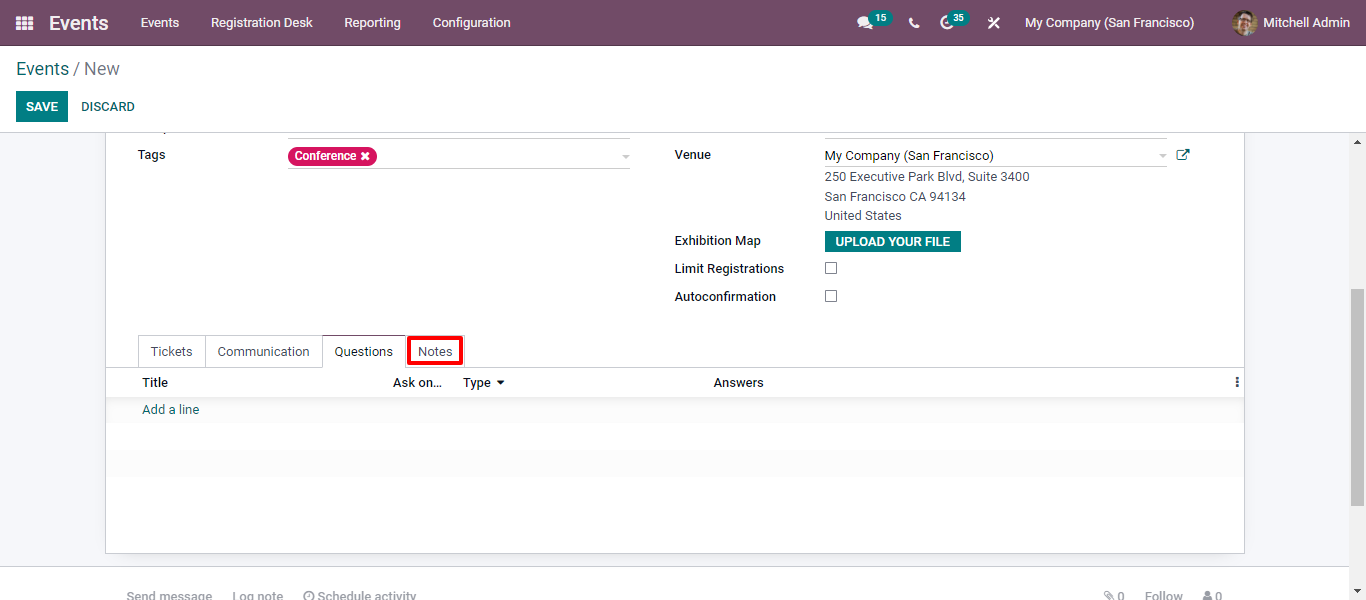
The questions you have created can be viewed below the Question tab. Additionally, you can share ticket information with the viewers using the Notes tab as shown below.
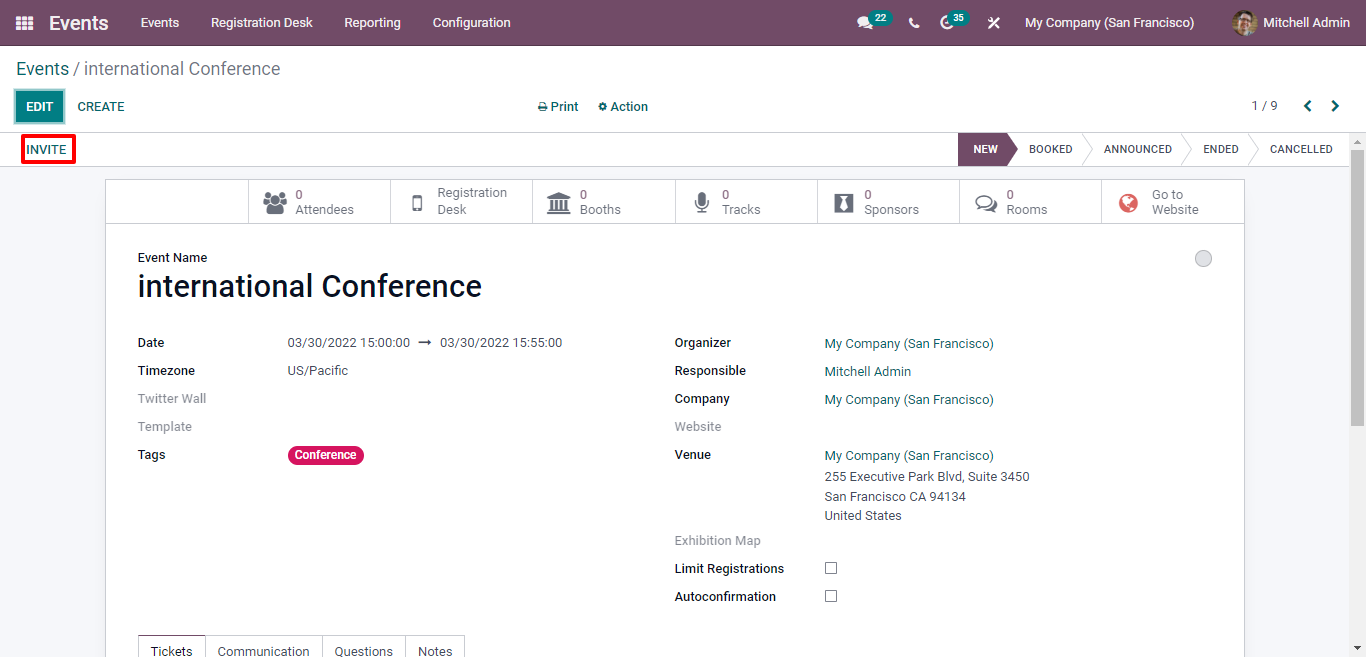
Click on the Save button after you finish entering the event's details. There is an Invite button that helps you invite more visitors.
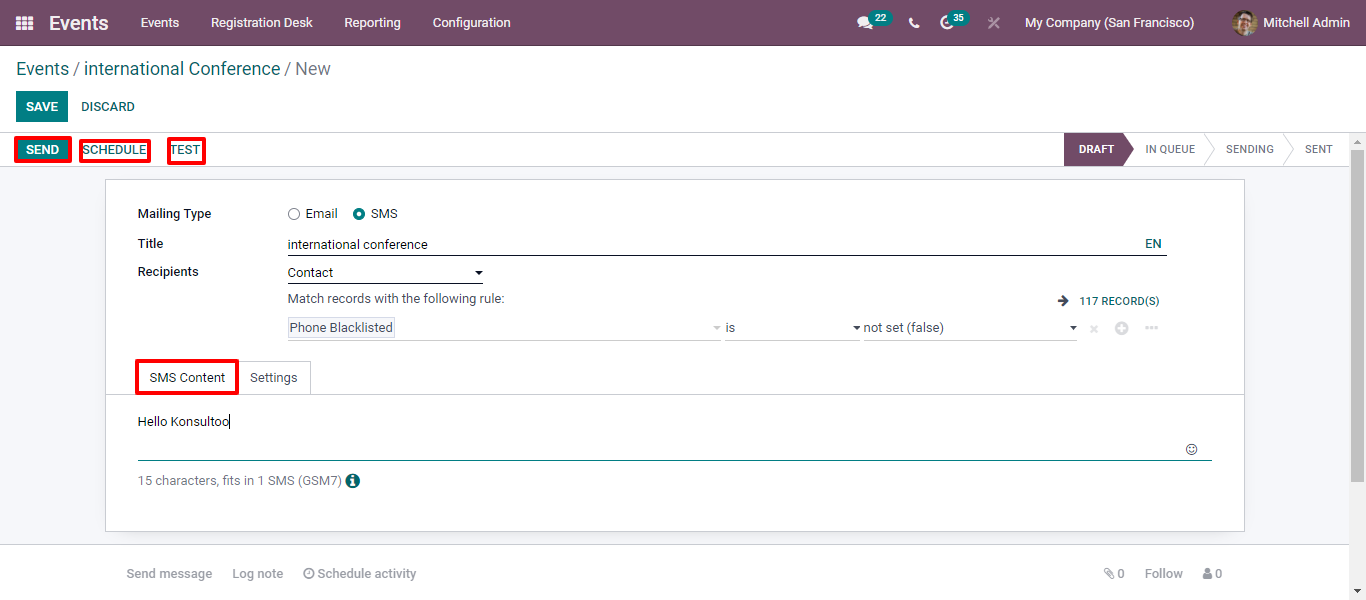
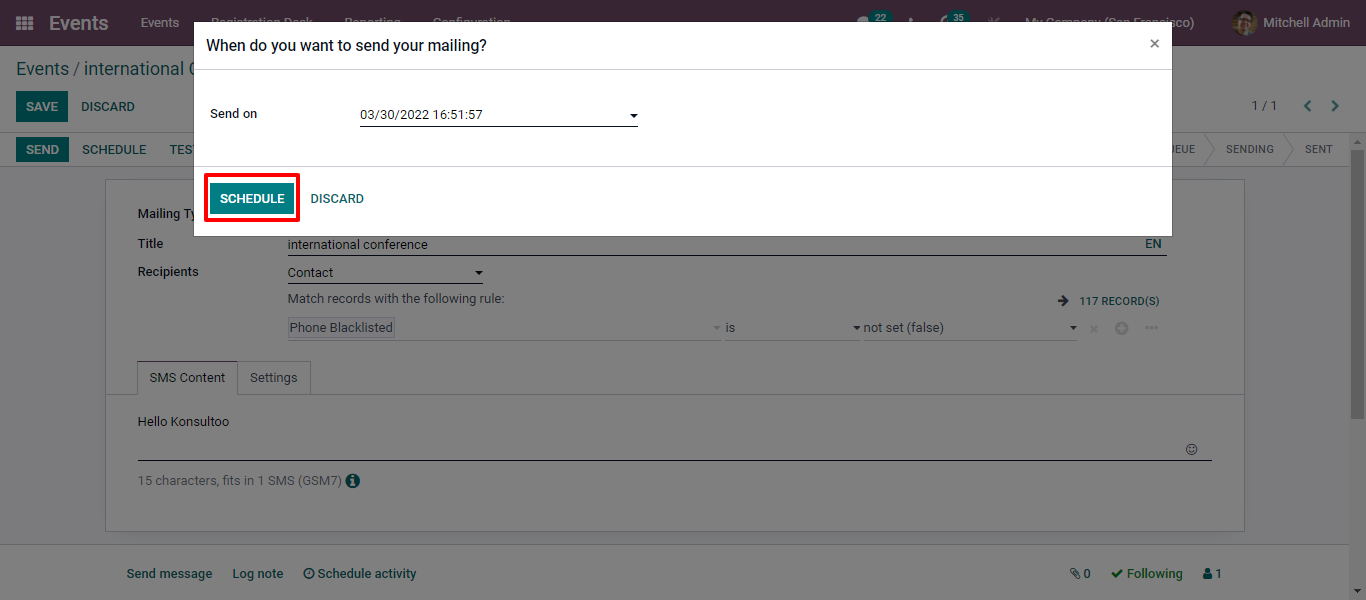
There are two types of Mailing to choose from. One is Email and the second one is SMS. Additionally, enter the subject, Select Recipients, and add the SMS content that allows you to Send, Schedule, and Test SMS as shown below.
After entering the date in the Send On field, you can schedule the event by clicking the Schedule button as shown below.
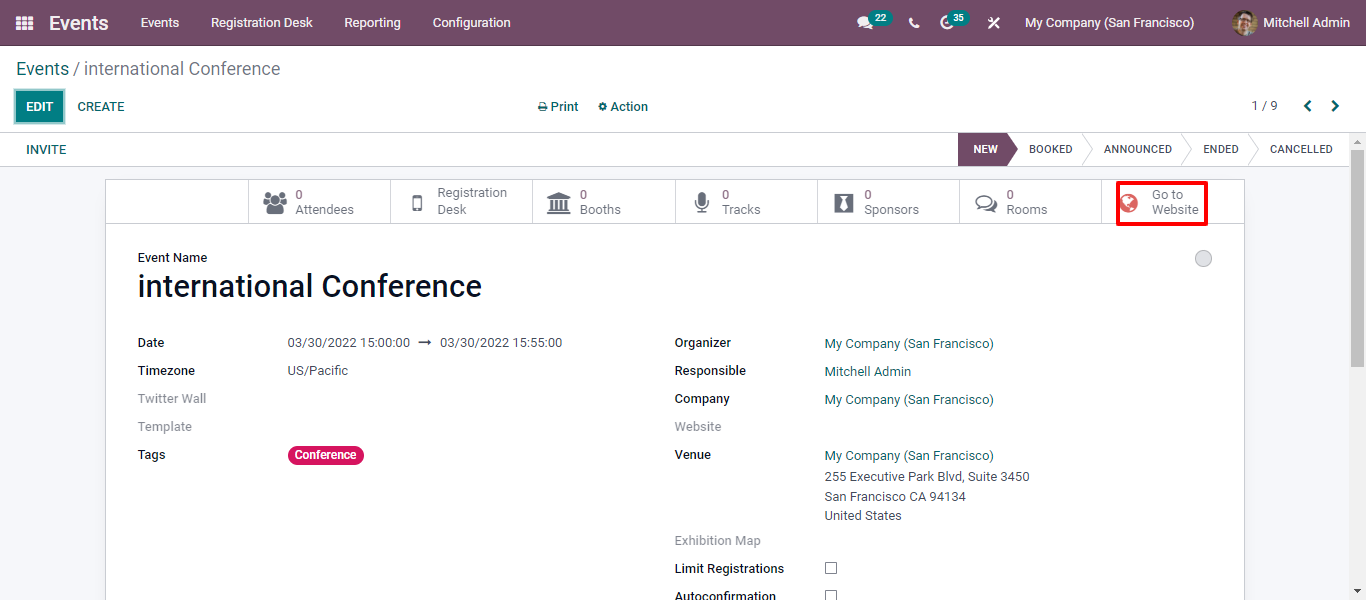
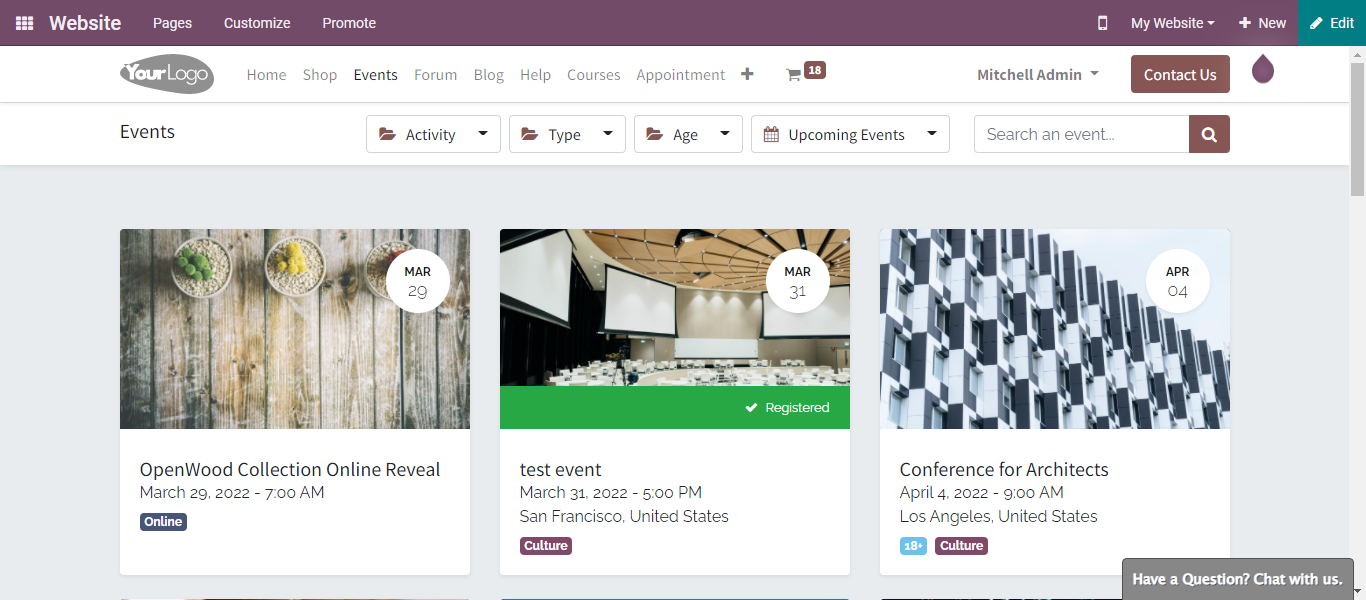
Once you save the event, you can publish it on the website by clicking on the Go to Website tab as displayed in the window.
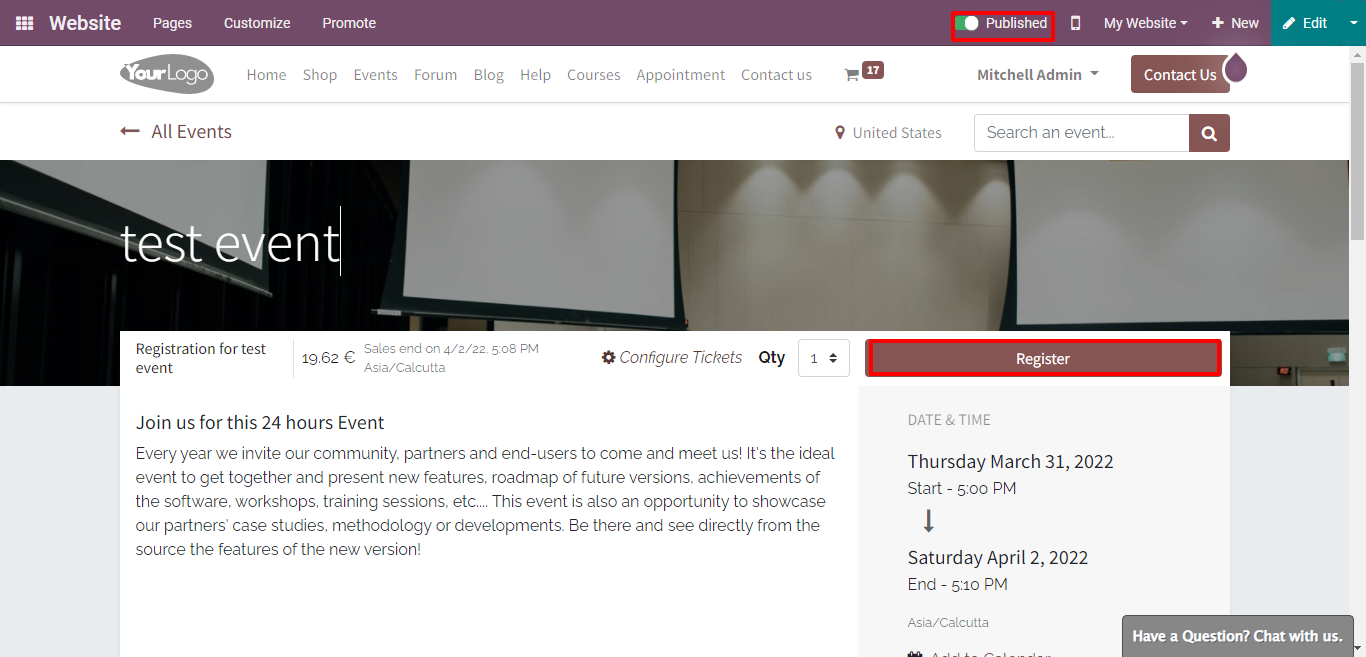
After publishing, you can view the website window along with the Event name, Ticket rate, location, and time. Open the drop-down menu, select the ticket, and click on the Register button as highlighted below.
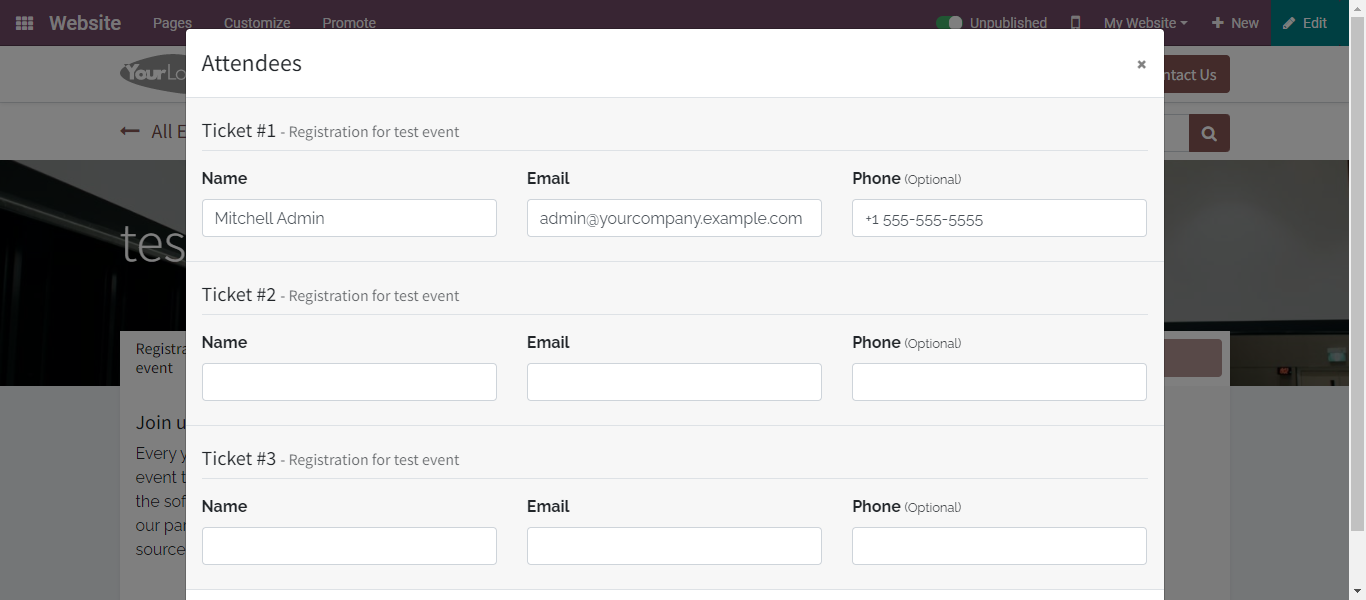
A new Attendees window will soon appear in front of you. Fill it with details Name, Phone, and Email. Then click on the Continue icon to proceed further.
In the Events tab, you will spot the details regarding the events you have published. Even the participants can view your published event as shown below.
Now, in the Event module, you can view all the information about the event you created. Here, in this window, you can spot the number of attendees.
The new features in the Odoo 15 Event module helps you manage your event in an organized way. You can contact us if you have any doubts regarding the Odoo Event module.