
In today's digital-driven era, every business person should embrace a digital system to track the company's confidential documents. It is not compulsion but it is a requirement to keep up with other emerging organizations.
There are many document systems available in the market you can choose from to manage your documents. Some of them offer unique features and functionalities that make it easy for you to control the documents in a systematic manner.
At present, Odoo is a highly recommended business management ERP software as compared to other ERP systems. That's different matter that they share analogies in their systems but when it comes to providing the users with additional features and functionalities, Odoo stands out.
Odoo has a variety of modules that are packed with bizarre features. Document module in Odoo is the ideal choice for the precise management of your key documents.
In this blog, we are going to shed a light on the various configuration options available in the Odoo 15 Document module. Let's discuss.
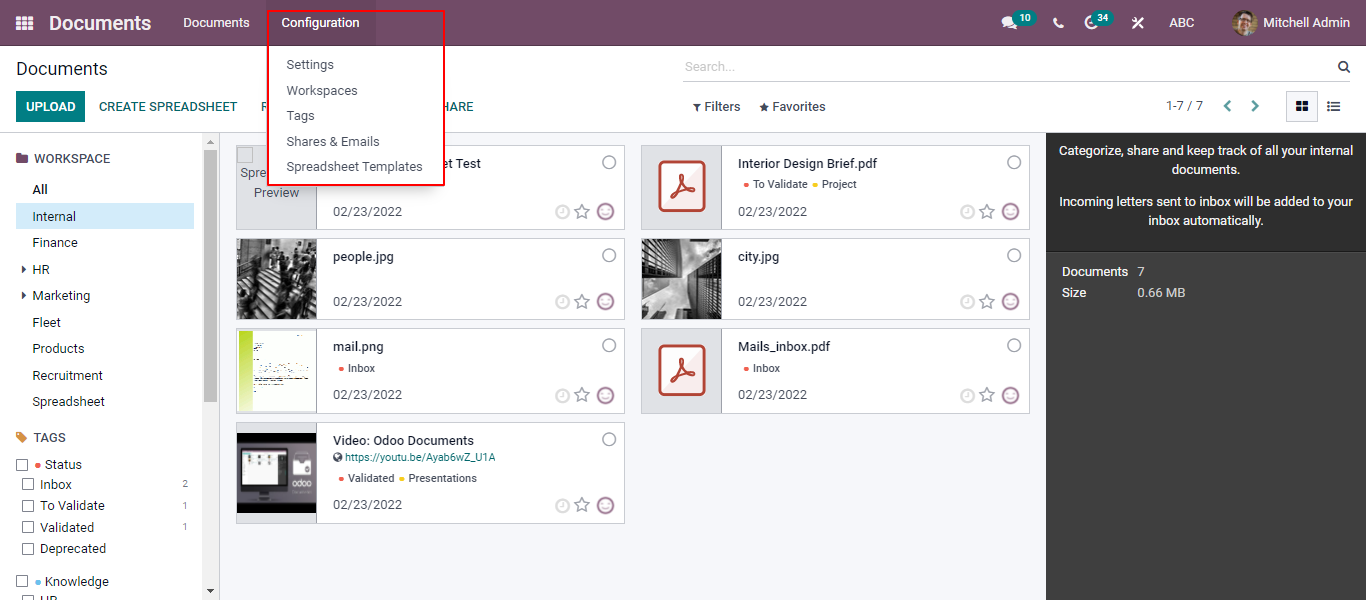
There is a configuration tab in the Odoo Document module. Click on that tab to get different menus such as Settings, Workspaces, Tags, Shares & Emails, and Spreadsheet Templates as shown in the image given below.
We are going to discuss these options one after another.
Settings
The Settings window has different options, which can be found under the File Centralization tab. You will find options like Human Resources, Product, Spreadsheet, Projects, Recruitment, and Accounting.
You can activate the Human Resources option to centralize the employee's key documents such as Payslips, job, contracts, and some other important aspects. You are also provided with options to specify Workspace and Default tags. You need to check the box, which is given near the option to activate the particular option.
The second option is Product that you can activate for centralizing important product files. Here, you have options available for both Workspace and Default tags as shown in the image given below.
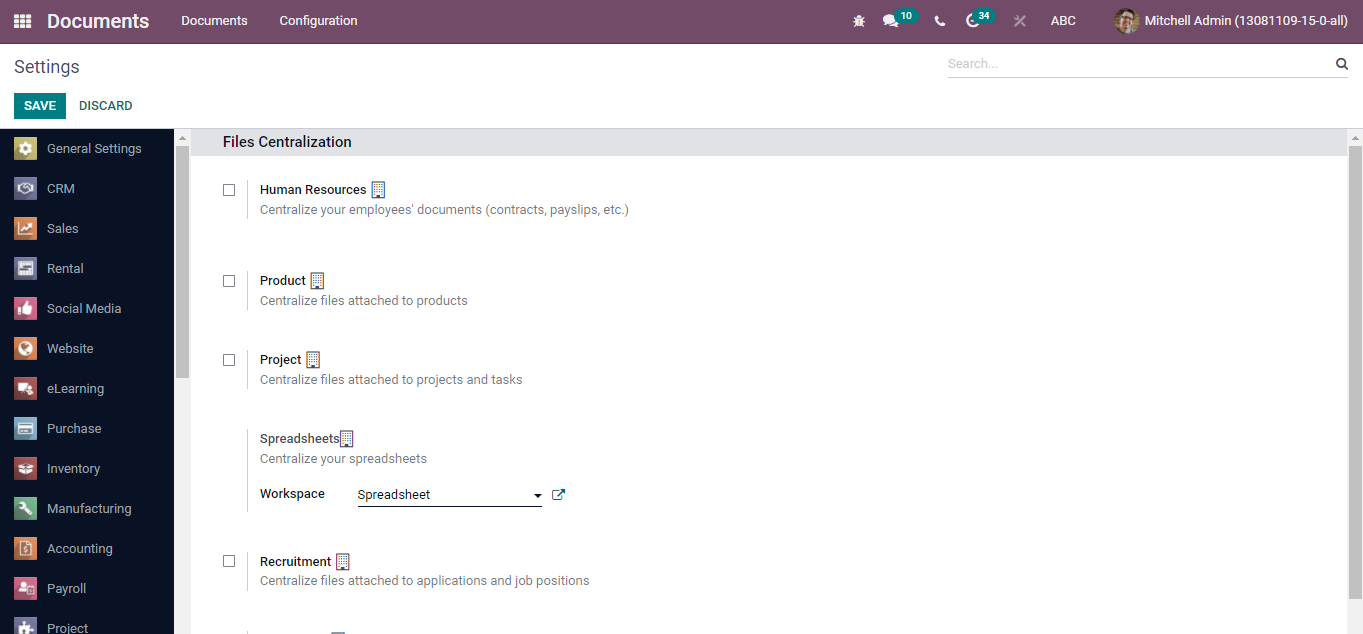
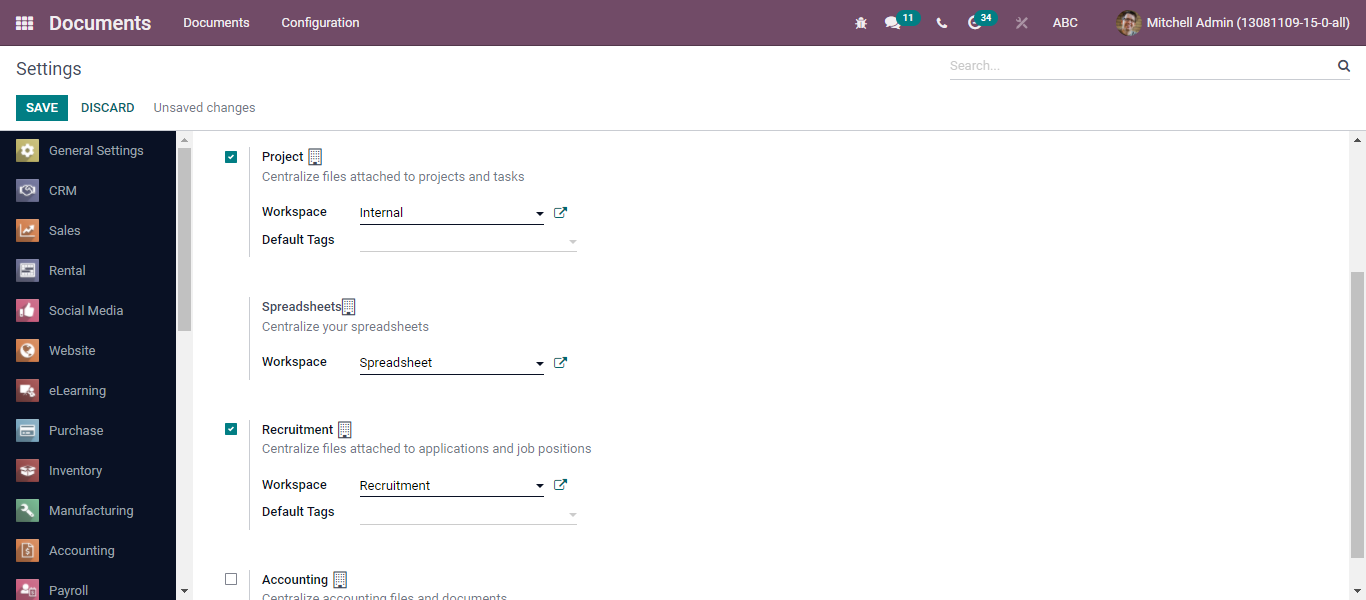
The Setting window has another option is Project. You can activate it to centralize files related to projects and tasks. Moreover, You can also understand the Workspace and Default tags by using the drop-down menu.
It is also easy to centralize your spreadsheets with the help of this module. You can specify the workspace directly from the Settings menu. If it was already configured then go to the drop-down menu and select it. Apart from this, you can also follow another way to define a Workspace. For that, You need to click on the external link menu icon to define a new Workspace. After selecting it, you can fill the creation form as highlighted below.
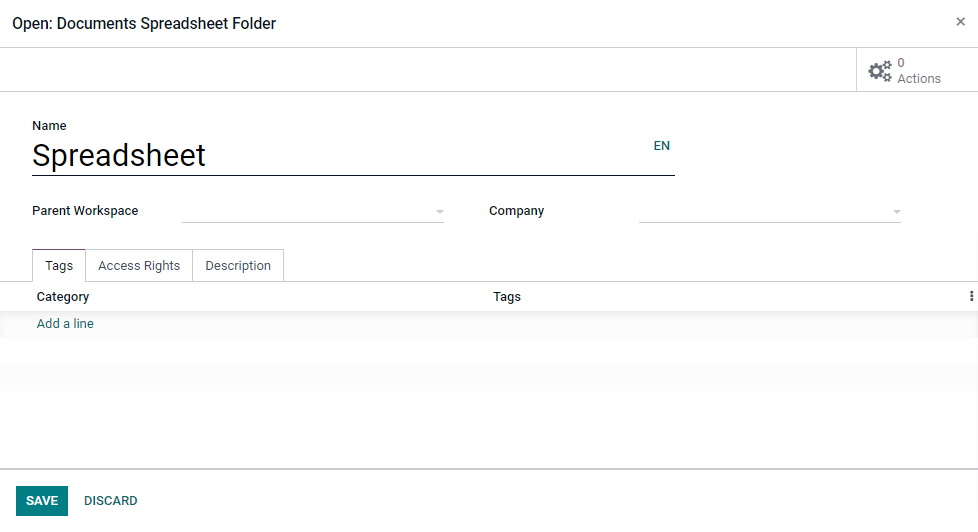
It gets easier for you to configure a new Workspace with the support of this creation form.
In addition, you can enable the Recruitment option to integrate the files that are attached to job applications and job positions. In the same way, you can centralize accounting filters and documents by activating the Accounting option. Additionally, you can sync journals and then form workspaces as shown below.
Workspaces
Here, you can find the Workspace menu under the configuration tab that helps you create and configure workspaces. After clicking on the workspace's menu, you are taken to the Workspace window as shown in the image given below.
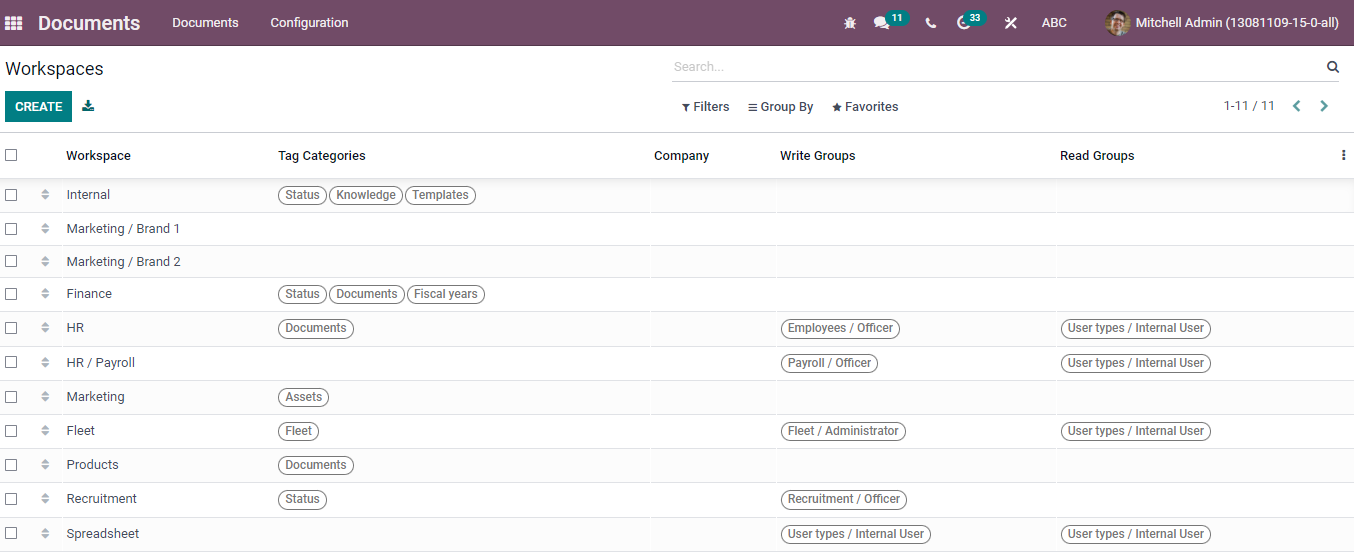
With the Workspaces window, you can get an overview of your defined Workspaces in advance. You will spot the details in the window such as Workspace Name, Tag, Categories, Company, Write Groups, and Read Groups. You can use each preconfigured Workspace data for deep analysis.
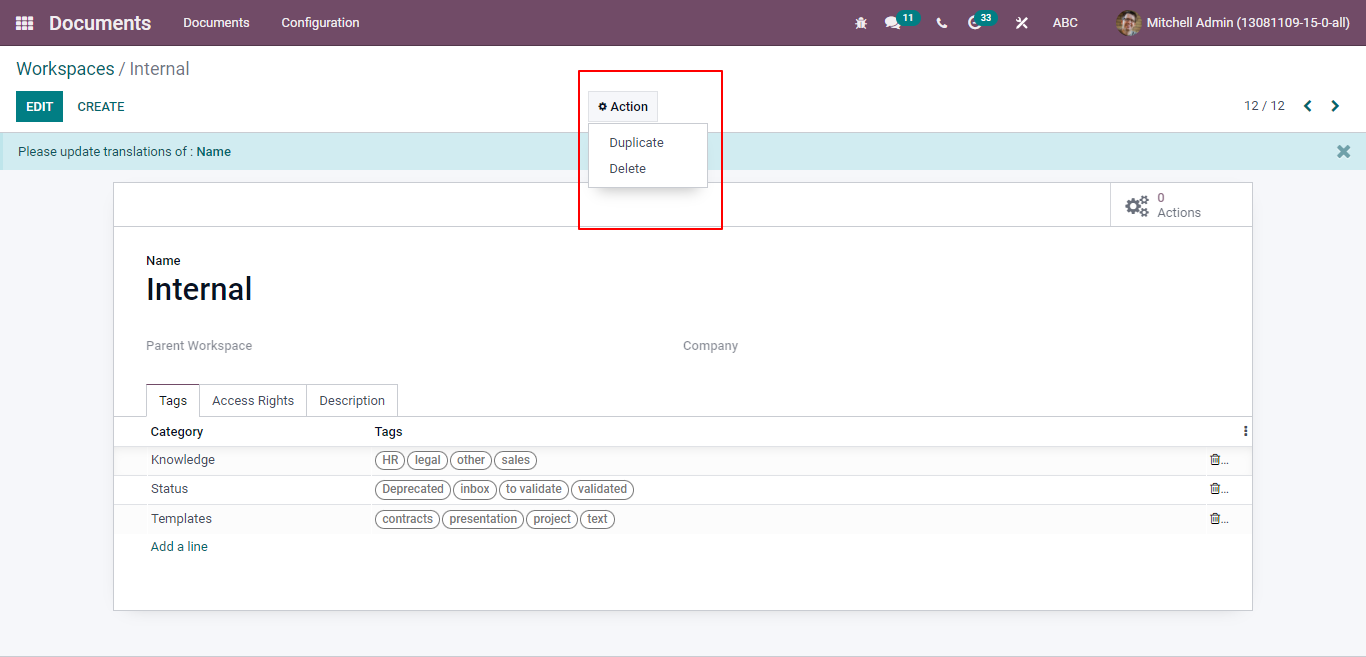
You can click on the Edit button to make necessary changes to the data. Furthermore, you are allowed to duplicate the record or delete the record as shown below.
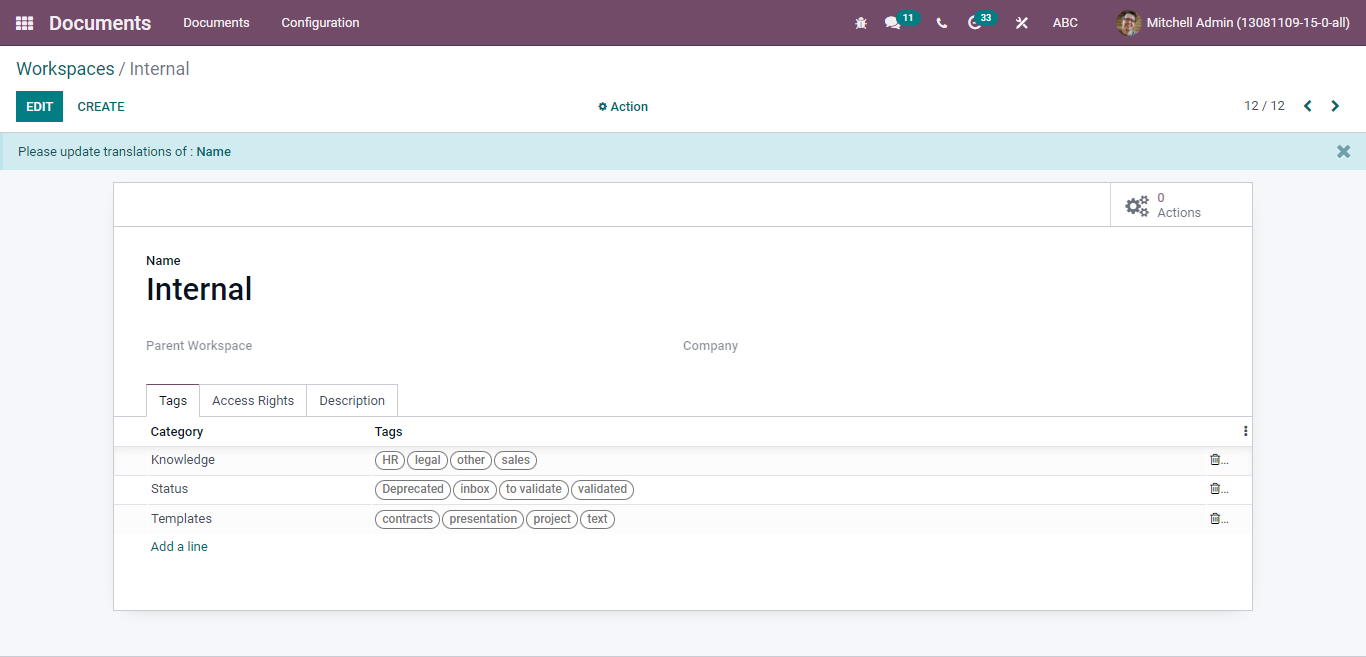
It is easy for you to view the options like Filters, Group By, Favorite, Search Tab. By using these tabs, you can easily customize filters by applying conditions as per your company's demands. On top of that, it is straightforward to add custom groups as well . For that, you just need to click on the Group By tab. The Parent Workspace option allows you to classify your workspaces depending upon their parent workspaces.
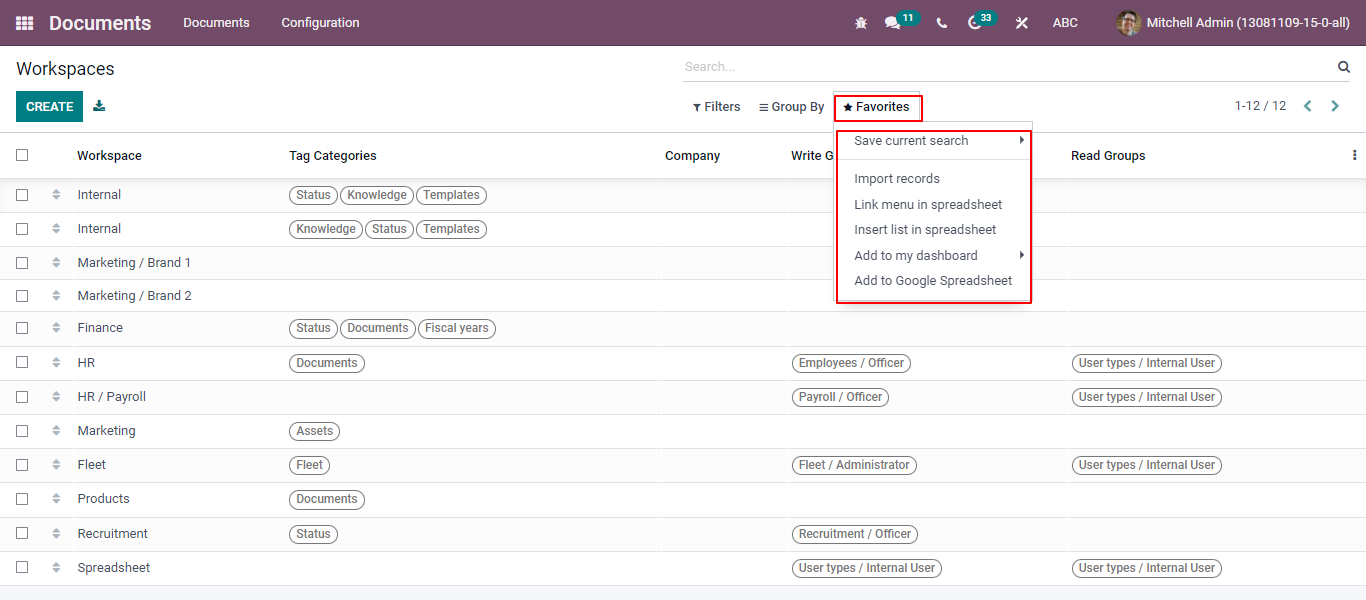
After clicking on the Favorite tab, you will get options such as Save current search, import records, Link menu in spreadsheet , and Add to my dashboard options as shown in the screenshot given below.
Additionally, you can export all the data onto an excel sheet with the help of the Export All menu. Now, click on the Create button to create a new workspace as displayed in the image given below.
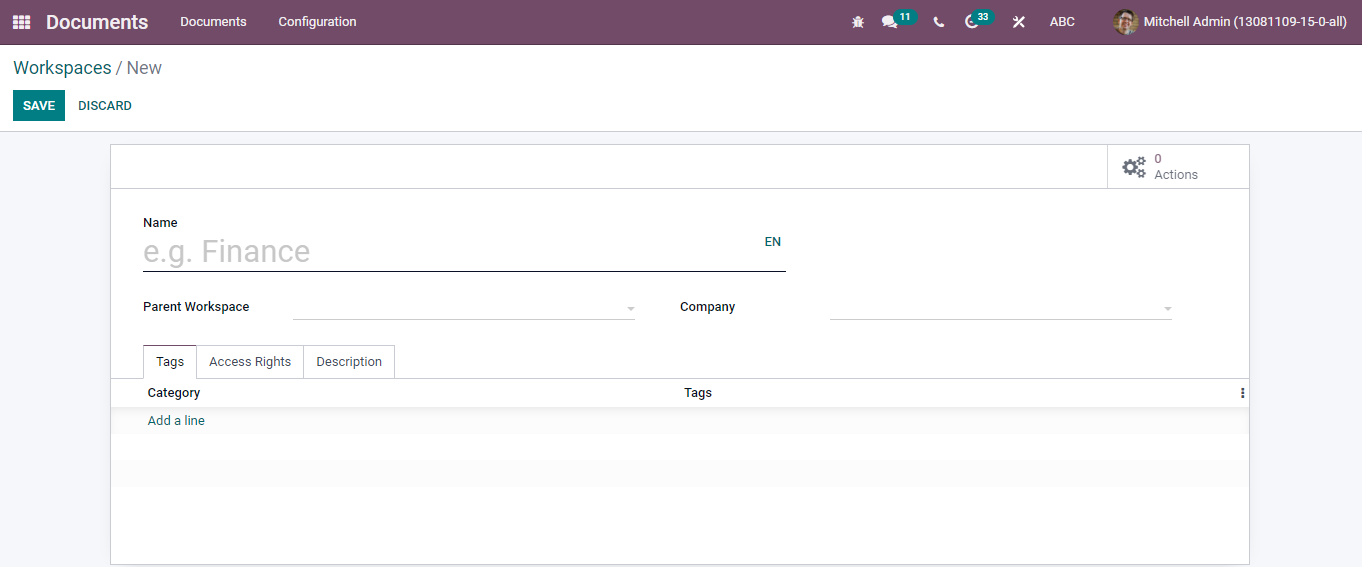
Enter the necessary details in the given field to configure a new workspace. In the beginning, you can define the name of Workspace in the specified field. Afterward, you can specify the Parent Workspace using the drop-down menu. You can define the tag categories for this workspace under the Tags tab. After this, you can add the line menu. By doing so, you are provided with a pop-up window by the system that helps you create tag categories.
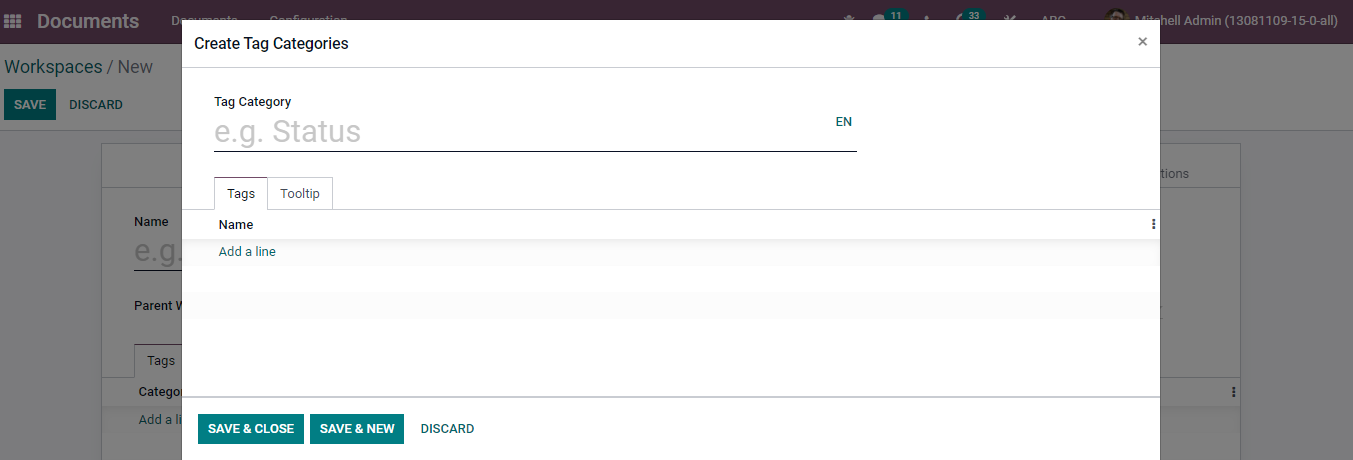
Define the Tag Category, Tags, and Tooltip. Then you must save and close the tag category you have created.
Under the Access Rights tab, you will get the Write Groups option in the Write Access and the Read Groups in the Read Access respectively. Allocation of the Write Groups will allow the groups to view the workspace. The group can also read, create, and edit their documents. The Read Groups can also view the workspace and create, read, and modify its documents.
Interestingly, the description tab in the workspace creation window enables you to describe the workspace in the specified box. After finishing the description, click on the SAVE button. Now, you will find your newly formed workspace with the workspaces, which were configured earlier.
Moreover, you can see the smart tab based on the module's installation into the system. Here, you can view the Actions and Documents buttons at the top of the window as displayed in the screenshot given below.
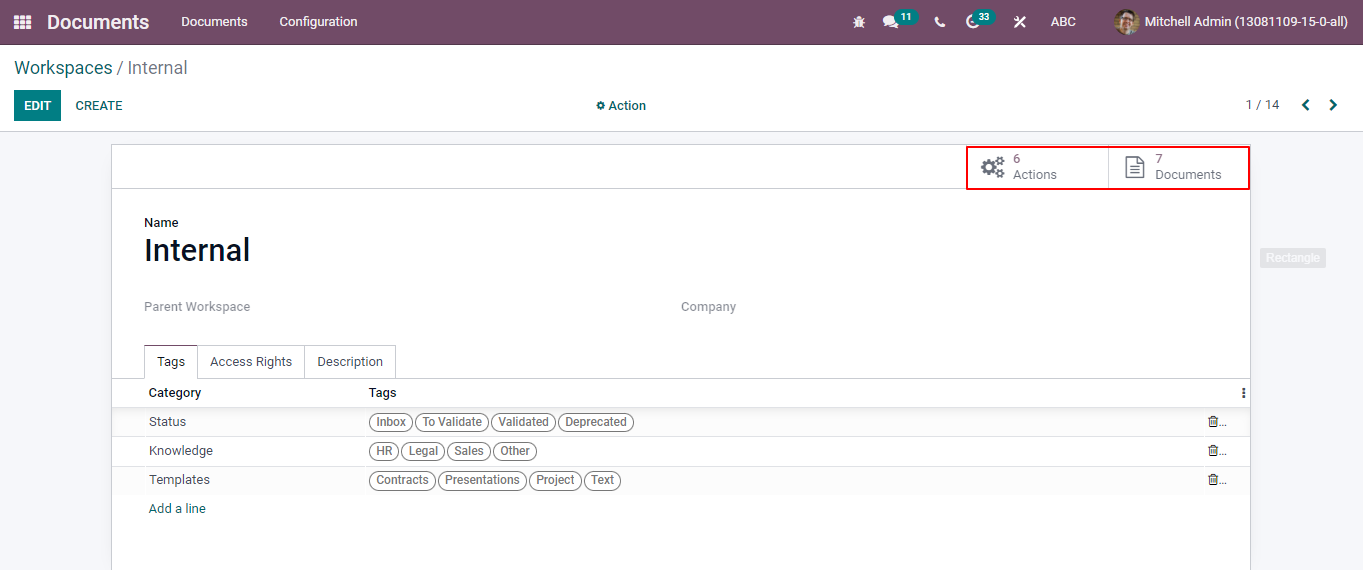
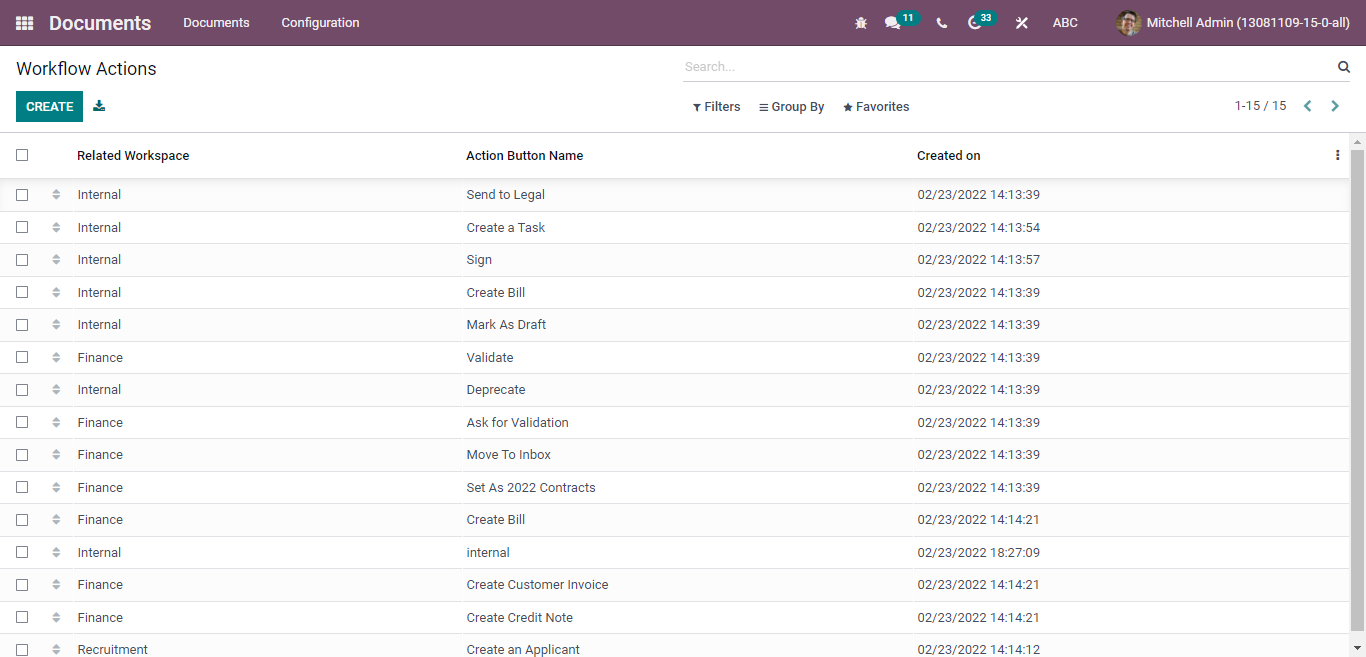
You can easily access the respective windows with the help of these buttons. As soon as you click on the Action smart button, you will be redirected to the Actions window where you can check all the details of previously created actions under the respective workspace.
In a similar way, the Documents smart button will take you to the Document window.
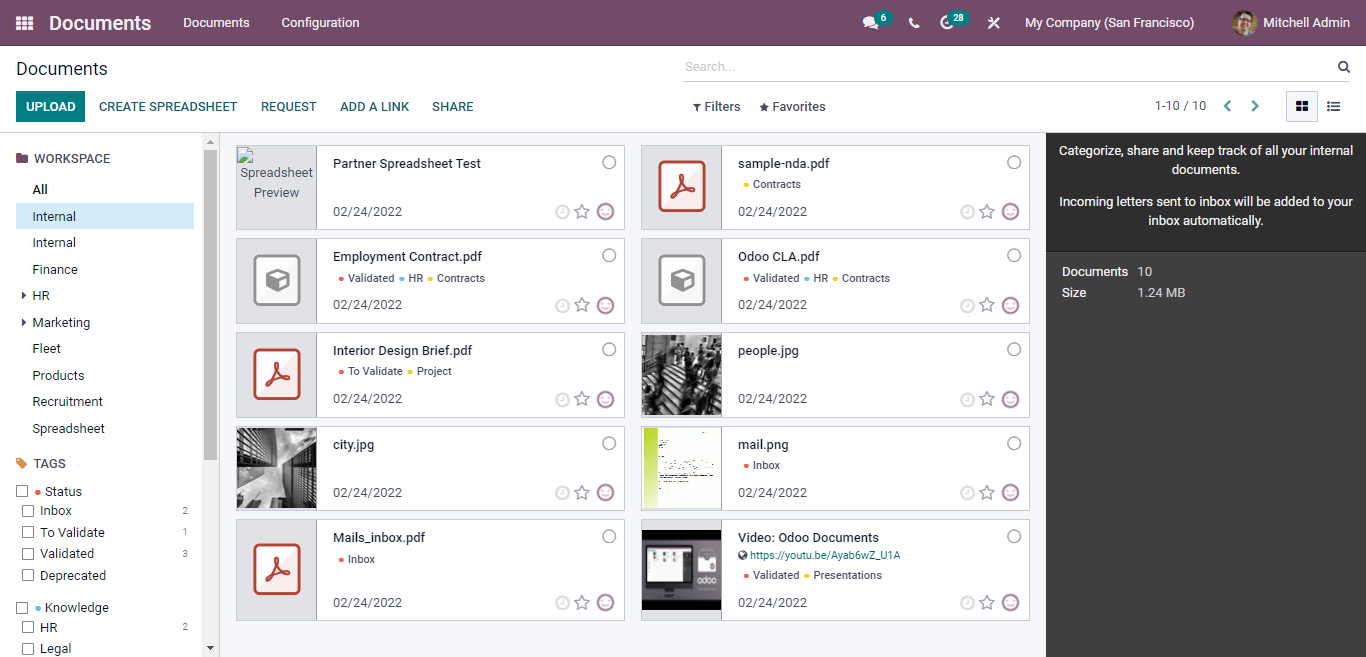
Tags
Tags play an important role in the Document module. With the Tags features, the process of classifying and identifying the documents and workspaces becomes much easier. With the help of the Tag menu, you can easily open the Tags window.
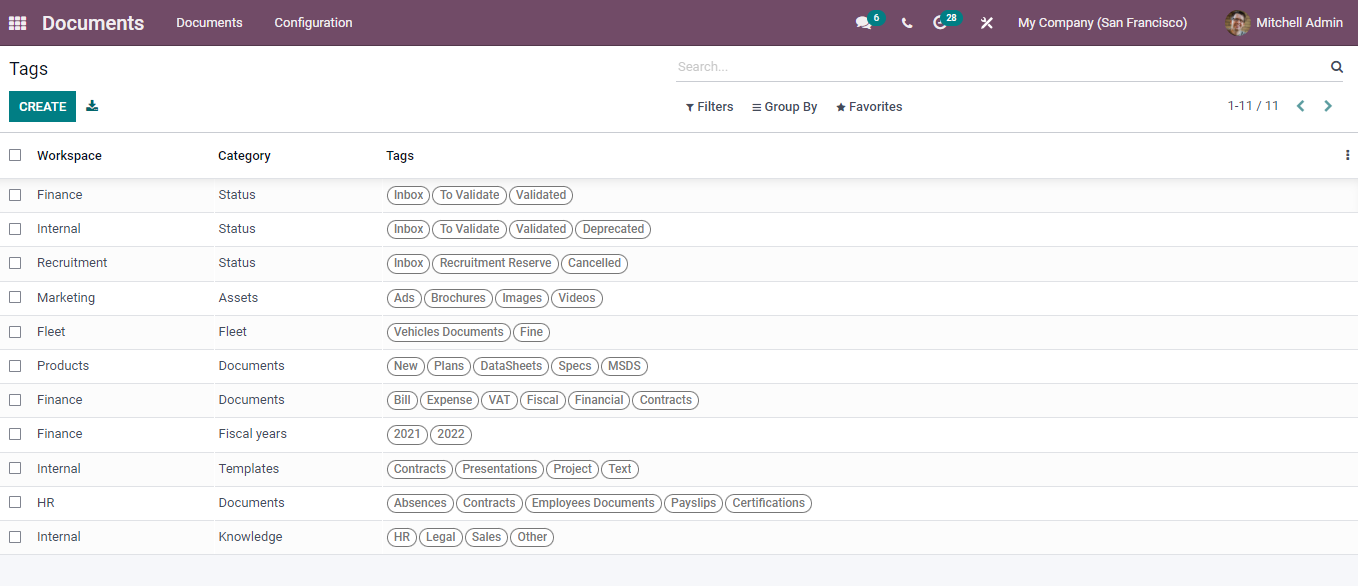
In this image, you can view the list of Tags, which were previously configured. You can find every tag mentioned along with its relevant Workspace, Category, and Tags.
Click on the create button to create a new Tag. After doing this, you are taken to the Tags creation window.
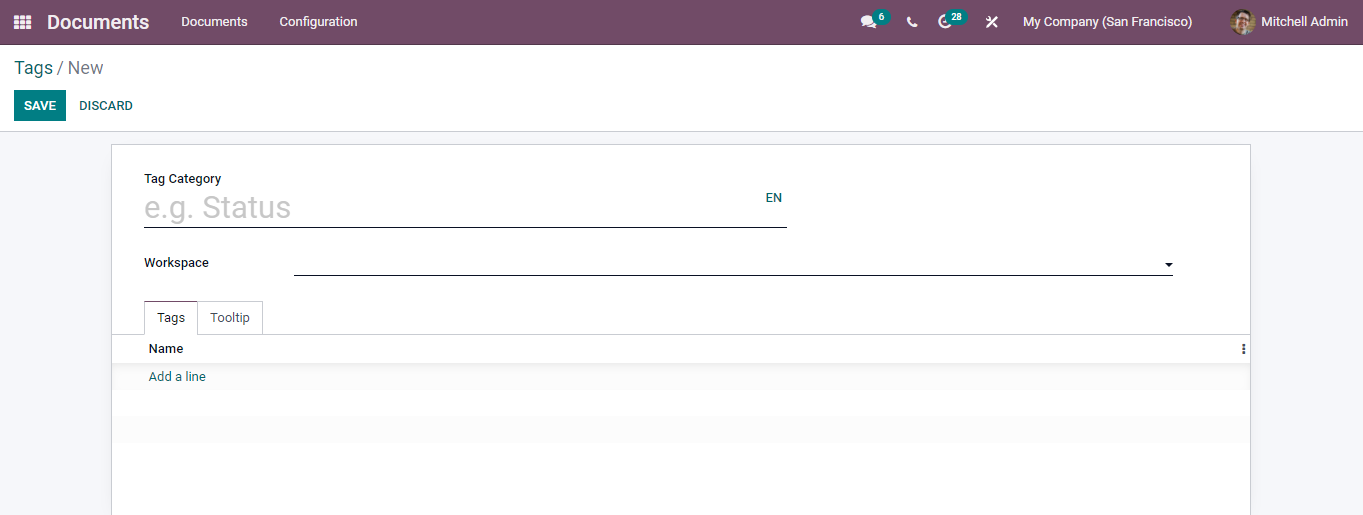
Define the Tag category in the given field and then start assigning Workspace using the drop-down menu. Besides, you can add tags by clicking on the Add a line button. With the use of this technique, you can add as many tags as you want.
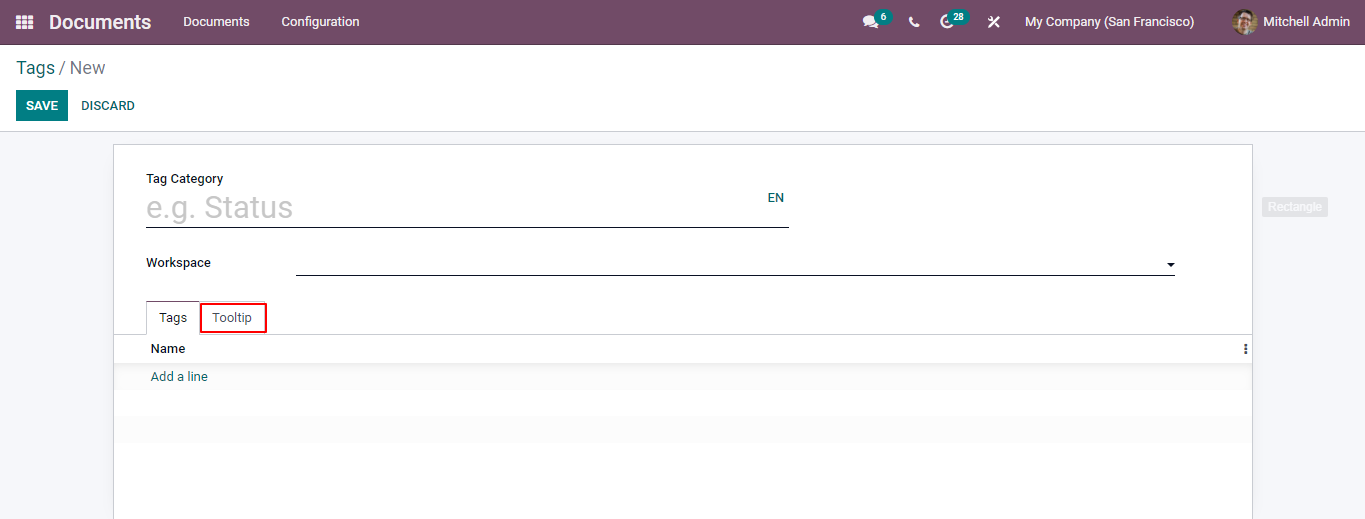
The same method, you can apply to add Tooltips. Use the Tooltip tab to add tooltips. These tooltips are either in the form of info tips or text.
Shares and Emails
You can spot the Shares and Emails menu under the configuration tab, which will lead you to the Share Links window as shown in the screenshot given below.
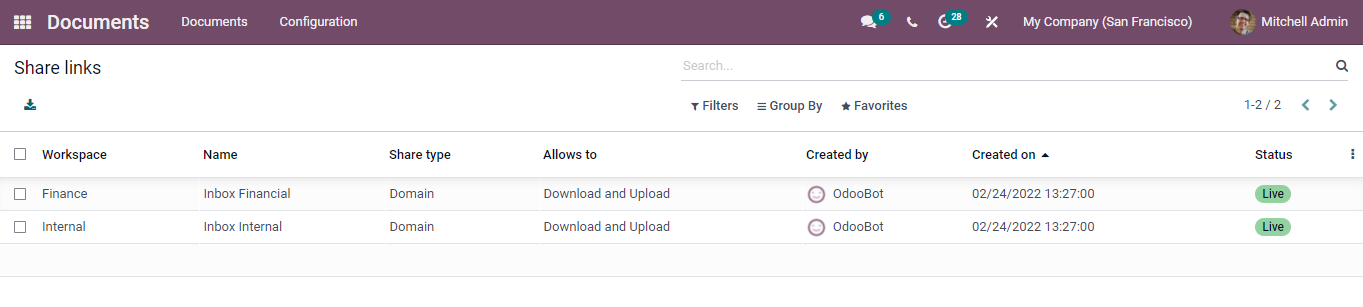
This window displays the links and emails of the shared documents. Press the respective data to check the information thoroughly.

Wrapping Up
Odoo 15 Document module has a lot of new features that establishes a fresh digital document system and digitize your business based on the current business scenario.